First 10 minutes
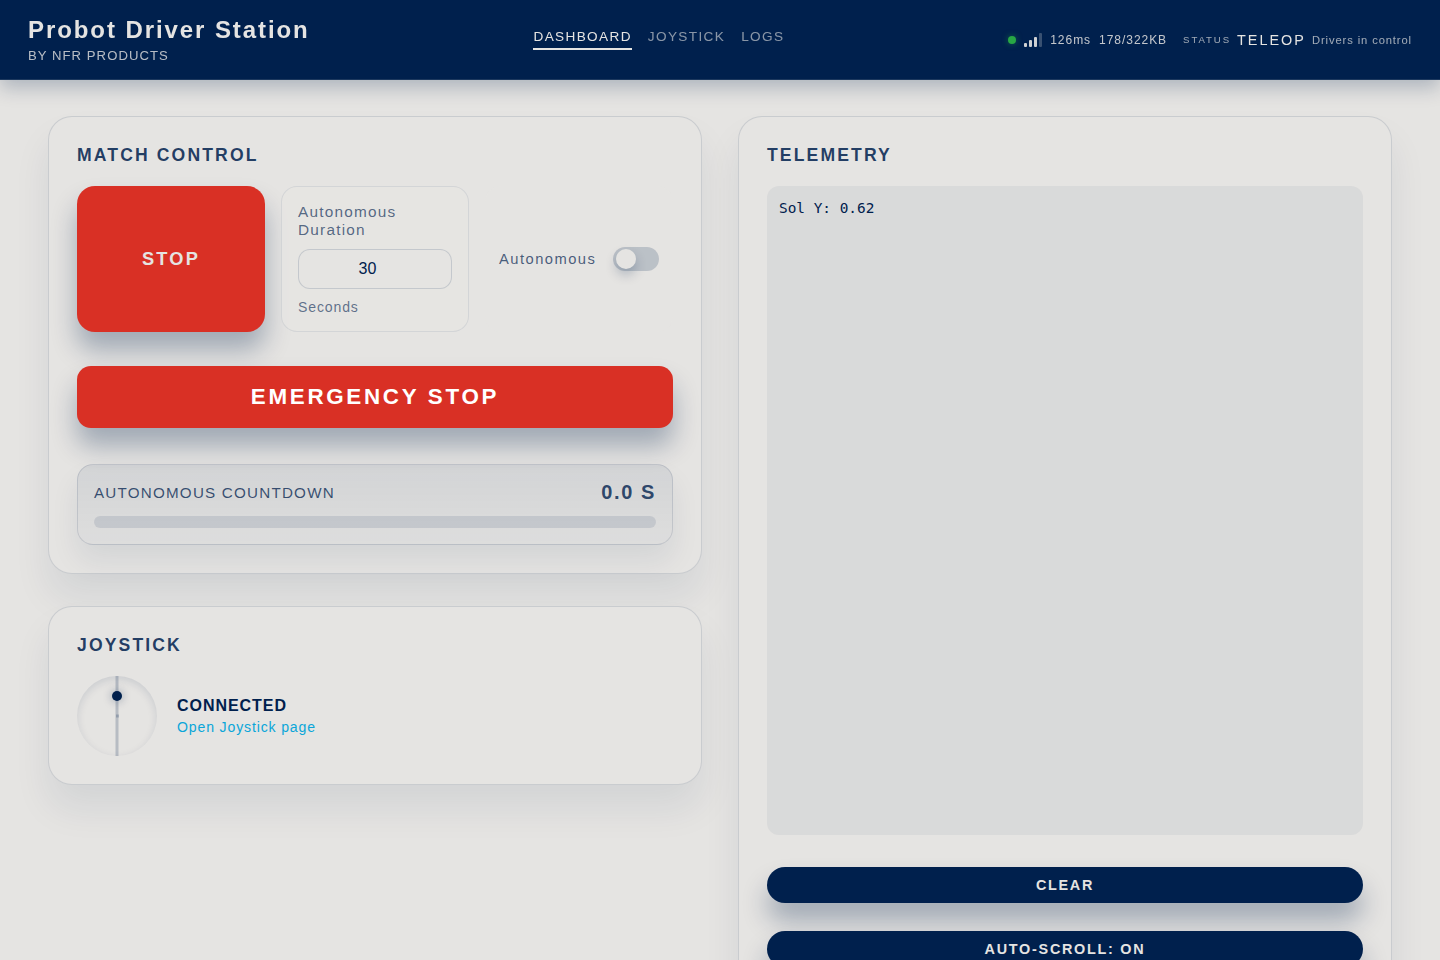
By the end of this page, your first Probot code runs on the board. Your phone connects to the robot's network, and the left stick of the gamepad changes a value in the Driver Station.
Before you start
- Arduino IDE is installed and set up for Probot: Set up Arduino IDE for Probot.
- An ESP32 board and a USB data cable.
- A phone, tablet or computer with WiFi. The Driver Station opens in its browser.
- A USB or Bluetooth gamepad. It must be able to connect to this device.
Menu names in this guide follow the English interface of Arduino IDE.
If you made your code in Blocks, follow Upload the code to the Probot board instead of the first two sections. Then continue at Connect to the robot's network.
Write the code
Probot code does not use setup() and loop(). Instead, it uses six functions that run at different moments of the match (Glossary). All six must be in the program, but their bodies can be empty.
- In Arduino IDE, select File > New Sketch.
- Delete every line in the new sketch.
- Paste the code below.
- Replace
Probotwith your robot's name. ReplaceProbot1234with a password of at least 8 characters. - Select File > Save, and give the sketch a name.
#define PROBOT_WIFI_AP_SSID     "Probot"      // WiFi network name
#define PROBOT_WIFI_AP_PASSWORD "Probot1234"  // at least 8 characters
#define PROBOT_WIFI_AP_CHANNEL  1             // 1-13
#include <probot.h>

void robotInit() {}        // once, when you press Init
void robotEnd() {}         // once, at Stop

void autonomousInit() {}   // once, when autonomous starts
void autonomousLoop() {}   // called again and again during autonomous

void teleopInit() {}       // once, when TeleOp starts

void teleopLoop() {        // called again and again during TeleOp
  auto js = probot::io::joystick_api::makeDefault();
  probot::clearTelemetry();                        // erase the previous text
  probot::printf("Sol Y: %.2f\n", js.getLeftY());  // -1..+1, forward is positive
}
The three #define lines must come before the #include <probot.h> line. The library reads these values when the code is compiled. If they come after it, the code does not compile.
Check: The sketch is saved. The code has no setup() or loop().
Upload the code to the board
- Connect the board to the computer with the USB data cable.
- Select Tools > Port, then select the port of the board.
- Check that Tools > Partition Scheme is set to Huge APP (3MB No OTA/1MB SPIFFS).
- On the toolbar, press Upload (the right arrow icon).
- When the upload finishes, select Tools > Serial Monitor. In the speed list, select 115200 baud.
Check: The IDE shows "Done uploading." When the board starts, it prints these lines to the Serial Monitor:
[DS   ] ========================================
[DS   ] WiFi SSID: Probot
[DS   ] Password:  ********
[DS   ] Channel:   1 (macro)
[DS   ] IP Address: 192.168.4.1
[DS   ] ========================================
If the lines appeared before you opened the monitor, that is fine. In the next section, you see the network in the WiFi list. If you get a compile error, see Errors and troubleshooting.
Connect to the robot's network
Note
Only one device at a time can control the Driver Station. A second device cannot open the page: The interface does not open.
- In the WiFi settings of your phone, select the
Probotnetwork (or the name you changed it to). Type the password. - If the welcome page opens, press Driver Station'ı Aç (Open Driver Station). The welcome page is in Turkish.
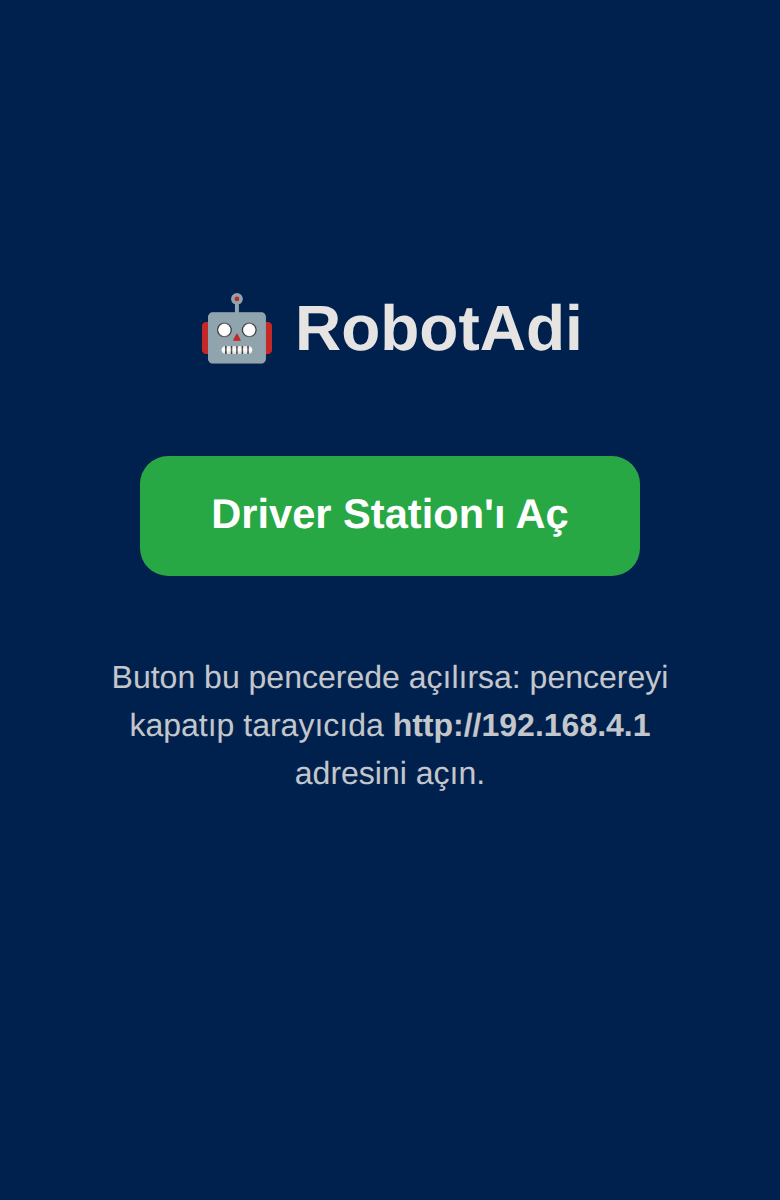
- If the Driver Station opens in the same small window, or the welcome page does not open at all, close the window.
- In the browser, open
http://192.168.4.1. The address starts withhttp, nothttps. The page can take a few seconds to open.
Check: The page shows the Dashboard, Joystick and Logs tabs. The LED on the board blinks blue.
Connect the gamepad
The browser does not show the gamepad to the page until you press a button on it. The gamepad connects to the device where you opened the Driver Station, not to the robot.
- Connect the gamepad by USB or Bluetooth to the device where you opened the Driver Station.
- Press any button on the gamepad.
- In the Driver Station, select the Joystick tab.
- Move the left stick.
Check: Joystick Check shows "Connected". The dot in the circle moves with the left stick.
Start the robot and read the value
- Select the Dashboard tab.
- In Match Control, turn off the Autonomous switch. This way, Start starts TeleOp directly.
- Press Init. The label of the same button changes to Start, and the LED lights yellow.
- Press Start. The label of the button changes to Stop.
- Push the left stick forward, then pull it back.
- Press Stop.
Check: After Start, the LED blinks green. In the Telemetry panel, Sol Y: 0.00 shows while the stick is centered. As you push forward, the value rises to 1.00. As you pull back, it falls to -1.00. After Stop, the LED blinks blue again.
Next step
- Driver Station interface: every button and indicator on the screen.
- Set up the robot's WiFi: the network name and channel when several robots are in a class.
- Write the functions for the match flow: the details of the six functions.
- Drive the motor: give the stick value to the motor.