Make a part from basic shapes
On this page you make your own part from a box, a cylinder, a sphere and a tube. You give the shapes a size and a color, cut into them with a hole shape and merge them all into one part.
Before you start
- Builder is open. Start with an empty scene: select File > New (see Save to a file and open it).
- If you want, put the shape next to a robot: load Omni chassis (see Start with a ready-made robot).
- Sizes are in millimeters.
Add a basic shape
There are four basic shapes: Box, Cylinder, Sphere and Tube (a hollow cylinder, for a spacer).
- In the Left panel, select the Add parts tab.
- Select the Basic shapes section.
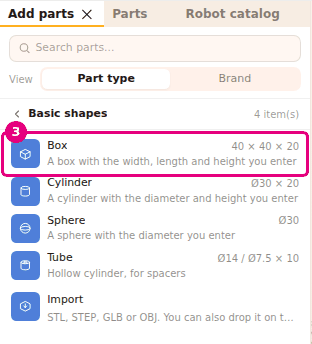
- Select the Box row. The box is added to the scene and is selected.
- To put the shape in a certain place, drag the row to the Scene and drop it.
Result: A blue 40 × 40 × 20 mm box is in the scene. "Box" appears at the top of the Properties panel.
New shapes start at these sizes: Box 40 × 40 × 20 mm, Cylinder Ø30 × 20 mm, Sphere Ø30 mm, Tube Ø14 / Ø7.5 × 10 mm.
Set the size, type and color
When you select a shape, the Properties panel shows its size fields, Type and Color.
| Shape | Size fields |
|---|---|
| Box | Width, Length, Height |
| Cylinder | Diameter, Height |
| Sphere | Diameter |
| Tube | Outer diameter, Inner diameter, Height |
- In the Scene, select the shape.
- In the Properties panel, type the new size in a field under Size (mm), for example
60in the Width field. - Press Enter. The shape changes while you type, and its bottom stays in place. Esc goes back to the old size.
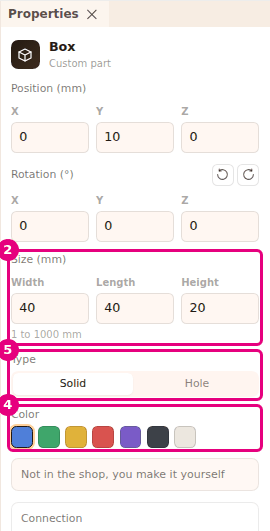
- In the Color row, select a color: Blue, Green, Yellow, Red, Purple, Black or White.
- In the Type row, select Hole if the shape will cut a hole in another shape. If it stays solid, leave Solid selected.
Result: The box has the size you typed and the color you chose. At the bottom of the panel, the note "Not in the shop, you make it yourself" appears.
Sizes go from 1 to 1000 mm, and the limit is shown below the fields. On a tube, the outer diameter is at least 2 mm and the inner diameter at least 0.5 mm. The inner diameter stays at least 1 mm smaller than the outer one.
When you select Hole, the shape turns see-through gray and the Color row disappears. The note changes to "Merge cuts a hole shape out of a solid shape, it is not made on its own".
Merge shapes and cut a hole
Merge makes the selected shapes into one part. Shapes of type Hole are cut out of the solid shapes.
- Add a Box and a Cylinder. Set the cylinder's Type to Hole.
- Move the cylinder to where it passes through the box (see Move and rotate a part).
- Select the box, then hold Shift and select the cylinder.
- In the Properties panel, press Merge.
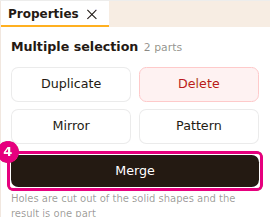
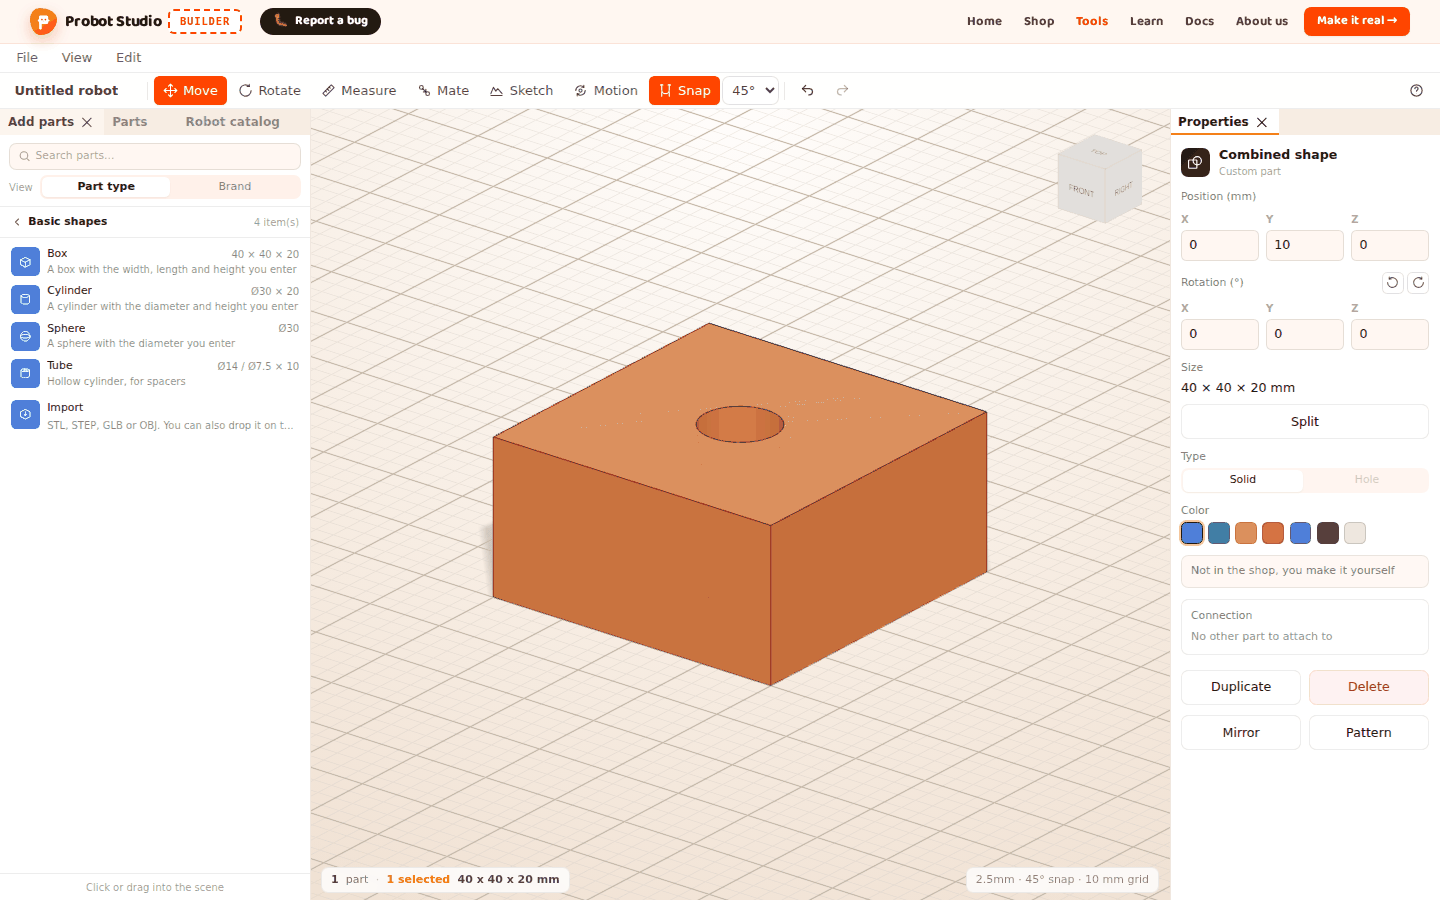
Result: A cylinder-shaped hole is cut in the box. "Combined shape" appears at the top of the Properties panel, and the Size row shows the overall size of the part.
- Merge appears only when everything in the selection is a basic shape, a combined shape or an Extrude part. If the selection has a catalog part, an imported model or a sketch, the button does not appear.
- If all the selected shapes are Hole, Merge stays faded. You need at least one solid shape.
- A combined shape cannot be made a Hole.
- You can merge a combined shape with other shapes again.
Split a combined shape
- In the Left panel, select the Parts tab.
- In the list, select the row of the combined shape. "Combined shape" appears at the top of the Properties panel.
- In the Properties panel, press Split.
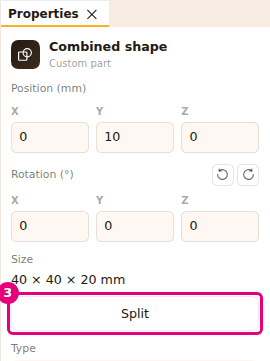
Result: The shapes are separate parts again, in the places they had before you merged them. They are all selected.
To undo a merge, you can also select Edit > Undo (Ctrl+Z).
See it in the parts list
Basic shapes are not sold in the shop. You make them yourself (for example, with a 3D printer). When you press Make it real → in the Site header, these shapes appear in a separate CUSTOM PARTS section, not in the parts table.
The section's note says "Not in the shop, you make these yourself. Not included in the total". Each row shows the name, size and count of the shape. Hole shapes are not on the list.
Details: Make it real: send the parts list to the shop cart.
Having trouble?
- Merge does not appear: The selection must have at least two parts. All of them must be basic shapes, combined shapes or Extrude parts. Imported models and sketches cannot be merged. See Troubleshooting.
- Merge is faded: All the selected shapes are Hole. Make one of them Solid, or add a solid shape to the selection. See Troubleshooting.
- I merged the shapes, but no hole was cut: The hole shape was not touching the solid shape. Press Split, move the hole shape inside the solid, and merge again.
- The Hole option is faded: A combined shape cannot be made a hole. Press Split first.
- "This part cannot be cut, so the hole was added as a separate Hole part" appears: This warning appears when you cut a hole with Extrude. If you opened the sketch on a catalog part, an imported model or a Hole shape, that part is not cut. The hole is added as a separate part. Basic shapes, combined shapes and Extrude parts are cut. See Draw a sketch and make it solid with Extrude, Troubleshooting.
- "Editing is off in assembly mode" appears: The robot is in assembly mode (from Build step by step). In the Assembly strip, press Switch to editing. See Troubleshooting.