Write a new FTC program
On this page you start an empty FTC program, set the OpMode name and type, and arrange your first blocks to drive a motor with the gamepad. The blocks of the FTC editor are in English.
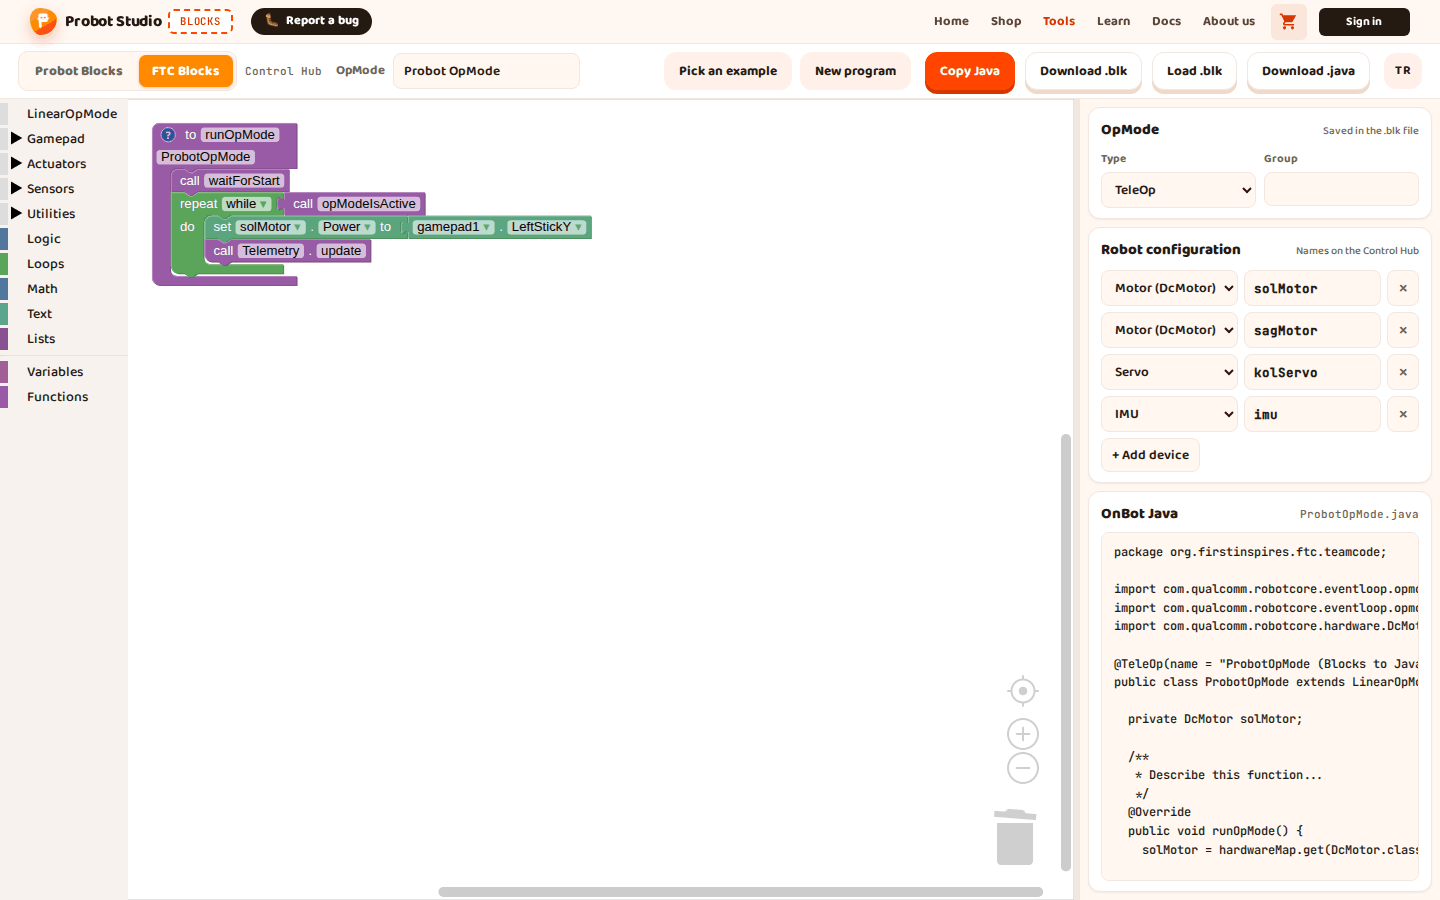
Before you start
- Blocks is open and the FTC Blocks tab is selected.
- The Robot configuration matches the Control Hub configuration. See Set up the robot configuration.
- The configuration has a Motor (DcMotor) named
solMotor. The default configuration has this motor.
To see a ready-made drive program, open Pick an example > Tank Chassis TeleOp.
If you opened an example, only the example's devices stay in the configuration (left_drive and right_drive in Tank Chassis TeleOp).
New program does not bring the default configuration's devices back. In that case, press + Add device in the Robot configuration section
of the side panel and rename the new motor1 to solMotor. Or use your own motor's name instead of solMotor in the steps.
Start a new program
Warning
New program deletes the program in the workspace. If you want to keep the program, download it in step 1.
- In the toolbar, press Download .blk. A "<ClassName>.blk downloaded." notification appears.
- In the toolbar, press New program.
- When it asks "Reset the FTC program to its starting state?", press OK.
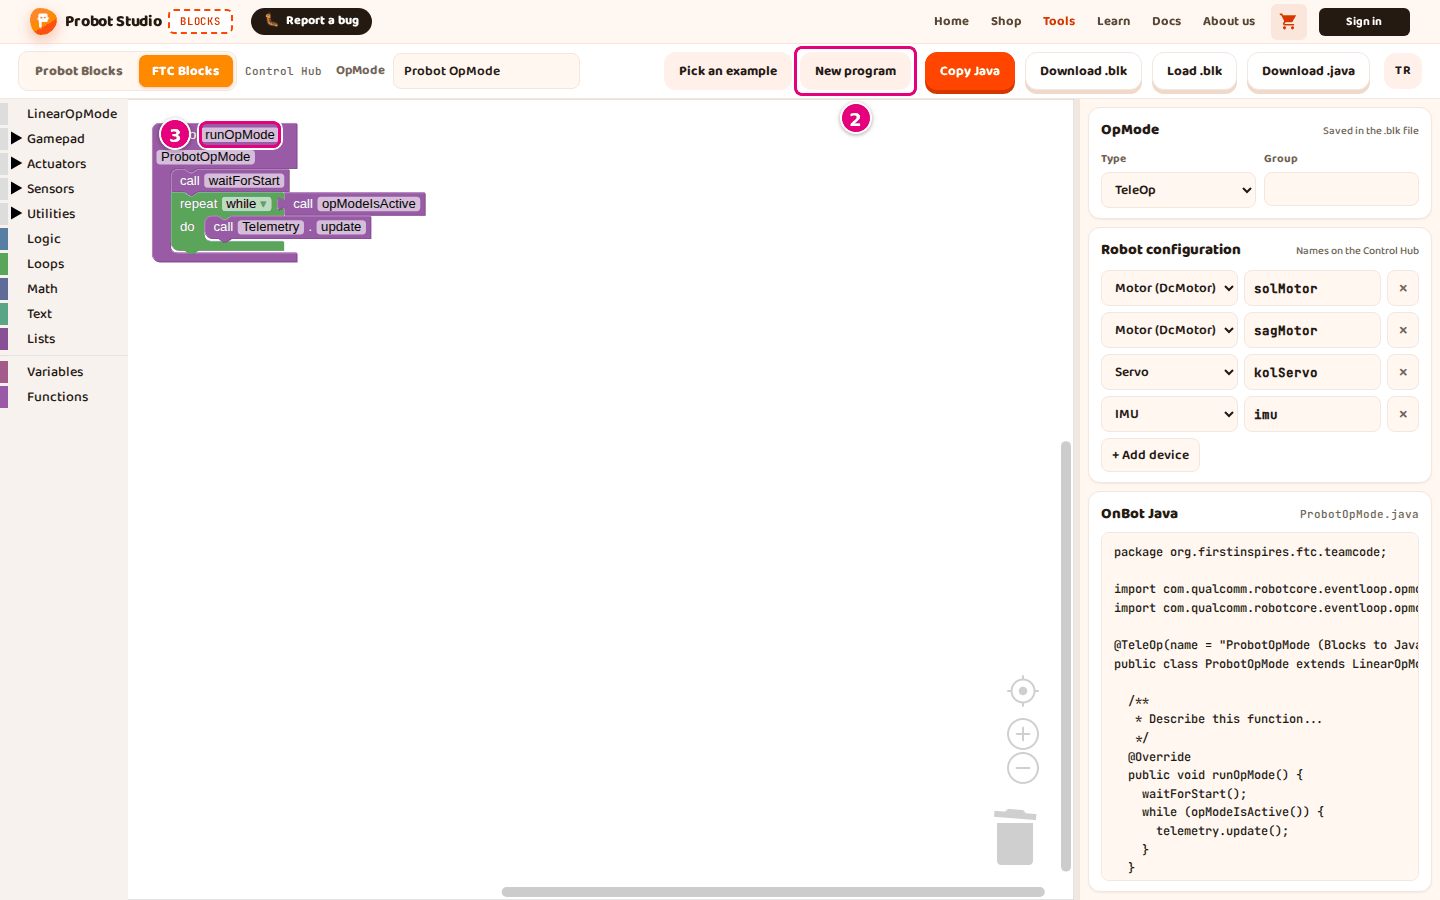
Result: Only the to runOpMode block stays in the workspace, in its starting state. In the OpMode section of the side panel, Type goes back to TeleOp and Group is cleared. The Robot configuration and the OpMode name in the toolbar do not change.
Get to know how the program is built
The to runOpMode block is the program itself and cannot be deleted. It comes with three parts inside:
| Block | When it runs | What goes here |
|---|---|---|
| Before call waitForStart | When you press INIT on the Driver Station | Setup: motor direction, starting values |
| call waitForStart | Waits until START is pressed | |
| Inside repeat while call opModeIsActive | From START to STOP, over and over | Reading the gamepad, driving motors, telemetry |
The call Telemetry.update block at the end of the loop sends the telemetry text to the Driver Station.
Set the OpMode name and type
- In the toolbar, type the program's name into the OpMode box, for example
First Drive. The box takes at most 60 characters. - In the OpMode section of the side panel, select TeleOp or Autonomous from the Type list.
- If you like, type a group name of at most 40 characters into the Group box. You can leave it empty.
Result: The file name in the title of the OnBot Java section becomes FirstDrive.java. The Java code gets the line
@TeleOp(name = "FirstDrive (Blocks to Java)"). If you typed a group, the group name is added inside the parentheses, for example @TeleOp(name = "FirstDrive (Blocks to Java)", group = "Drive").
If you select Autonomous, the line starts with @Autonomous.
The Java class name comes from the OpMode name. Turkish letters become plain letters. The words are joined together,
and each word starts with a capital letter. If the name starts with a digit, Op is added in front. If the name is empty, the class name is ProbotOpMode.
Drive a motor with the gamepad
Tip
If there is no solMotor under DcMotor, the configuration has no motor with this name. Add it with + Add device, or select your own motor's name in the steps.
- In the block list, select the Actuators > DcMotor > solMotor category.
- Drag the set solMotor.Power to 1 block into the do slot of the repeat while loop, above call Telemetry.update.
- In the block list, select the Gamepad category.
- Drag the gamepad1.LeftStickY block onto the
1slot of the set solMotor.Power to block.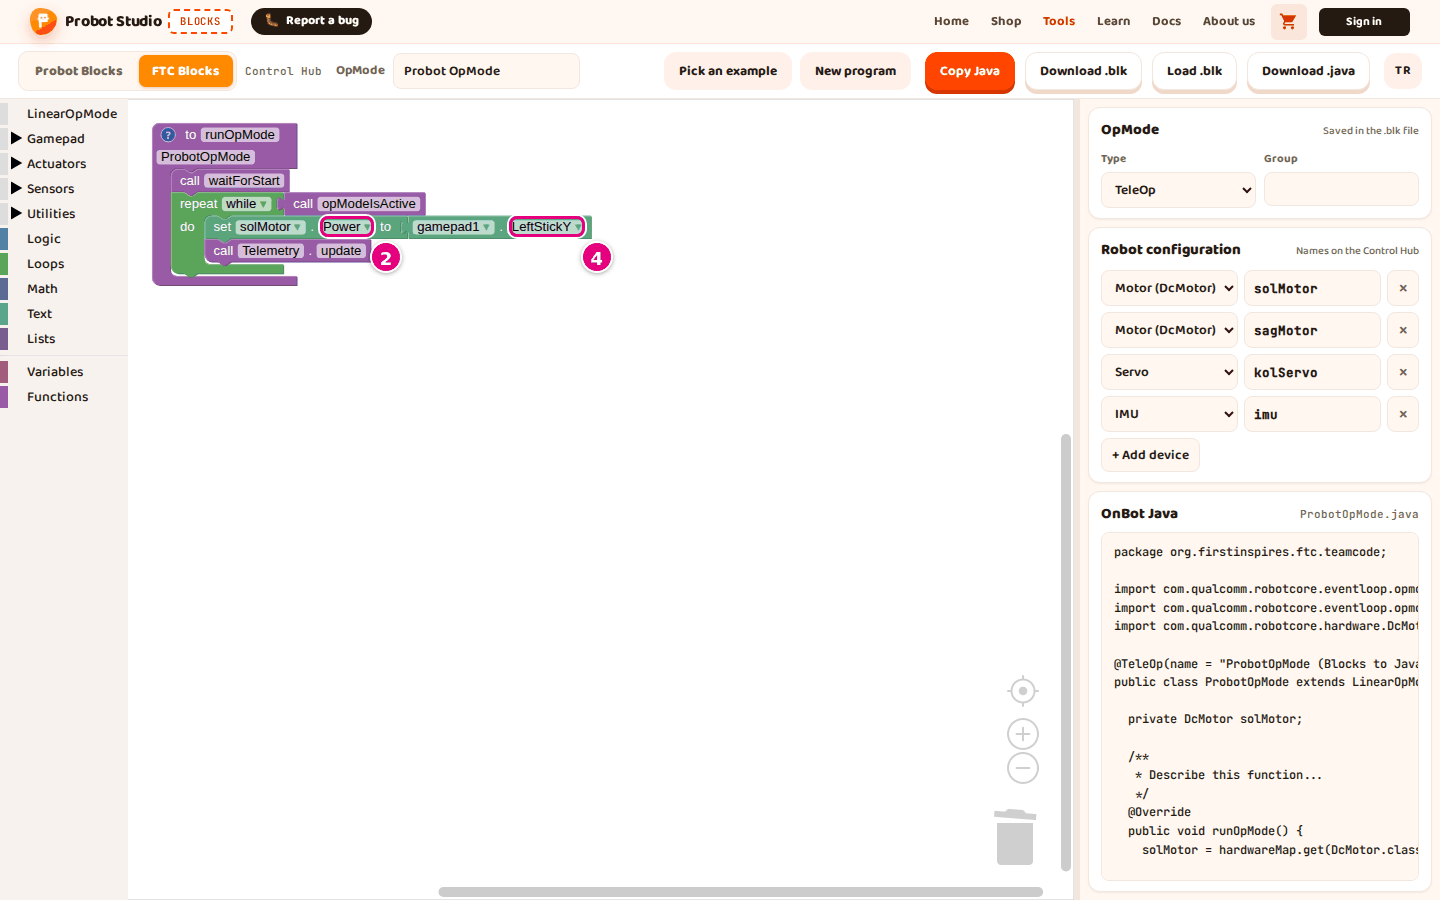
Result: The OnBot Java section gets the line solMotor.setPower(gamepad1.left_stick_y);. On the robot, after START,
solMotor turns when you push the left stick and stops when you let go of the stick.
In FTC, LeftStickY gives a negative value when you push the stick forward. If the motor turns the wrong way, put the
minus sign block from the Math category in between, or change the motor's Direction value.
Write to telemetry
- In the block list, select the Utilities > Telemetry category.
- Drag the call Telemetry.addData block with the key and number slots into the loop, above call Telemetry.update.
- Press the
keytext in the key slot and typepower. - In the block list, select the Actuators > DcMotor > solMotor category.
- Drag the solMotor.Power block onto the
123in the number slot.
Result: The OnBot Java section gets the line telemetry.addData("power", solMotor.getPower());. On the Driver Station
screen, a power line appears after START. As you push the left stick, its value changes between -1 and 1.
Edit the blocks
The FTC workspace works much like the Probot one. The trash can is the same too: press it to list the deleted blocks, and drag them back from there. The differences:
- The mouse wheel does not scroll; it zooms in and out. To scroll, drag an empty area.
- The only redo shortcut is Ctrl+Shift+Z. Ctrl+Y does not work.
- Right-click a block to get Duplicate, Add Comment, Collapse Block, Disable Block, Delete Block and Help. On blocks with several inputs (for example call Telemetry.addData), Inline Inputs or External Inputs also appears after Add Comment.
- If blocks are plugged into a block's slots, an item with a count appears instead of Delete Block. The count includes the number and text
boxes in the slots: for
set solMotor.Power to 1it says Delete 2 Blocks. Blocks attached below it are not deleted; the stack closes up without breaking. - Right-click an empty area to get Undo, Redo, Clean up Blocks, Collapse Blocks, Expand Blocks and a delete item (for example Delete 5 Blocks).
All menu items: Interface tour. Shortcuts: Shortcuts.
Create a variable
- In the block list, select the Variables category.
- Press Create variable....
- Type the variable's name into the "New variable name:" box, for example
speed. - Press OK.
Result: The set speed to and speed blocks appear in the Variables category.
To rename or delete the variable, open the name dropdown on a speed block. Rename variable... changes the name in all blocks. Delete the "speed" variable deletes the variable together with the blocks that use it. If more than one block uses it, you first see a question such as "Delete 2 uses of the "speed" variable?".
Create a function
- In the block list, select the Functions category.
- Drag the to do something block to an empty spot in the workspace.
- Press the do something name on the block and type
driveForward. - In the block list, select the Functions category again.
- Drag the driveForward block into the loop, above call Telemetry.update.
Result: The OnBot Java section gets the line driveForward(); inside the loop.
The call block does not say call; it shows only the function's name. This block appears in the block panel after the function block is placed in the workspace. You can also get the same block by right-clicking the function block and selecting Create "driveForward".
Having trouble?
- The solMotor category does not appear: The configuration has no motor with this name. If there are no motors at all, the DcMotor category does not appear either. Add the motor as shown in Before you start.
- "There is no ... named ... in the current robot configuration" warning on a block: The block uses a device name that is not in the configuration. See Troubleshooting.
- "A name must start with a letter and can only use letters, numbers and _." appears: A device name must start with a letter. It cannot have spaces, Turkish letters or hyphens. See Troubleshooting.