Draw a sketch and make it solid with Extrude
On this page you draw a 2D sketch on a face or a plane and give it dimensions. Then you give it a thickness to make a solid part. You can also cut a hole in a part the same way.
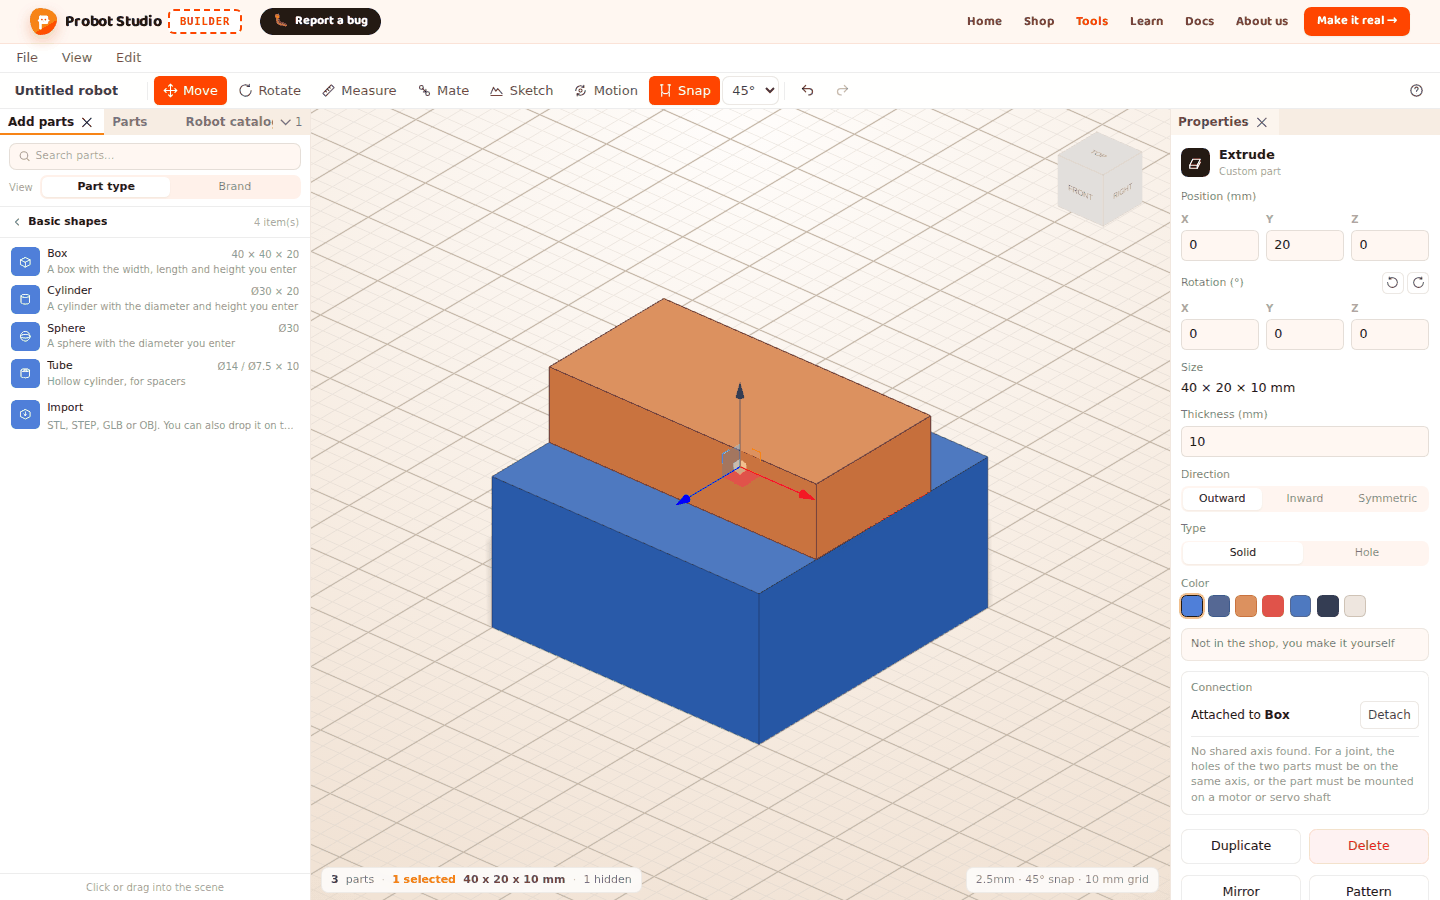
Note
Sketch and Extrude are still being developed. The screens and buttons may change over time.
Before you start
- Builder is open. You can start with an empty scene: File > New. If the scene has parts, Builder asks "The parts in the scene will be deleted. Start a new project?". To keep your work, save it first, then confirm (see Save to a file and open it).
- To draw on the face of a part, the scene needs a part with a flat face. For example: Add parts > Basic shapes > Box (see Make a part from basic shapes).
- Dimensions are in millimeters. A sketch is not a part, and it does not go into the parts list.
Open a sketch and select a plane
- In the Toolbar, press Sketch (S). The Sketch tab opens in the Left panel, with "New sketch" in its heading.
- In the Scene, choose where you want to draw:
- Click a flat face of a part. The sketch opens on that face and moves with the part.
- Or, in the Sketch tab, press Top, Front or Right in the Standard plane row.
- If you click empty space, the sketch opens on the ground.
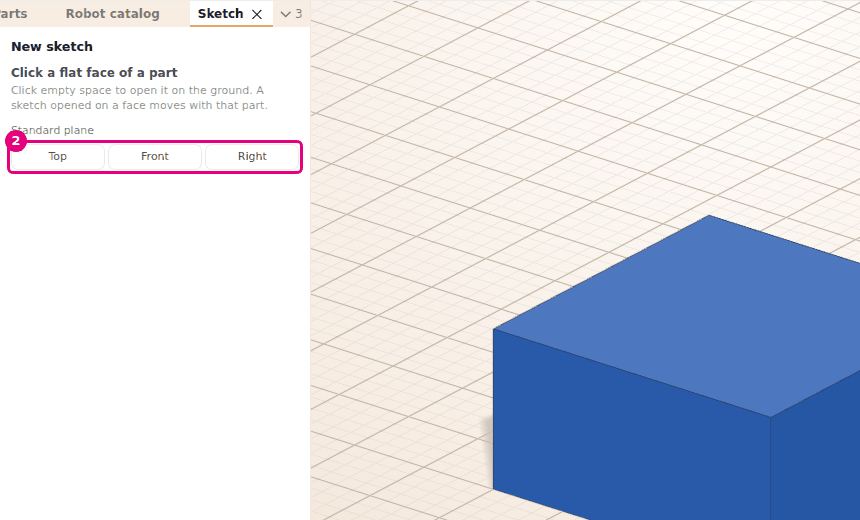
- If you change your mind, press Cancel (Esc).
Result: The camera looks straight at the plane you chose. The Tools group appears in the Sketch tab, and Line is selected.
If you click a curved face, "A sketch opens only on a flat face" appears. Choose another flat face.
Draw the shape and finish the sketch
The Tools group in the Sketch tab has six tools. You can also choose a tool with its key.
| Tool | Key | How to draw |
|---|---|---|
| Line | L | Click one point, then the next. It ends when you get back to the start, when you double-click, or when you press Esc. |
| Rectangle | R | Click two corners. The sides stay horizontal and vertical. |
| Circle | C | Click the center, then a point on the edge. |
| Arc | A | Click the start, the end, then a point the arc passes through. |
| Project | P | Click a face of a part that is parallel to the plane. The edges of the face are added to the sketch. |
| Select | S | Click an item or an endpoint, and drag. Del deletes the selected item. |
- In the Tools group, select Rectangle (R).
- In the Scene, click one corner of the rectangle.
- Click the opposite corner. The rectangle is drawn.
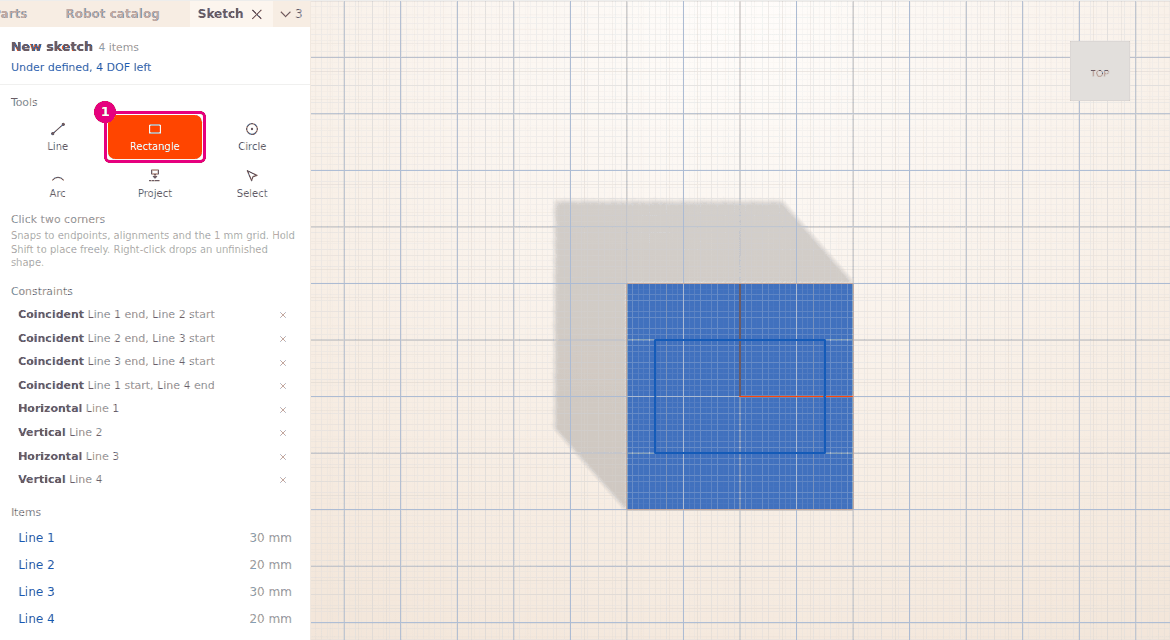
- If you want, draw a circle inside the rectangle with Circle. When you extrude, this circle becomes a hole.
- At the bottom of the Sketch tab, press Finish (Enter).
Result: The sketch is saved. It shows as lines in the scene and is selected. It is listed as "Sketch" in the Parts tab.
While you draw, points snap to endpoints, alignments and the 1 mm grid. Hold Shift to place a point freely. Right-click drops an unfinished shape. While a sketch is open, Ctrl+Z and Undo undo only the last change in the sketch. Delete deletes the selected items. Cancel closes without saving the changes. If you press Finish without drawing anything, no sketch is added.
Add dimensions and constraints
A constraint fixes an item's length, its direction or how it relates to another item. Endpoints that snap together while you draw become Coincident on their own. The sides of a rectangle are Horizontal and Vertical from the start.
- In the Tools group, select Select (S).
- In the Scene, click one side of the rectangle. The item's name and the Length box appear in the Selection group.
- Type
40in the Length box and press Enter. The side becomes 40 mm long. - To add another constraint, in the Selection group, press one of the constraint buttons.
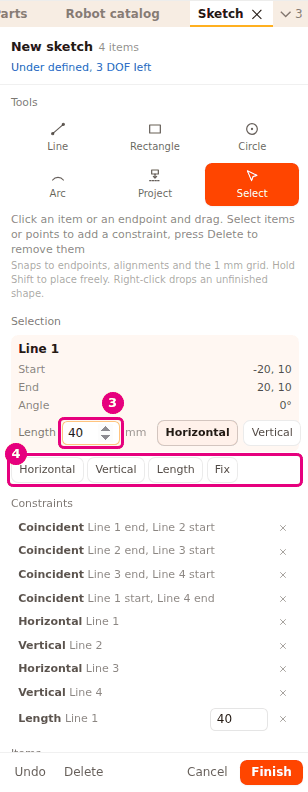
- Add dimensions and constraints until the status at the top of the tab says "Fully defined".
Result: "Fully defined" appears at the top of the tab. The shape no longer changes when you drag it.
To select more than one item or point, hold Shift and click. To select a point, click an endpoint, a center or the origin. These constraints appear, depending on what you select:
| Selection | Constraints |
|---|---|
| Two points | Coincident, Distance, Horizontal distance, Vertical distance |
| A point and a line | On line, Distance |
| One or more lines | Horizontal, Vertical; Length for a single line |
| A circle or an arc | Radius |
| Two lines | Equal, Parallel, Perpendicular |
| Two circles or arcs | Equal |
| Any item | Fix |
When a single line is selected, Horizontal and Vertical are also next to the Length box. For a circle or an arc, the box is called Radius. The constraints you add are listed in Constraints. In the list, you can change the value of a constraint that has a dimension. To remove a constraint, press the × on its row (Delete constraint).
The status at the top of the tab tells you one of three things:
- "Fully defined": everything is fixed.
- "Under defined, N DOF left": the shape can still move in N ways (N degrees of freedom, DOF). You can still extrude the shape.
- "Extra or conflicting constraints, delete the red ones": remove the red rows with Delete constraint.
Make a solid with Extrude
Extrude gives every closed region of the sketch a thickness and makes a solid part. A circle inside a closed shape becomes a hole in the solid.
Tip
If you drew with lines, bring the last endpoint back to the first one to close the shape. Otherwise Extrude stays faded. See Troubleshooting.
- In the Scene, select the sketch.
- In the Properties panel, press Extrude. If there is more than one closed region, the button shows a count, like "Extrude (2 regions)".
- In the Extrude tab that opens in the Left panel, type the thickness in the Thickness (mm) box. The first time, it is 5 mm. In later Extrudes, it keeps the last thickness you typed (after the page reloads, it is 5 mm again).
- In the Type row, select Solid (a new solid part) or Hole (cuts the part the sketch is on).
- In the Direction row, select Outward, Inward or Symmetric. A see-through preview appears in the scene: orange for Solid, gray-brown for Hole.
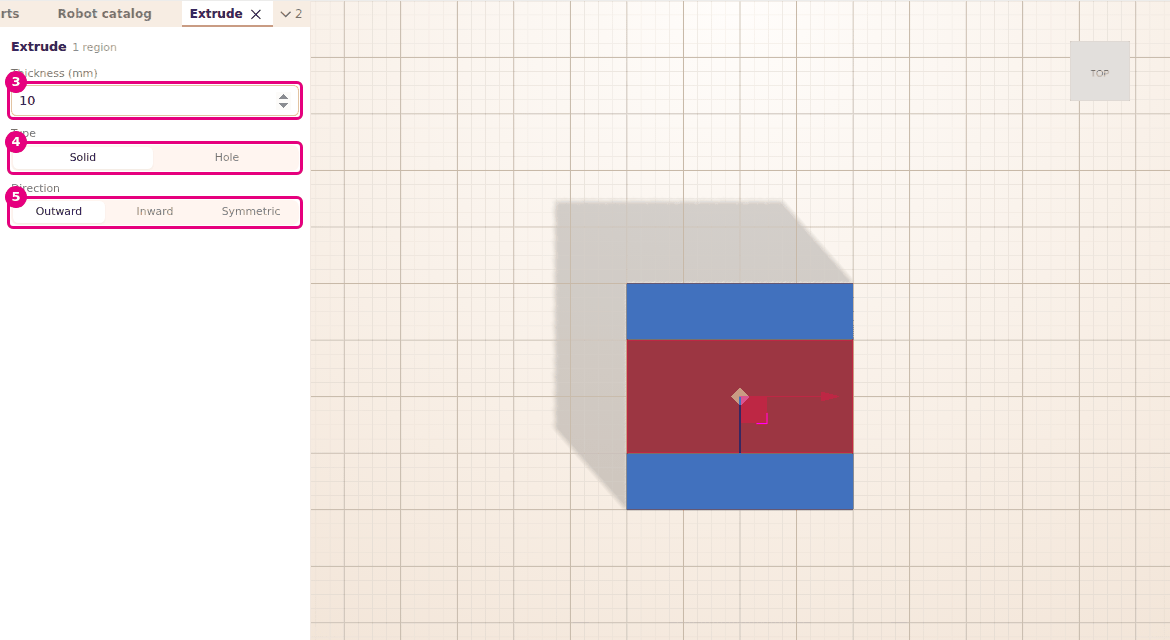
- Press OK (Enter). To change your mind, press Cancel (Esc).
Result: Each closed region becomes a separate solid part and is selected. The sketch is hidden.
You can also open Extrude with a right-click: in the Scene, right-click the sketch and select Extrude.
- The thickness can be from 0.1 to 1000 mm. If you type a value above 1000, it becomes 1000.
- When you select Hole, Direction changes to Inward on its own.
- A hole cuts the shape you opened the sketch on (a basic shape, an Extrude part or a combined shape), and the part becomes a combined shape. A catalog part, an imported model or a part of type Hole is not cut: "This part cannot be cut, so the hole was added as a separate Hole part" appears.
- If the sketch is on the ground, the hole is added as a separate part: "Hole part added, use Merge to cut it". See Merge shapes and cut a hole.
- If there is no closed region, Extrude is faded ("Draw a closed shape to extrude").
Change the sketch and the Extrude part later
- Edit the sketch: Double-click the sketch. Or right-click it and select Edit sketch. Or, with the sketch selected, press Edit in the Properties panel. "Edit sketch" appears at the top of the tab. Save the change with Finish. If you delete all the items and press Finish, the sketch is deleted.
- Find a hidden sketch: After Extrude, the sketch is hidden. In the Parts tab, press the Show icon on its row to bring it back.
- Change an Extrude part: Select the part. In the Properties panel, change the thickness with Thickness (mm) and Direction (Outward, Inward, Symmetric). Type and Color work as they do for basic shapes.
- An Extrude part is separate from its sketch. Changing the sketch does not change the old Extrude part. For a new shape, use Extrude again.
Having trouble?
- "A sketch opens only on a flat face" appears: You clicked a curved face. Choose a flat face or use a standard plane. See Troubleshooting.
- "The sketch has no closed region" appears or Extrude is faded: The shape does not close. Bring the last endpoint of the line to the first one. See Troubleshooting.
- "Extra or conflicting constraints, delete the red ones" appears: Delete the red rows in the Constraints list. See Troubleshooting.
- The Sketch tab is gone and so is the drawing: Closing the tab with its × closes the sketch without saving. Open Sketch again.
- Esc does not close the sketch: While you draw, Esc first drops the unfinished shape, then the selection. To close, press Finish or Cancel.
- No Merge when the selection has a sketch: Sketches cannot be merged. Extrude first, then merge the Extrude part. See Troubleshooting.
- Thickness does not go above 1000 mm: The largest thickness is 1000 mm.