Make it real: send the parts list to the shop cart
On this page you will list the parts in your design and run them through the robot check. Then you will send the list to the shop cart in one go.
Before you start
- A robot is in the scene. To start with a ready-made example, press Omni chassis on the "The scene is empty" card (see Start with a ready-made robot). This chassis has no Control Hub, battery or power switch, so it is good for trying the robot check.
- Your internet connection is on. Prices and stock come from the shop when the window opens.
- Builder does not need an account. You complete the order in the shop.
Open the Make it real window
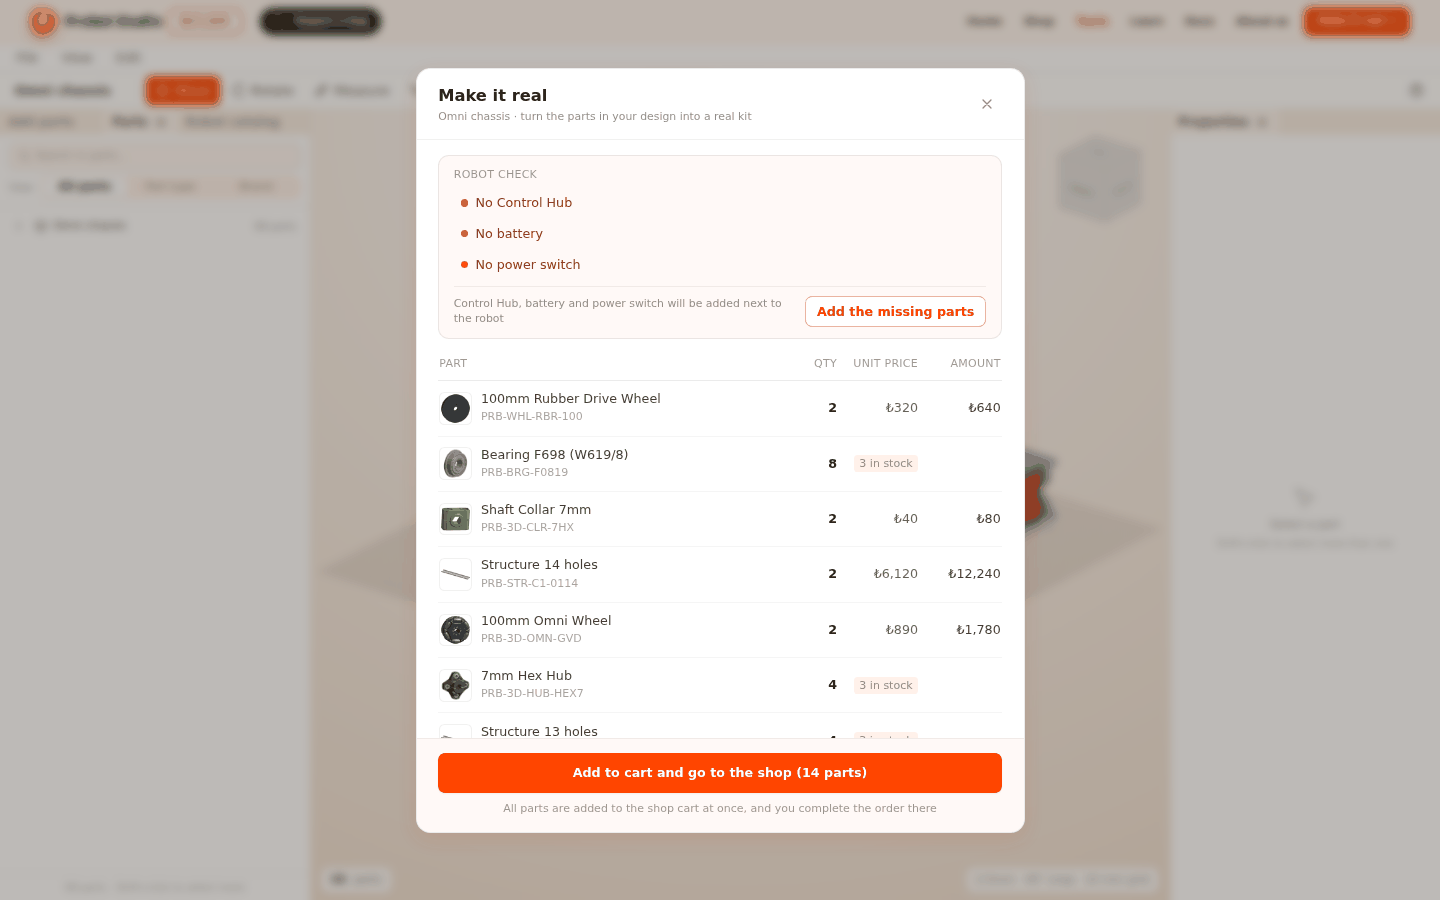
- In the Site header, press Make it real →. At the top of the window, "Checking the robot" appears. The check ends in a few seconds.
- Move the mouse pointer over the window.
- Scroll down with the mouse wheel. The parts table is below the robot check.
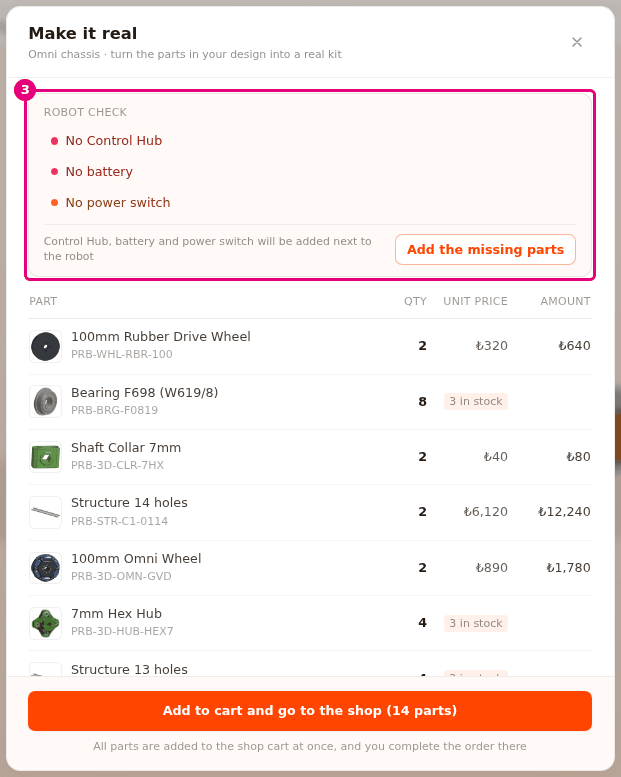
Result: The Make it real window opens. Below the title it says "<project-name> · turn the parts in your design into a real kit". Below that are the robot check and the parts table.
Get a price quote in the Build panel opens the same window (see Check the robot with Build).
Read the robot check
The robot check looks at the main FTC competition rules. The check does not stop you from adding parts to the cart. Game elements are not part of the check.
- At the top of the window, read the heading of the robot check.
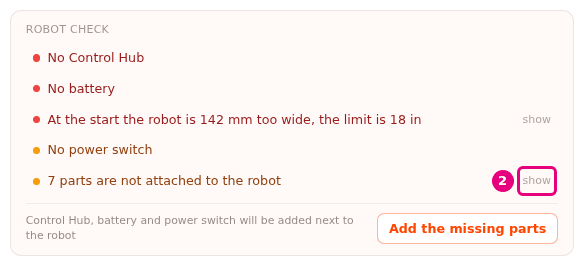
- In the "ROBOT CHECK" list, press show at the end of a row.
- In the Scene, move the selected parts to the robot or mate them to it (see Mate parts by their holes).
- In the Site header, press Make it real → again.
Result: The row you fixed leaves the check list. show closes the window, selects the parts the row is about and turns the camera to them.
| Heading | When |
|---|---|
| "Checking the robot" | While the part models are loading. |
| "The robot passed the check" | There are no problems. |
| "ROBOT CHECK" | There is at least one row. Errors are listed first. |
| Row | Type | What it means |
|---|---|---|
| "No Control Hub" | Error | The robot has no Control Hub. |
| "No battery" | Error | The robot has no battery. |
| "No power switch" | Warning | The robot has no main power switch. |
| "The robot has N motors, the limit is 8" | Error | You can use at most 8 motors. |
| "The robot has N servos, the limit is 8" | Error | You can use at most 8 servos. |
| "At the start the robot is N mm too wide, the limit is 18 in" | Error | The robot is bigger than the starting size (18 in, 457.2 mm). For length and height it says "too long" and "too tall". |
| "<part name> is not attached to the robot" / "N parts are not attached to the robot" | Warning | These parts do not touch the rest of the robot. |
| "<parts> placed next to the robot, choose where they go" | Info | You have not moved the parts that Add the missing parts brought in yet. |
If some part models do not load, "(some models did not load, the size is approximate)" is added to the end of the size row. show appears only on rows that are about specific parts.
Add the missing parts
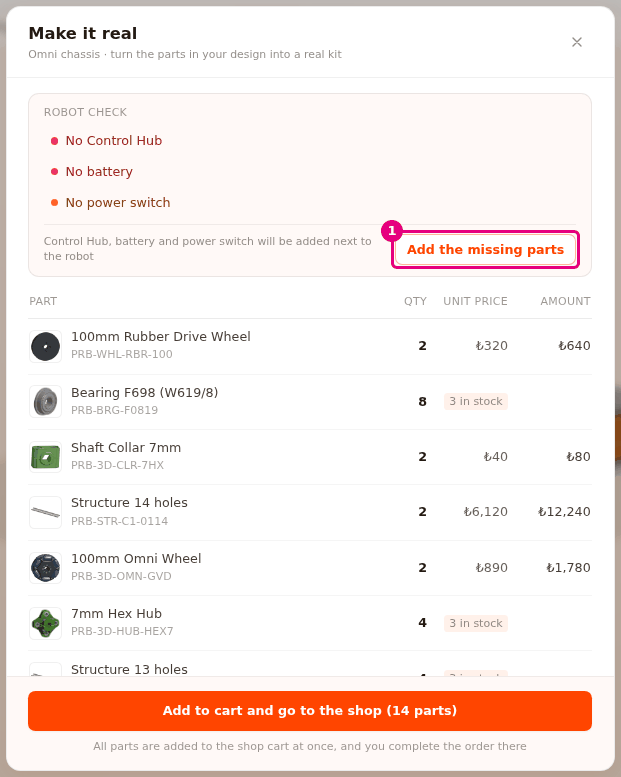
If there is no Control Hub, battery or power switch, Add the missing parts appears below the check list. Next to it, it says which parts will be added (for example "Control Hub, battery and power switch will be added next to the robot").
- In the Make it real window, press Add the missing parts. A "... added, choose where they go"
notification appears in the corner of the screen.
- Press the window's × to close the window.
- In the Scene, select the added part and place it on the robot with Move (see Move and rotate a part).
- In the Site header, press Make it real → again.
Result: The added parts appear in the table. "No Control Hub", "No battery" and "No power switch" leave the check rows.
Until you move the parts, the check keeps the "... placed next to the robot, choose where they go" row. Parts you have not moved are left out of the size check and the attachment check.
Read the parts table
The table's columns are PART, QTY, UNIT PRICE and AMOUNT. Each part type is one row. For parts whose length you set, each length is its own row, and the length is added to the end of the name (for example ", 25 mm").
| Column | What it shows |
|---|---|
| PART | The part's name, with its product code (SKU) below it. |
| QTY | The count in the scene. For a part sold in packs, "N packs" appears below it. |
| UNIT PRICE | The unit price. For a part sold in packs, the pack size appears below it, like "pack of 10". |
| AMOUNT | The unit price times the quantity that goes to the cart. |
Prices come live from the shop and can change.
Instead of a price, the UNIT PRICE column can show:
| Text | What it means |
|---|---|
| "…" | The price is loading from the shop. |
| "price coming soon" | The shop has no price entered for this part. The row does not go to the cart. |
| "out of stock" | The shop has no stock. The row does not go to the cart. |
| "N in stock" | The stock is less than the quantity needed. For a part sold in packs it says "N packs in stock". The row does not go to the cart. |
| "Coming soon" | Prices are not shown. |
How the numbers are worked out:
- Parts sold in packs (such as bolts and nuts): number of packs = ⌈count / pack size⌉, so it is rounded up. 23 bolts in packs of 10 make 3 packs. The number of packs goes to the cart.
- Shaft cut to length: If you shorten a shaft that the shop sells as a full-length rod, the total length of the shafts you cut is rounded up to a whole number of rods. Four short shafts cut from one rod count as 1.
- Parts not sold in the shop appear faded at the end of the table, with no price. Below each one it says "Available through Probot", "Not sold by Probot, get it from another supplier" or "not sold in the shop".
Two separate sections can appear below the table:
| Section | Description | What is in it |
|---|---|---|
| "CUSTOM PARTS" | "Not in the shop, you make these yourself. Not included in the total" | Parts you made with basic shapes or with Sketch/Extrude, and parts you imported. Name, size and count. For an imported part, the file name also appears before the size. Basic shapes of type Hole that stand on their own, and sketches, are not on the list. |
| "BELTS NOT IN THE SHOP" | "The shop has no belt of this length. Not added to the cart or the total" | "HTD5M belt N mm, AT and BT pulleys" rows. A suggestion appears below each one. |
The suggestion on a belt row is one of these: "The closest belt in the shop is N mm, X mm too short. Move the pulleys Y mm closer" ("apart" if it is "too long"), "... It does not fit these pulleys" or "No belts in the shop". X is the difference in belt length. Y is how far to move the pulleys. Y is roughly half of X. If you move the pulleys as suggested, the belt matches the shop belt and moves into the table (see Add a belt to two pulleys).
The total row says "Total". If some rows are left out, the reason appears in parentheses: "Total (not counting parts without a price)", "Total (not counting parts out of stock)" or, if both apply, "Total (not counting parts without a price or out of stock)".
Add to cart and go to the shop
Builder goes to the shop in the same tab. Your work is kept in the browser. When you come back to Builder, the last session opens ("Last session restored").
- At the bottom of the Make it real window, press Add to cart and go to the shop (N parts). For
a moment the button shows "Preparing the cart…".
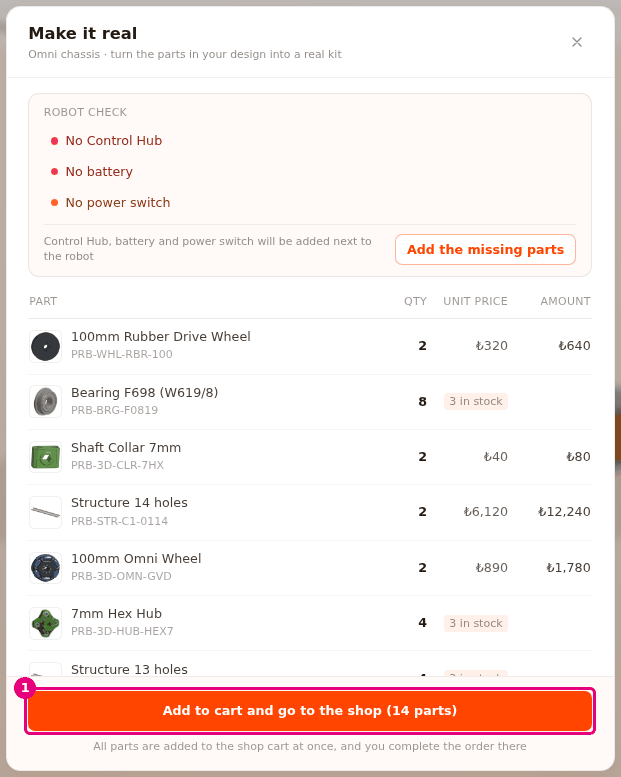
- In the shop cart, check the parts and the quantities.
- In the shop, complete the order.
Result: The shop cart opens (in Turkish). The rows that have a price and enough stock are in the cart. Products that were already in your cart stay there too.
The N on the button is the number of parts in the rows that go to the cart. If no row can go to the cart, the button is faded. Below the button it says "All parts are added to the shop cart at once, and you complete the order there".
Close the window
There are three ways to close the window: press the window's ×, press Esc, or click the darkened area outside the window. Closing it does not change your design.
Having trouble?
- "No parts in the scene - design your robot first" appears: The scene is empty. Load a ready-made robot or add parts. In this case the button is faded. See Troubleshooting.
- "Could not reach shop prices right now - the list is shown, but adding to the cart is off. Try again in a moment." appears: Builder could not reach the shop. Close the window and open it again after a while. See Troubleshooting.
- The "Could not add the parts to the cart. Your current cart is unchanged. Try again." notification appears: Adding to the cart stopped halfway. The products already in your cart stay there, and some parts may have been added in this try. Without closing the window, press Add to cart and go to the shop again: the missing parts are added, and the ones already added are not added a second time. See Troubleshooting.
- The "Some part models could not be loaded" notification appears: A part model did not load during Add the missing parts. The part is still added. Check your internet connection. See Troubleshooting.
- The "Could not reach the shop stock - using the static catalog" notification appears when Builder opens: Builder could not get the live stock. Reload the page. See Troubleshooting.
- A row does not go to the cart: The UNIT PRICE column shows "price coming soon", "out of stock" or "N in stock". Keep track of these parts in the shop separately. See Troubleshooting.
- For other warnings, see Troubleshooting.