Start with a ready-made robot
On this page you will load a fully assembled robot into the scene. Instead of building from scratch, you open a ready-made robot, look it over and make changes to it.
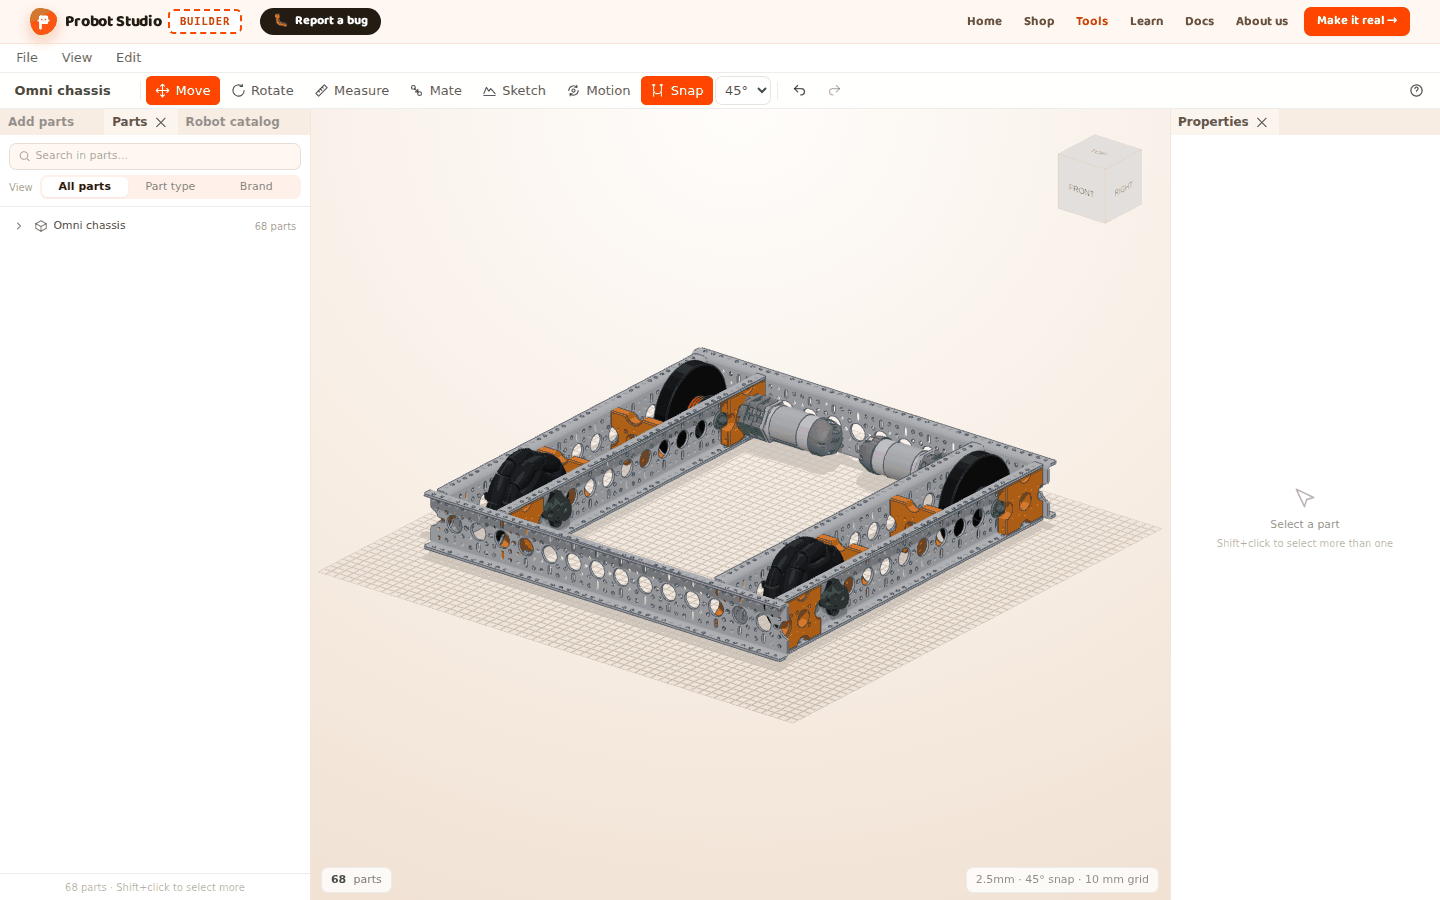
Before you start
- Builder is open:
https://probotstudio.com/builder/?dil=en. - Loading a robot removes everything in the scene. If your own work is in the scene, first select File > Save (download JSON). See Save to a file and open it.
Ready-made robots
Builder has five ready-made robots and two design examples. The names are as they appear on screen.
| Robot | Difficulty | Parts | Where |
|---|---|---|---|
| Starter Bot | Intermediate | 182 parts, 14 assembly steps | Robot catalog (large card), the "The scene is empty" card |
| Omni chassis | Beginner | 68 parts | Robot catalog, the "The scene is empty" card |
| NFR mecanum chassis | Intermediate | 24 parts | Robot catalog |
| NFR omni chassis | Beginner | 22 parts | Robot catalog |
| WattOS mecanum chassis | Intermediate | 33 parts | Robot catalog, the "The scene is empty" card |
| Omni robot with an arm | Intermediate | 148 parts | Robot catalog > COMMUNITY, "Design example" |
| 4-motor omni chassis (+ layout) | Intermediate | 72 parts | Robot catalog > COMMUNITY, "Design example" |
The Starter Bot carries an intake, a feeder and a shooter on an omni chassis. The Control Hub, battery and power switch are also inside the robot. The Starter Bot is the only robot with assembly steps. See Build the robot step by step.
Load a robot from the empty scene
When the scene is empty, the "The scene is empty" card sits in the middle. There are three robot cards at the bottom of it.
- In your browser, open
https://probotstudio.com/builder/?dil=en. If the scene is empty, the "The scene is empty" card is in the middle. Below it is the line "START WITH A READY-MADE ROBOT OR AN EMPTY SCENE". - Press the Omni chassis card.
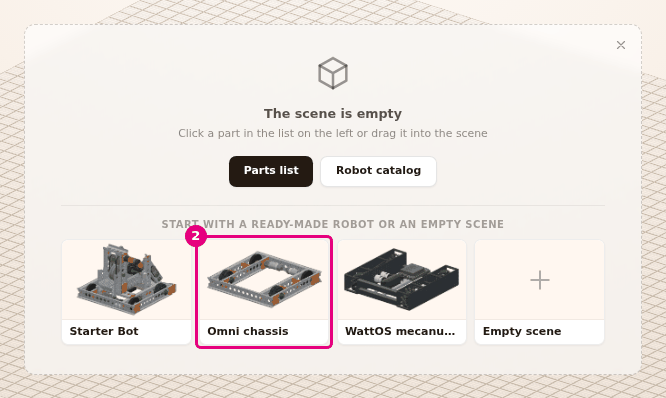
- The robot appears in the scene in a few seconds. To see all of it, select View > Fit view.
Result: The Omni chassis is in the scene and the camera fits the robot in view. The notification in the corner of the screen shows the robot's name and "loaded, press Ctrl+Z to undo". The project name in the Toolbar becomes "Omni chassis".
The Empty scene card does not load a robot. It closes the card and brings the Add parts tab to the front.
Load a robot from the Robot catalog
- In the Left panel, select the Robot catalog tab.
- Type
wattosin the Search robots... box. The list is filtered by robot name and description. - In the READY-MADE ROBOTS section, press the WattOS mecanum chassis card. The robot appears
in the scene. If there are parts in the scene, the robot does not load and a confirmation appears
below the cards. Press Replace. See the section "Replace the robot in the scene with another robot" below.
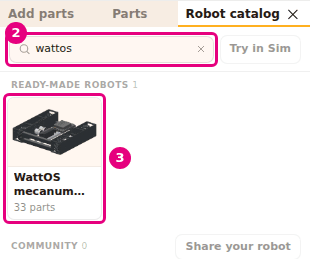
Result: The WattOS mecanum chassis is in the scene. The status bar shows "37 parts": the robot's 33 parts and the 4 belts that drive the wheels.
The catalog has two kinds of cards:
- Large card (Starter Bot): It shows the difficulty, a description, "182 parts · 14 assembly steps" and the subsystem tags (chassis, intake, feeder, shooter, electronics). Load puts the whole robot in the scene. Build step by step opens the robot in assembly mode.
- Small cards: They show a picture, the name and the part count. Press anywhere on the card to load the robot.
If the Robot catalog tab is closed, select File > Robot catalog. On the "The scene is empty" card, Robot catalog also brings the tab to the front.
Replace the robot in the scene with another robot
Warning
Replace removes all the parts in the scene. The parts you added yourself are removed too. First download your work with File > Save (download JSON).
- In the Left panel, select the Robot catalog tab.
- If text is left in the Search robots... box (for example
wattos), press the cross next to the box (Clear search). The list shows all the robots again. - Press the Omni chassis card. A confirmation appears below the cards: "The N parts in the scene will be removed and replaced by Omni chassis."
- If you want the new robot, press Replace. If you change your mind, press Cancel.
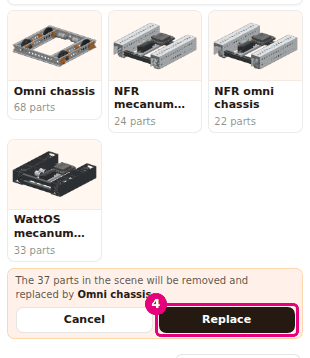
Result: The old parts are gone and the Omni chassis is in the scene.
For the Starter Bot, the confirmation appears inside the large card, in place of Load and Build step by step. If you loaded the wrong ready-made robot, select Edit > Undo (Ctrl+Z). The previous scene comes back.
Open community robots
The COMMUNITY section is below READY-MADE ROBOTS. The number of robots is shown next to the heading. The design examples come first, then the community robots that passed review.
- Design example card: Below the Omni robot with an arm card, it says "Design example · 148 parts". This robot carries an arm turned by a servo on the Starter Bot chassis and intake. It also has a small gripper with one servo. The second design example is 4-motor omni chassis (+ layout) (see Open the 4-motor omni chassis).
- Community robot card: Below the card are the author's name and the part count ("{author} · N parts").
- These cards work like the small cards: press a card to load the robot. If the scene is full, the Cancel / Replace confirmation appears first. When a community robot loads, the notification shows the robot's name and "loaded into the scene".
- If the list is long, Show more appears at the bottom. Press it to get the next robots.
- Search robots... also filters the community robots by name and author.
To send your own robot to the community, see Save to your account and share.
Open the 4-motor omni chassis
In the COMMUNITY section, the second design example is 4-motor omni chassis (+ layout). Its four wheels are set out in a "+" layout, and each wheel has a Starter Bot drive module. The profile channels face outward, and the corners are joined with connector brackets.
- In the Left panel, select the Robot catalog tab.
- Scroll the list to the COMMUNITY section.
- Select the 4-motor omni chassis (+ layout) card. The card is narrow, so its name and the "Design
example · 72 parts" line below it are shortened.
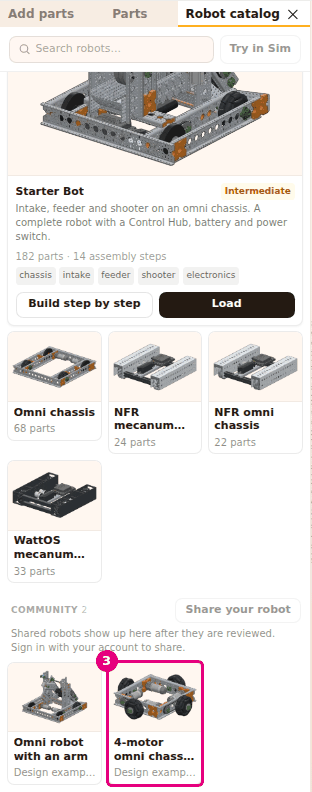
- If the scene is full, press Replace in the confirmation that appears.
Result: The four-wheel chassis is in the scene. The status bar shows "72 parts".
Find the parts of a ready-made robot
The parts of a ready-made robot are gathered in one row in the Parts tab.
- In the Left panel, select the Parts tab.
- Select the row with the robot's name (for example Omni chassis). The row shows "68 parts" next to it.
- Press the arrow at the start of the row ("Show its parts").
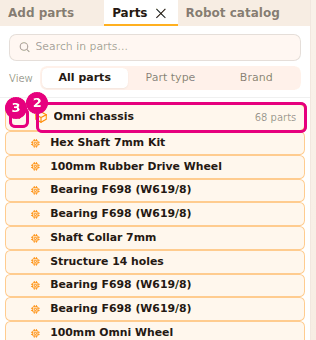
Result: All of the robot's parts are selected in the scene. The parts are listed one by one below the row.
Press the arrow again to close the list ("Close"). When the mouse pointer is over the row, the Hide and Delete icons appear. They apply to all of the robot's parts. Parts you add to the robot later are outside this row, in their own rows.
Having trouble?
- The "The scene is empty" card does not appear: There are parts in the scene, or you closed the card with the cross. Use the Robot catalog tab.
- "No ready-made robots match this search" appears: Clear the Search robots... box.
- There is a red error box in the community list: Press Try again in the box. The design examples are not affected by this error. See Troubleshooting.
- "Loading community robots" does not go away: Check your connection and reload the page.
- I loaded the wrong robot: If it is a ready-made robot or a design example, select Edit > Undo (Ctrl+Z). Loading a community robot cannot be undone. To keep your work in the scene, download it with File > Save (download JSON) before you load a community robot.
- There is no Robot catalog tab: In the View menu, in the PANELS group, check Robot catalog. See Arrange the panels and Troubleshooting.