Check the robot with Build
On this page you will open the Build panel and build your robot. Build shows whether the parts are attached to each other, lists any collisions and shows the parts list.
Before you start
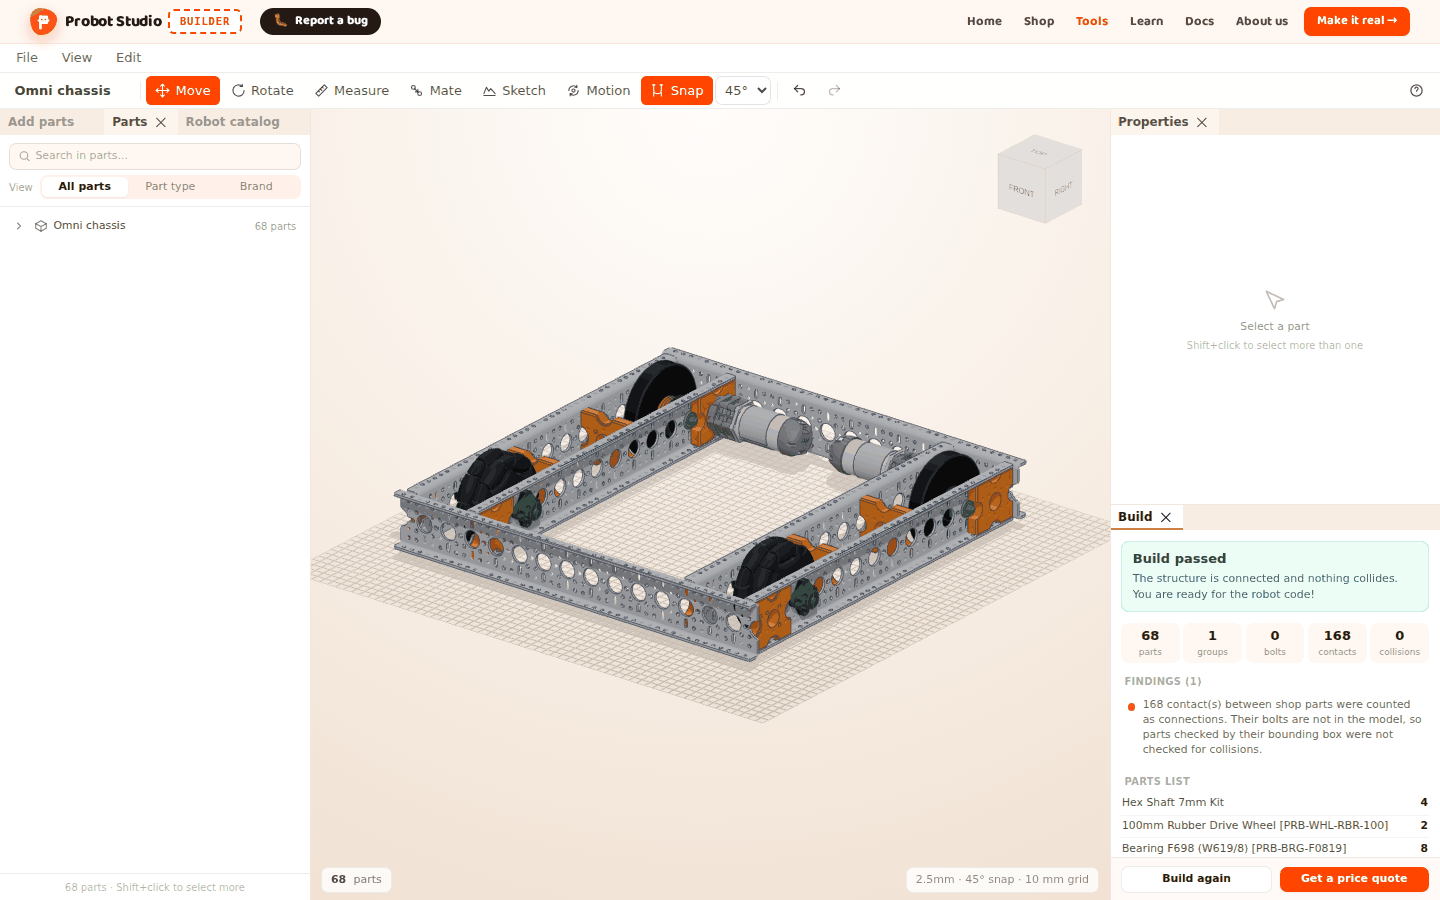
- A robot is in the scene. To start with a ready-made example, press Omni chassis on the "The scene is empty" card (see Start with a ready-made robot).
- The Build panel is closed by default. You open it first.
Open the Build panel
In the Menu bar, select View > Build. The menu closes by itself.
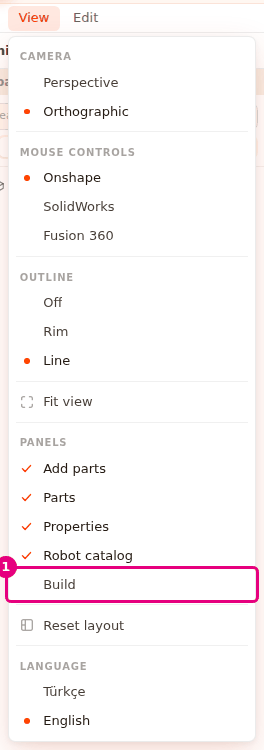
Result: The Build panel opens below the Properties panel. The panel shows the text "No build yet" and Build. If Properties is closed, the panel opens next to the Scene.
To close the panel, uncheck View > Build. This browser remembers your choice.
Run Build and read the result
- In the Build panel, press Build.
- Read the result heading at the top of the panel.
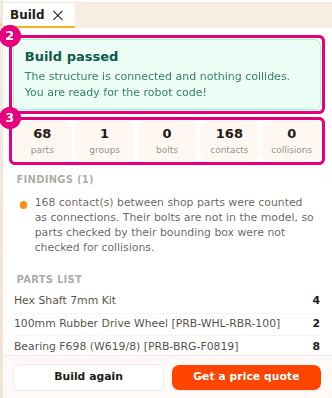
- Check the five counters below the heading.
Result: One of three headings appears at the top of the panel, with the counters below it.
| Heading | Description | When |
|---|---|---|
| "Build passed" | "The structure is connected and nothing collides. You are ready for the robot code!" | There are no errors and no warnings. There may be info rows. |
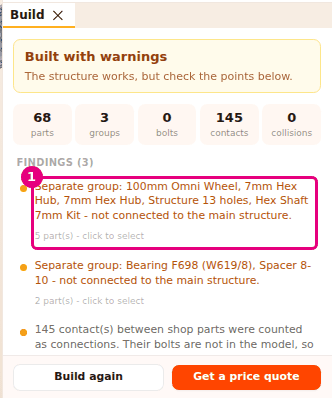
| "Built with warnings" | "The structure works, but check the points below." | There are no errors and at least one warning. |
| "Build failed" | "Fix the errors first, then build again." | There is at least one error. |
| Counter | What it counts |
|---|---|
| parts | The material parts in the scene. Shapes of the Hole type and sketches are not counted. |
| groups | Sets of parts attached to each other. If the whole robot is attached, it is 1. |
| bolts | Each pair of lined-up holes between parts (two lined-up holes count as 2), plus each bolt or nut that touches or goes into another part. |
| contacts | Pairs of parts whose surfaces touch but whose holes do not line up. Shop parts that touch or go into each other are also counted here. |
| collisions | Pairs of parts that go more than 2 mm into each other. Most shop parts are not counted here (see Run Build on a ready-made robot). |
The build result does not update by itself. After you change the robot, press Build again.
Note
The wheel and motor checks do not work on the parts of a ready-made robot. To check a ready-made robot, also look at the "Robot check" in the Make it real window (see Read the robot check).
Run Build on a ready-made robot
Build checks shop parts by the box around their model. This box does not see the hole the shaft goes through. So shop parts that touch or go into each other count as connected, not as a collision.
- On the "The scene is empty" card, press Omni chassis.
- In the Build panel, press Build.
- In the "Findings" list, read the row "N contact(s) between shop parts were counted as connections."
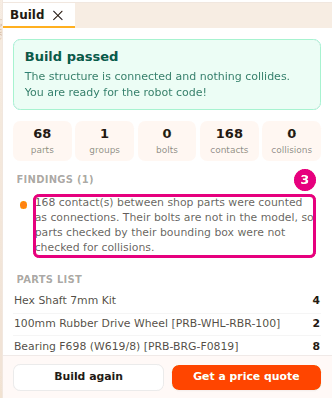
Result: The heading says "Build passed". For the Omni chassis the counters are 68 parts, 1 group, 0 bolts, 168 contacts and 0 collisions.
For shop parts, the counters and findings work like this:
- contacts also counts the contacts of shop parts. For shop parts bolts stays 0, because their bolts are not in the model.
- Parts with a C-shaped cross section, such as profiles, and bent sheet parts are checked by their real shape. These can collide.
- Rotated parts (for example wheels set at 45°) are checked in their real direction. Rotated parts that sit close but do not go into each other are not counted as a collision.
- If shop parts touch each other, the "No bolted connections" warning does not appear.
- If there is a motor but no Control Hub in the scene, the info row "There are N motor(s) but no Control Hub. Motors connect to a Control Hub." appears.
Look through the findings
Below the counters, the "Findings (N)" list appears. A red dot is an error, a yellow dot is a warning, and the rest are info. The list starts with the errors.
- In the Build panel, select a row in the "Findings" list. Below the row it says "N part(s) - click
to select".
- In the Scene, right-click the selected part and select Focus. The camera points at the part.
- In the Toolbar, press Mate and mate the part to the correct hole (see Mate parts by their holes).
- In the Build panel, press Build again.
Result: The finding you fixed leaves the list. The counters update.
Rows without "click to select" below them ("The scene is empty - there are no parts to build.", "No bolted connections" and "N contact(s) between shop parts were counted as connections.") cannot be selected.
| Finding | Type | What it means | What to do |
|---|---|---|---|
| "The scene is empty - there are no parts to build." | Error | There are no parts in the scene. | Add a part or load a ready-made robot. |
| "A and B overlap (~N.Nmm)." | Error | Two parts go into each other. | Move one of the parts, or mate it by its hole with Mate. |
| "A and B touch, but their bolt holes do not line up." | Info | The parts touch, but their holes are not on top of each other. | Line up the holes with Mate. |
| "Separate group: A, B - not connected to the main structure." | Warning | These parts do not touch the rest of the robot. | Move the parts to the robot or mate them to it. |
| "No bolted connections - the parts are only resting on each other." | Warning | No part has a hole that lines up with a hole of another part. | Mate the parts by their holes with Mate. |
| "No motor shaft on the axis of N wheel(s)." | Warning | No motor turns the wheel. | Mate the wheel to a motor shaft. |
| "There are wheels but no motor - the robot cannot move." | Warning | The robot has wheels but no motor. | Add a motor and mate the wheel to its shaft. |
| "There are N motor(s) but no Control Hub. Motors connect to a Control Hub." | Info | There is a motor in the scene but no Control Hub. | Add a Control Hub (see Make it real: send the parts list to the shop cart). |
| "N contact(s) between shop parts were counted as connections. ..." | Info | Shop parts that touch or go into each other were counted as attached. | Do nothing. See Run Build on a ready-made robot. |
Read the parts list
Below the findings is the "Parts list" table. Each row shows the name of a part and how many are in the scene. Different lengths of the same part are separate rows. A belt whose length is not in the shop shows as an "HTD5M belt N mm, not in the shop" row.
This list does not show prices or stock. For prices, stock and the cart, use Get a price quote.
Get a price quote
If the panel says "No build yet", press Build first. Get a price quote appears below the build result.
- At the bottom of the Build panel, press Get a price quote.
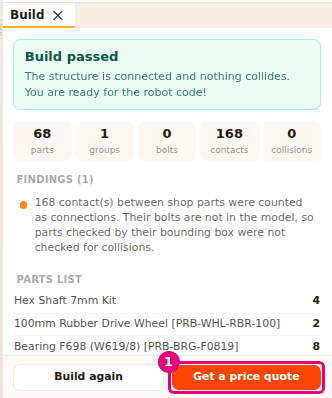
- In the Make it real window that opens, read the parts list and the robot check.
- Press the window's × to go back to the Build panel.
Result: The Build panel shows again. Get a price quote opens the same window as Make it real → in the Site header. To send the parts to the cart, see Make it real: send the parts list to the shop cart.
If the last build ran on an empty scene, Get a price quote is faded. After you add parts, press Build again.
Having trouble?
- There is no Build button in the panel, and Build is not checked in the menu: The panel is closed. Select View > Build. See Troubleshooting.
- I fixed the robot, but the finding is still there: The result does not update by itself. Press Build again. See Troubleshooting.
- "The scene is empty - there are no parts to build." appears: There are no parts in the scene, or all of them are shapes of the Hole type or sketches. Add a material part. See Troubleshooting.
- Pressing a finding row selects nothing: That finding is not about any part. The row does not say "click to select".
- For other warnings, see Troubleshooting.