Select, hide and delete parts
On this page you select parts in the scene one at a time or several at once. You hide the part in front to see the part behind it, delete a part you do not want and undo a mistake.
Before you start
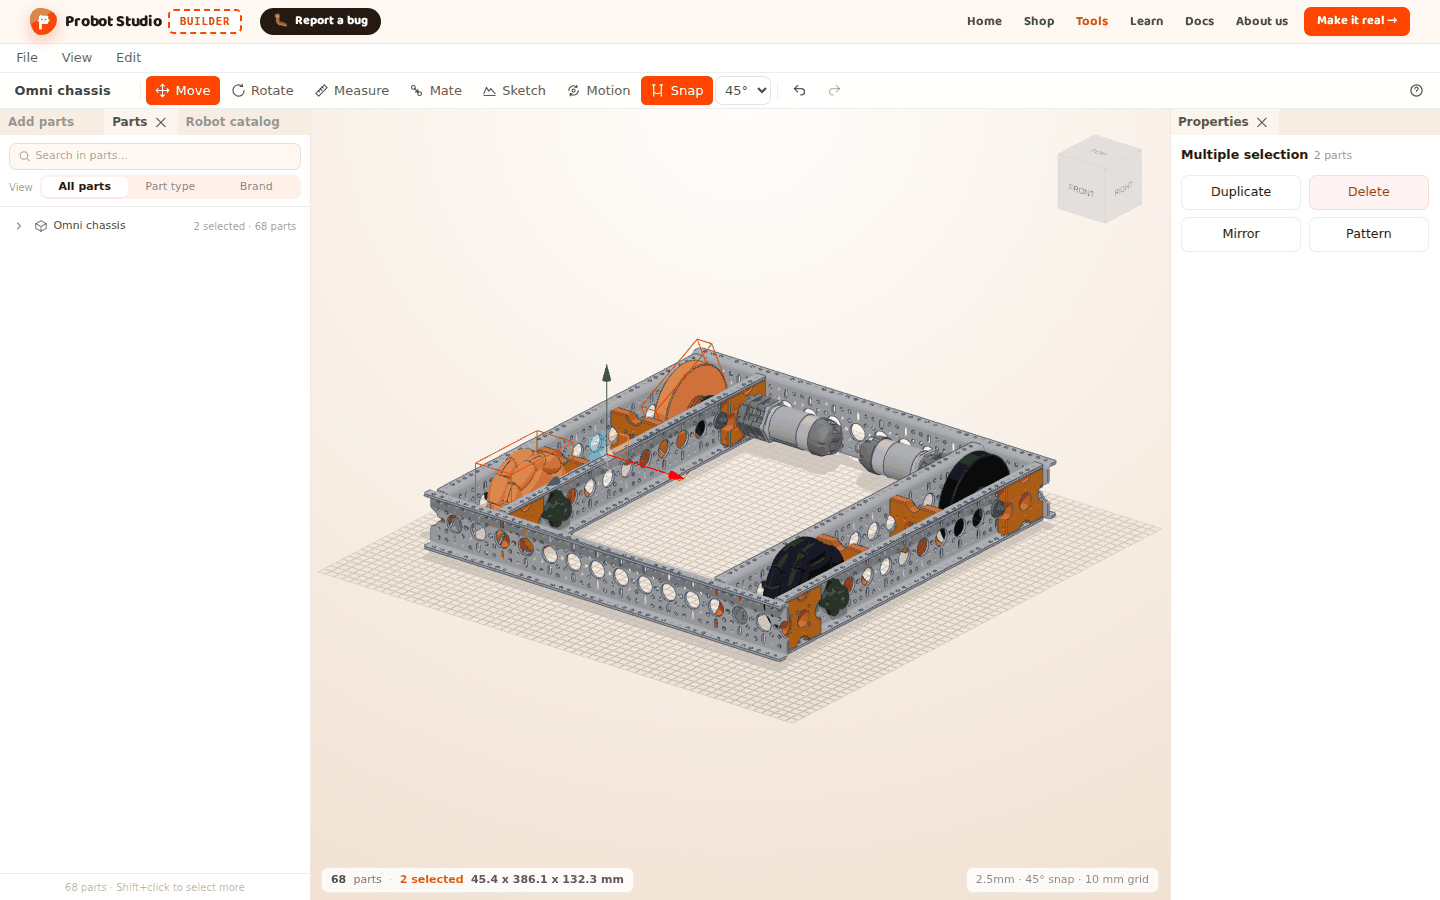
- The Omni chassis is open in the scene (see Start with a ready-made robot). The status bar says "68 parts".
- In the Toolbar, Move is selected. While Measure, Mate or Sketch is on, you cannot select parts in the scene.
Select parts in the scene
With any mouse controls option, the left button only selects. A frame is drawn around the selected part.
- To see the whole robot, select View > Fit view.
- In the Scene, left-click one wheel of the chassis. The wheel is selected.
- Hold Shift and click another wheel. The second wheel is added to the selection.
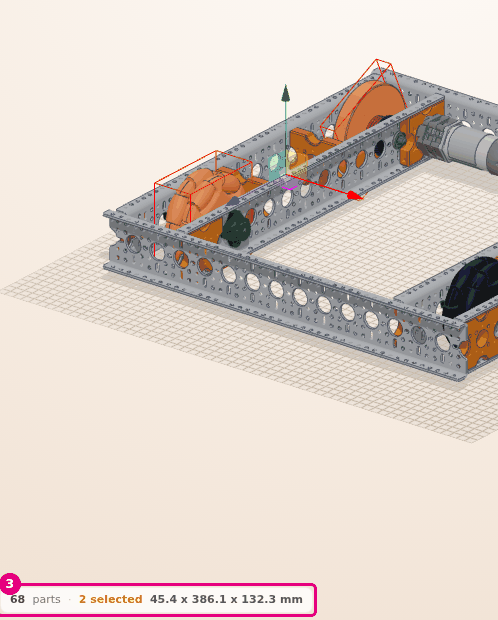
Result: The status bar shows "68 parts · 2 selected" and the size of the selection. The size is in mm, in the order width x length x height.
- Clicking with Ctrl, or Cmd on a Mac, works like Shift. If you click a selected part this way, it leaves the selection.
- Clicking empty space clears the selection. Esc also clears the selection.
- To select all the parts, right-click empty space and select Select all (Ctrl+A).
- If there are hidden parts, the status bar also shows how many (for example "3 hidden").
Select by drawing a box
In the scene, drag with the left button from an empty spot. A box is drawn.
When you let go, every visible part the box touches is selected. A part does not have to be inside the box. Touching the edge of the box is enough.
If you hold Shift or Ctrl when you start dragging, the parts in the box are added to the selection you already have. If you start dragging on top of a part, no box is drawn.
Select a grouped part
The first click on a part grouped with Group selects the whole group. If you click the same part again, the selection goes one level further in. The last click selects only that part.
To make a group, see Group parts and attach them to each other.
Select from the Parts tab
If a part is hard to see in the scene, you can select it from a list. The parts of a ready-made robot are gathered in one row.
- In the Left panel, select the Parts tab. The list starts with the "Omni chassis" row, with "68 parts" next to it.
- On the "Omni chassis" row, press the arrow ("Show its parts"). The row opens and lists the robot's parts.
- In the Search in parts... box, type
wheel. The list narrows to the parts that have "wheel" in their name, type, product code (SKU) or hardware name. - In the list, select a wheel row. The part is selected in the scene.
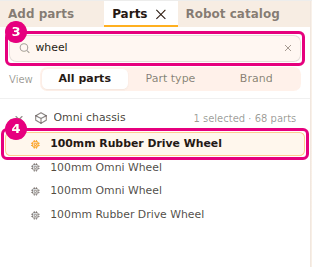
Result: The row is highlighted and the wheel in the scene is selected. The bottom of the panel says "N / 68 parts · Shift+click to select more".
- Clicking a row with Shift, Ctrl or Cmd adds it to the selection or removes it.
- If you select the "Omni chassis" row itself, all the robot's parts are selected. If some of them are selected, the row says "N selected · 68 parts".
- The View selector arranges the list. All parts shows the parts in the order they were added, with their groups. Part type and Brand show them under headings. Press a heading to close or open it.
- Builder remembers your View choice in this browser.
Hide and show a part
A hidden part leaves the scene but is not deleted. Hide the part in front to reach the part behind it.
- In the Scene, right-click a Structure part of the chassis. The context menu opens.
- In the menu, select Hide (H). The part leaves the scene.
- In the Scene, right-click empty space to bring the hidden parts back.
- In the menu, select Show all (1).

Result: The notification "1 part(s) shown" appears in the corner and the part comes back to its place.
- H hides the selected parts. A hidden part leaves the selection.
- In the Parts tab, an eye icon appears when you point at a row ("Hide" / "Show"). The row of a hidden part looks faded and has a crossed-out eye.
- You cannot click a hidden part in the scene. To bring it back, use the Show icon on its row or Show all (n).
- Hiding and showing are steps you can undo, too.
Delete a part
Warning
In the Parts tab, the Delete icon on a ready-made robot's row deletes all the robot's parts. If you deleted it by mistake, select Edit > Undo before you do anything else.
- In the Scene, select the part you want to delete. You can select several parts with Shift.
- Right-click one of the selected parts. The top of the menu shows the part's name and how many parts are selected.
- In the menu, select Delete (2). If one part is selected, the item is called Delete.
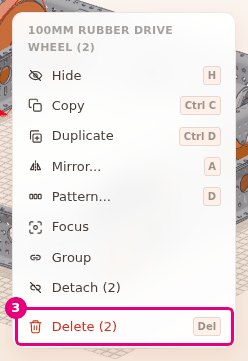
Result: The parts leave the scene and the Parts list. The status bar says "66 parts".
Other ways to do the same thing:
- The Del or Backspace key. While Measure is on, these keys delete the last measurement instead of a part.
- Edit > Delete.
- Delete in the Properties panel.
- In the Parts tab, the Delete icon (×) that appears when you point at a row.
Parts attached to the deleted part are detached and stay where they are. If you delete a pulley, the belt on it is deleted too.
Undo a mistake
Select Edit > Undo (Ctrl+Z). The last change is undone. Builder goes back at most 59 steps. To redo a step you undid, select Edit > Redo (Ctrl+Y or Ctrl+Shift+Z).
The undo and redo icons in the Toolbar do the same thing. If there is no step to undo, the icon is faded. Undo and redo clear the selection.
While you type in a text or number box, shortcuts do not work. Leave the box first.
Having trouble?
- Clicking a part does not select it: Measure, Mate or Sketch may be on. To close Measure or Mate, press Move in the Toolbar, or press Esc a few times until the tool closes. Each press goes back one step. In Measure, the waiting point is cleared first, then all the measurements. To leave Sketch, press Sketch in the Toolbar or press Finish (Enter). Esc closes Sketch only while you are choosing a plane.
- The whole group is selected instead of the part I clicked: The part is grouped. Click the same part again.
- No box is drawn and the camera rotates: Start dragging with the left button, from an empty spot.
- Right-clicking does not open the menu: If the mouse moves while the right button is held down, the menu does not open (with Onshape controls the camera also rotates). Right-click without moving the mouse. The menu does not open in assembly mode or while Measure, Mate or Sketch is on.
- "Editing is off in assembly mode" appears in the corner: In the Assembly strip, press Switch to editing. See Troubleshooting.
- I cannot find the hidden part: Right-click empty space and select Show all (n).