Add, connect and edit blocks
On this page you learn how to add blocks in Probot Blocks, connect them to each other, delete and duplicate them, and move around the workspace.
Before you start
- Blocks is open and the Probot Blocks tab is selected.
- Open a ready-made example to try things out: Pick an example > Tank Drive. See Start with a ready-made example.
Add a block
- In the block list, select the Telemetry category. The block panel opens.
- Drag the write to telemetry block from the panel into the slot of the teleopLoop block.
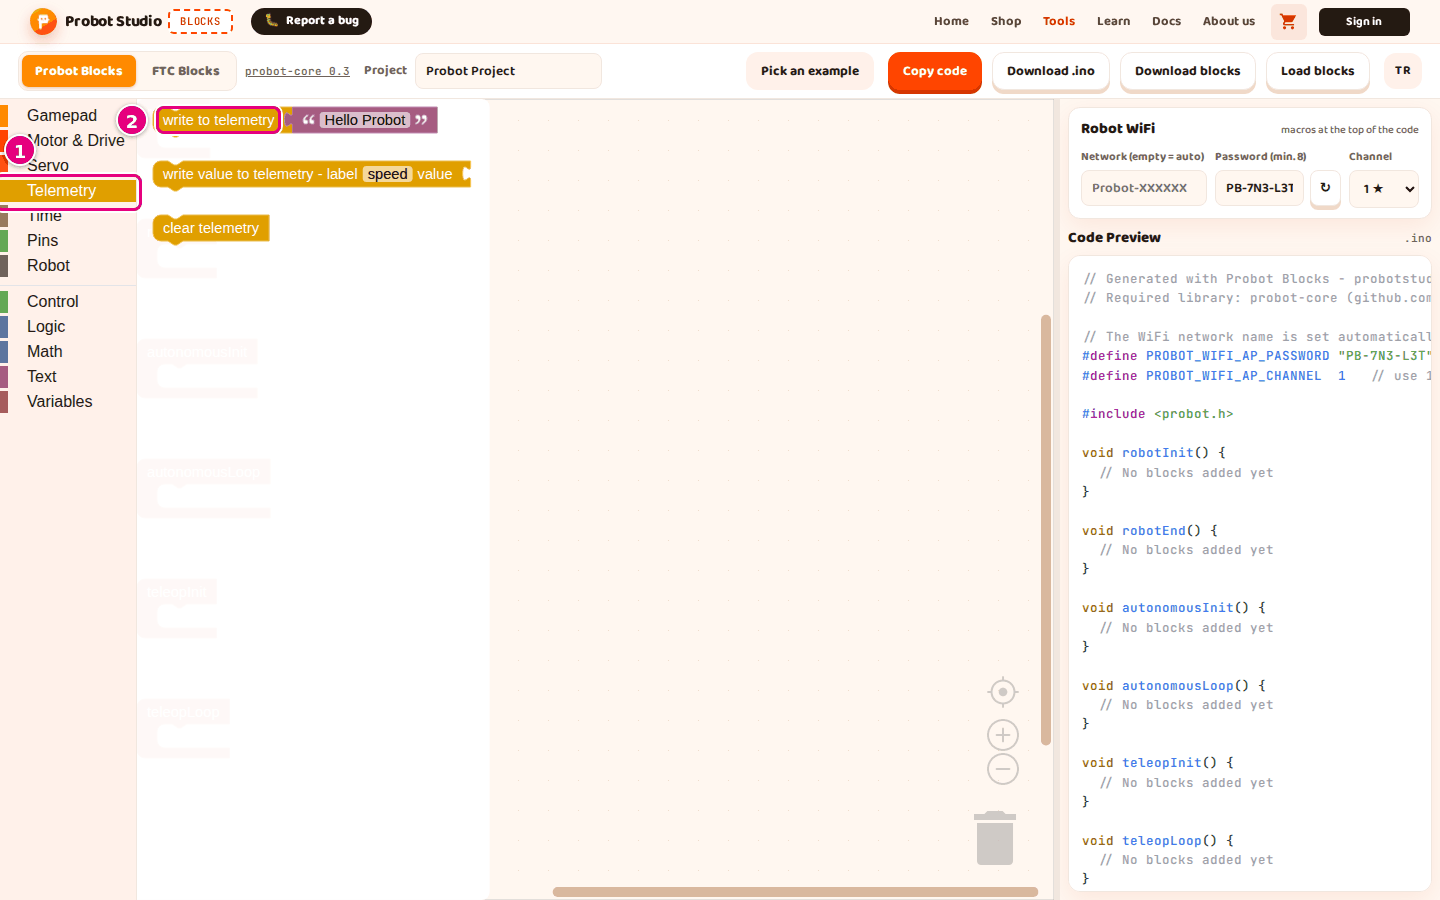
- Let go of the block when the slot of teleopLoop is highlighted.
Result: The block sits inside teleopLoop. In Code Preview, the line
probot::println("Hello Probot"); appears inside void teleopLoop().
Hover over a block for a moment and a tooltip explains what it does.
Note
Only blocks connected inside the six lifecycle blocks go into the code. A block that sits loose in the workspace is not written into the code.
Variables are the only exception. A loose variable block ("set ... to ...", "change ... by") or
count with loop still adds double <name> = 0; to the Definitions section. The block itself
(the assignment, the loop) does not go into the code.
Plug a block into a slot
Some blocks have value slots (for example the power slot on drive motor). You can type a number into a slot or plug a value block into it.
- In the block list, select the Motor & Drive category.
- Drag the drive motor block into the slot of teleopLoop. Its power slot shows
0.5. - In the block list, select the Gamepad category.
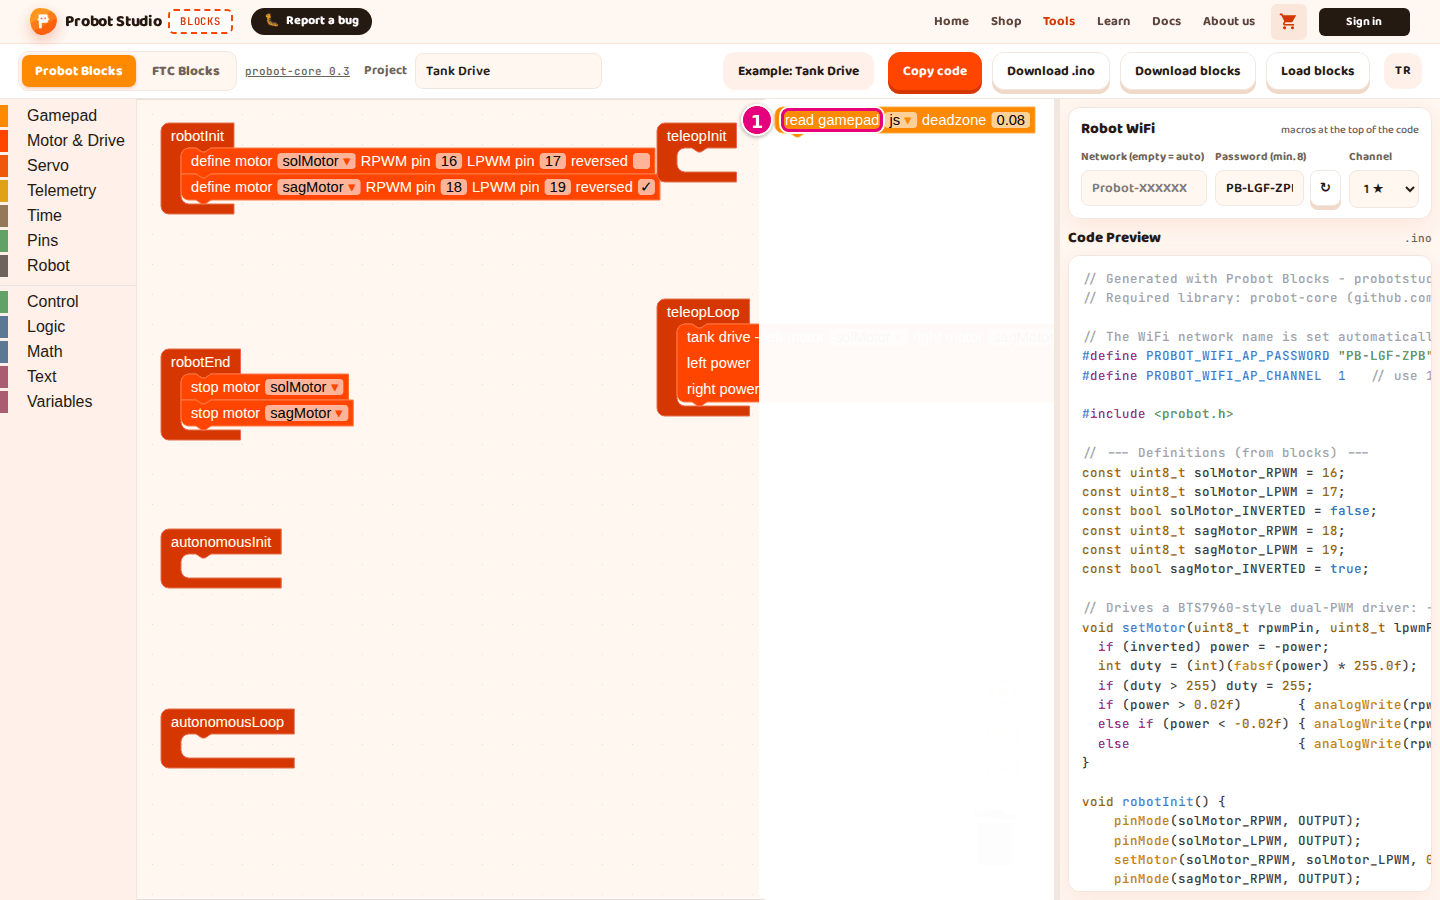
- Drag the js left stick ↕ (forward +) block into the power slot of drive motor. The
0.5number block pops out of the slot and sits loose next to it. - Drag the loose
0.5number block to the trash can.
Result: js left stick ↕ (forward +) sits in the power slot. In Code Preview, the setMotor(...)
line shows js.getLeftY() instead of 0.5.
Change a value in a block
- Press the number or text in the block.
- Type the new value.
- Press Enter or click an empty spot in the workspace.
Result: The block shows the new value, and the code updates right away.
For fields with a dropdown (▾), select an option from the list. To check a checkbox (for example
reversed), press the box.
Add an else branch to an if block
The if block in the block list has one branch. You add else if and else branches with the block's gear icon.
- In the block list, select the Control category.
- Drag the if block into the slot of teleopLoop.
- Press the gear icon on the if block. A small editing area opens next to it.
- In the editing area, drag the else piece from the list to below the if piece.
- Press the gear icon again. The editing area closes.
Result: A new else branch appears on the if block. In Code Preview, the line } else {
comes after the line if (false) {.
You can add the else if piece more than once. The else piece is added only once and stays at the bottom. You add pieces to the create text with block the same way. Press its gear icon, then in the editing area drag the item piece into the join piece.
Delete a block
Lifecycle blocks cannot be deleted. You delete other blocks in one of these ways:
- Select the block, then press Delete or Backspace.
- Right-click the block and select Delete Block. If there are other blocks inside it, the menu item shows the count, for example Delete 3 Blocks.
- Drag the block to the trash can or onto the block list.
When you delete with Delete, Backspace or Delete Block, only that block and the blocks inside it go away. The blocks connected below it join the block above and stay in place. If you delete a block by dragging it to the trash can or the block list, the blocks connected below it go with it.
Bring back a deleted block
- In the workspace, press the trash can. The deleted blocks are listed in a panel.
- Drag the block you want back from the panel to the workspace.
- Plug the block into the lifecycle block you want.
Result: The block is back in the workspace. A shorter way is to undo your last action with Ctrl+Z.
Undo and redo
- To undo, right-click an empty spot and select Undo (Ctrl+Z).
- To redo what you undid, right-click an empty spot and select Redo (Ctrl+Y or Ctrl+Shift+Z).
On a Mac, use Cmd instead of Ctrl. For Redo, Ctrl+Y also works on a Mac.
Duplicate a block
- Right-click the block you want to duplicate.
- In the menu, select Duplicate.
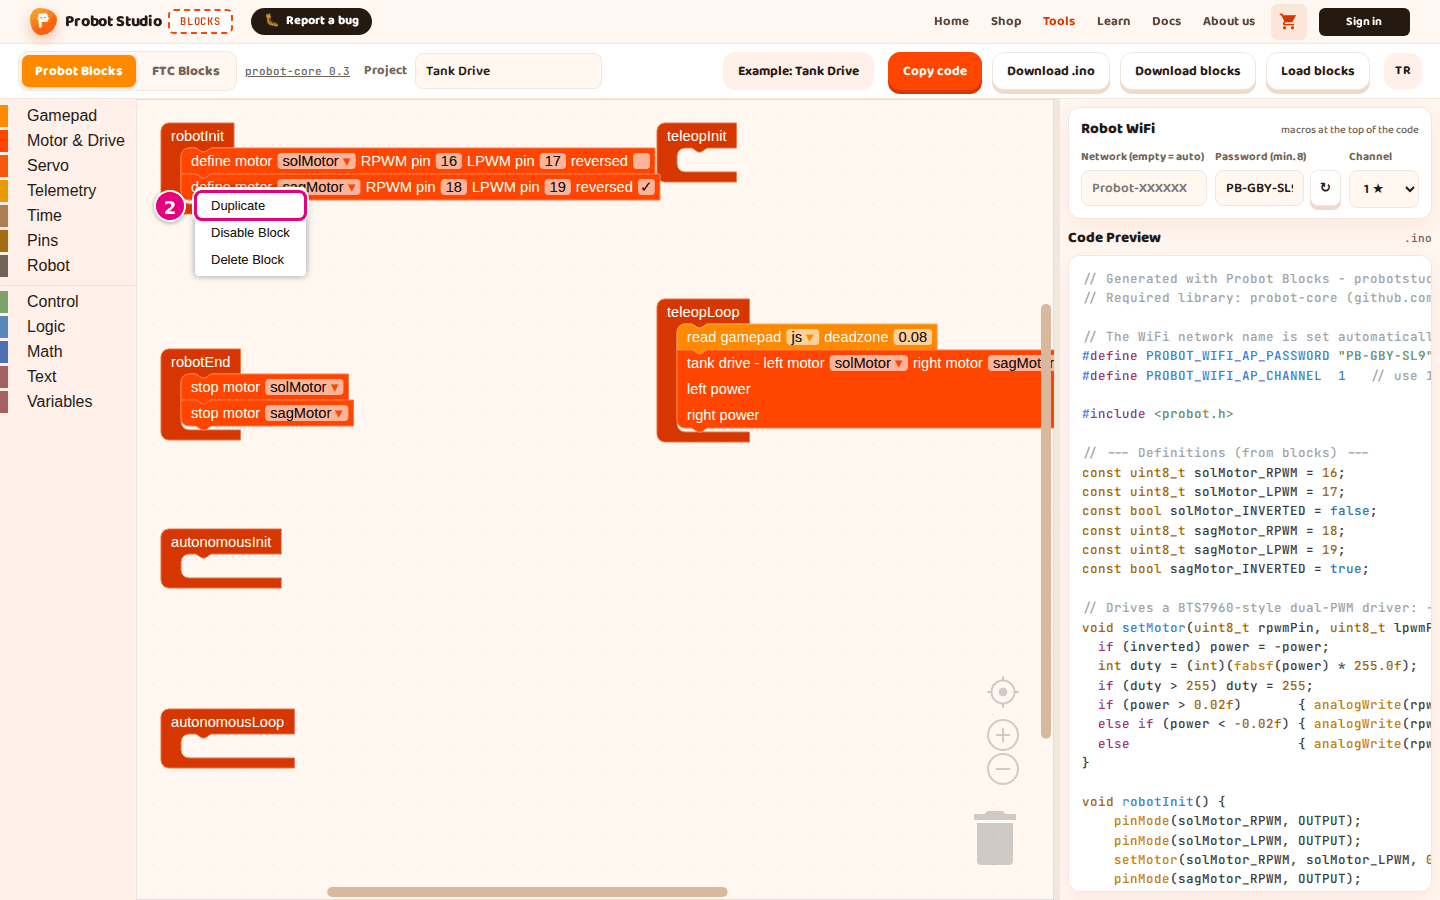
- Drag the copy and plug it in where you want.
Result: A copy of the block appears, together with the blocks inside it.
With the keyboard: select the block, press Ctrl+C, then Ctrl+V. To cut, press Ctrl+X.
Disable a block for now
- Right-click the block.
- Select Disable Block. The block looks faded, and its line disappears from Code Preview.
- To turn the block back on, right-click it again.
- Select Enable Block.
Result: The block looks the way it did before. Its line comes back in Code Preview.
Show inputs side by side or stacked
On blocks with more than one value slot (for example tank drive), you can change how the slots are laid out.
- Right-click the block and select Inline Inputs. The slots sit side by side in one row.
- To go back, select External Inputs. The slots sit one under the other.
Tidy up the blocks
- Right-click an empty spot in the workspace.
- Select Clean up Blocks. The blocks line up one under the other.
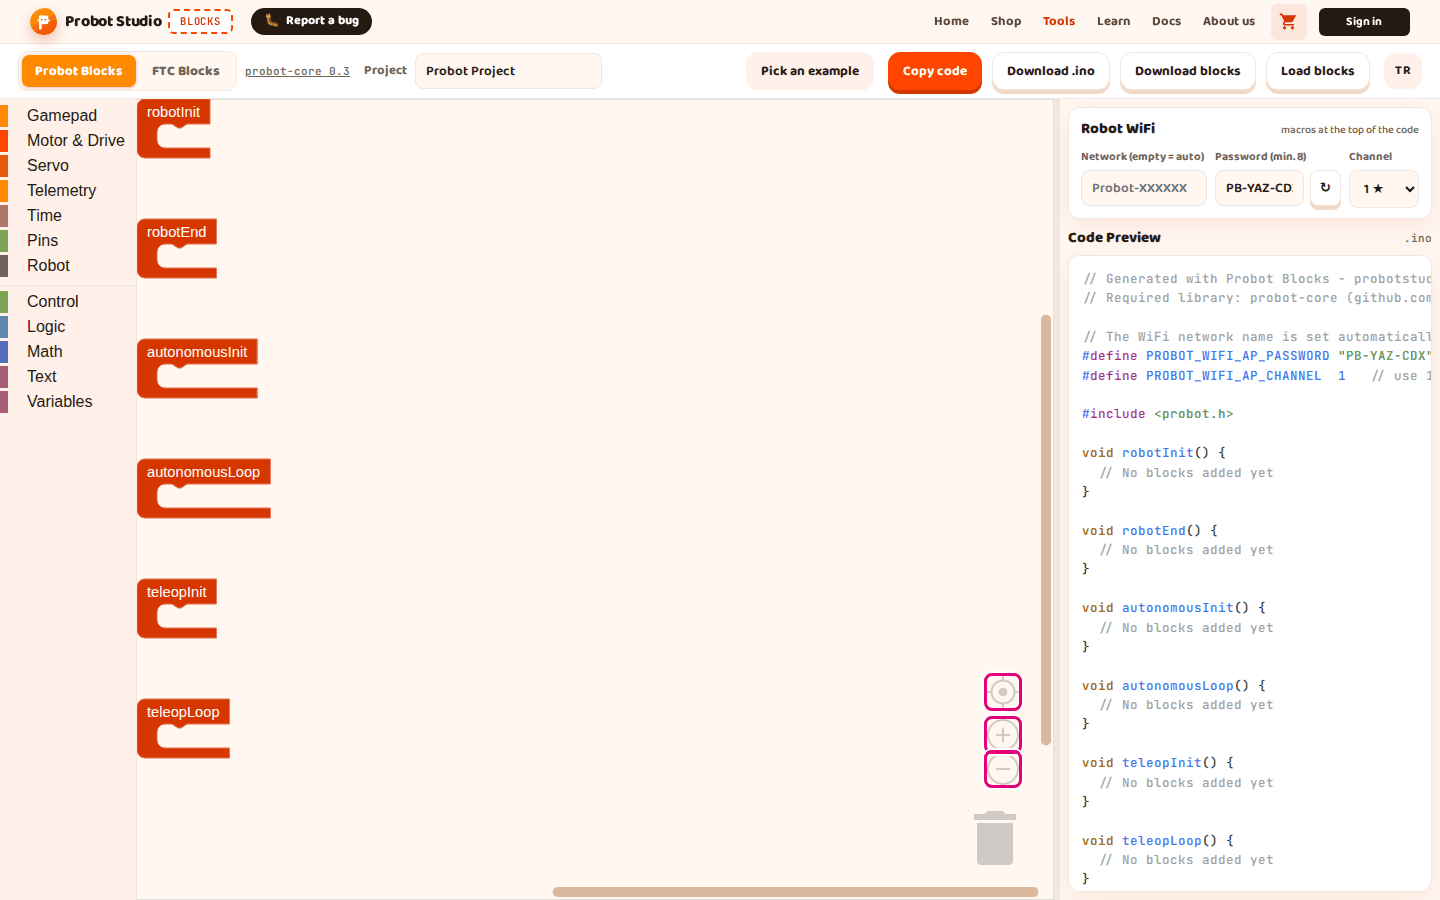
- In the workspace, press the center button (target icon). The view is centered and the zoom is reset.
Result: The blocks line up on the left without overlapping. Despite its name, this command does not delete any blocks. It only arranges them.
Move around the workspace
- Scroll: Drag an empty spot in the workspace. The mouse wheel scrolls up and down, and Shift+wheel scrolls sideways.
- Zoom in and out: In the workspace, press + or −, or use Ctrl+wheel.
- Center: Press the center button (target icon). The view is centered and the zoom is reset.
Widen the side panel
- Move the mouse over the thin strip between the workspace and the side panel. The pointer turns into a double arrow.
- Hold the strip and drag it.
- Let go.
Result: The side panel gets wider or narrower. The browser remembers the width. This strip does not work on a touchscreen.