Build the robot step by step
On this page you will watch the Starter Bot being built part by part in assembly mode. At each step you see which parts go on. Then you open the robot for editing.
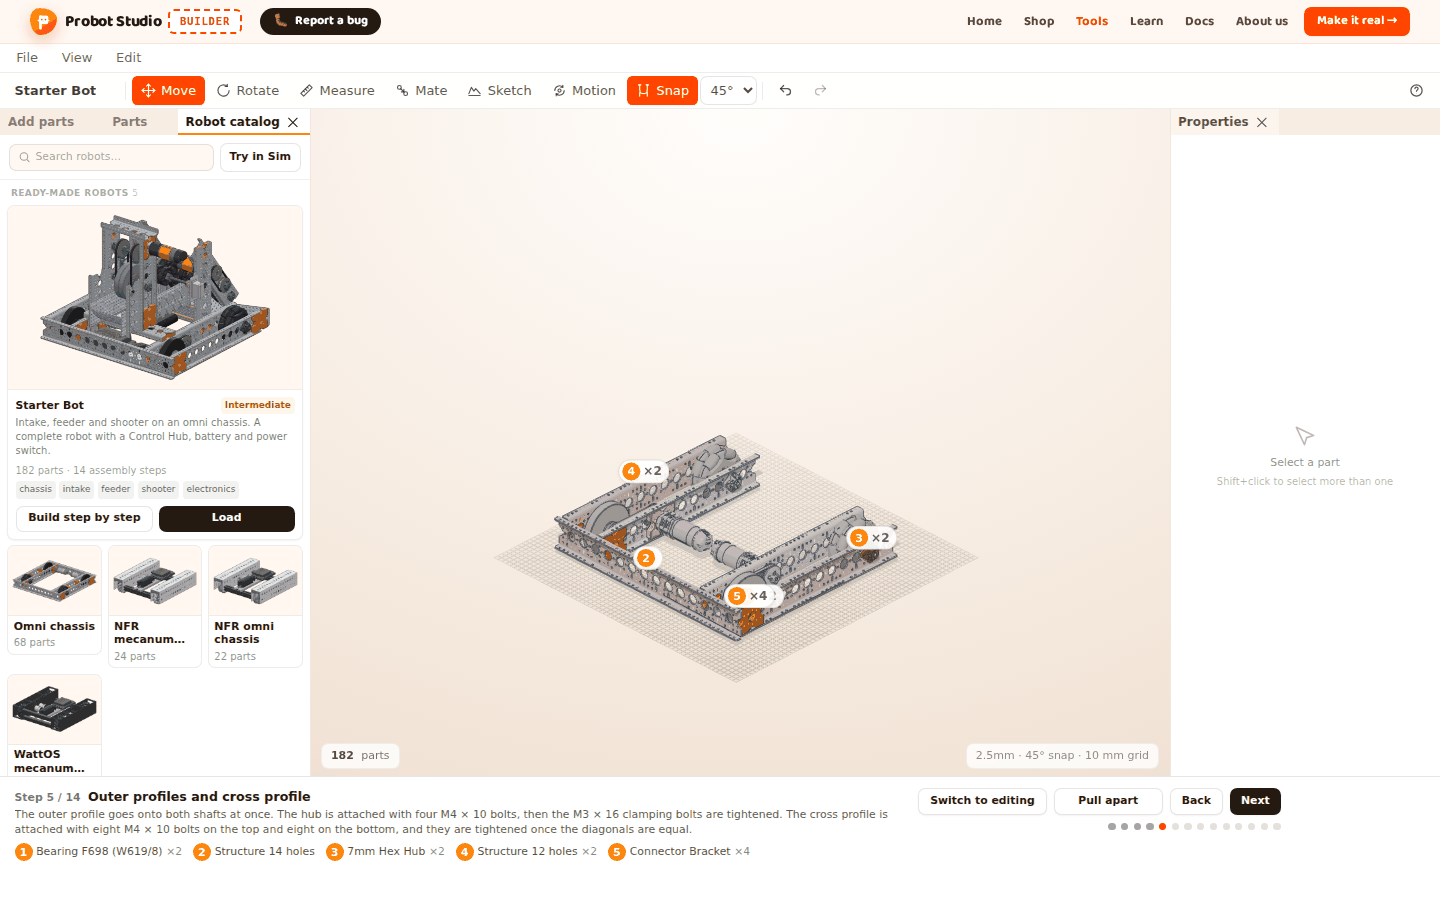
Before you start
- The only robot with assembly steps is the Starter Bot: 182 parts, 14 steps. The other ready-made robots have no Build step by step.
- Assembly mode removes everything in the scene and puts the Starter Bot there. If your own work is in the scene, first select File > Save (download JSON).
- For more about ready-made robots, see Start with a ready-made robot.
Start assembly mode
- In the Left panel, select the Robot catalog tab.
- On the Starter Bot card, press Build step by step.
- If the scene has parts in it, a confirmation appears on the card. Press Replace.
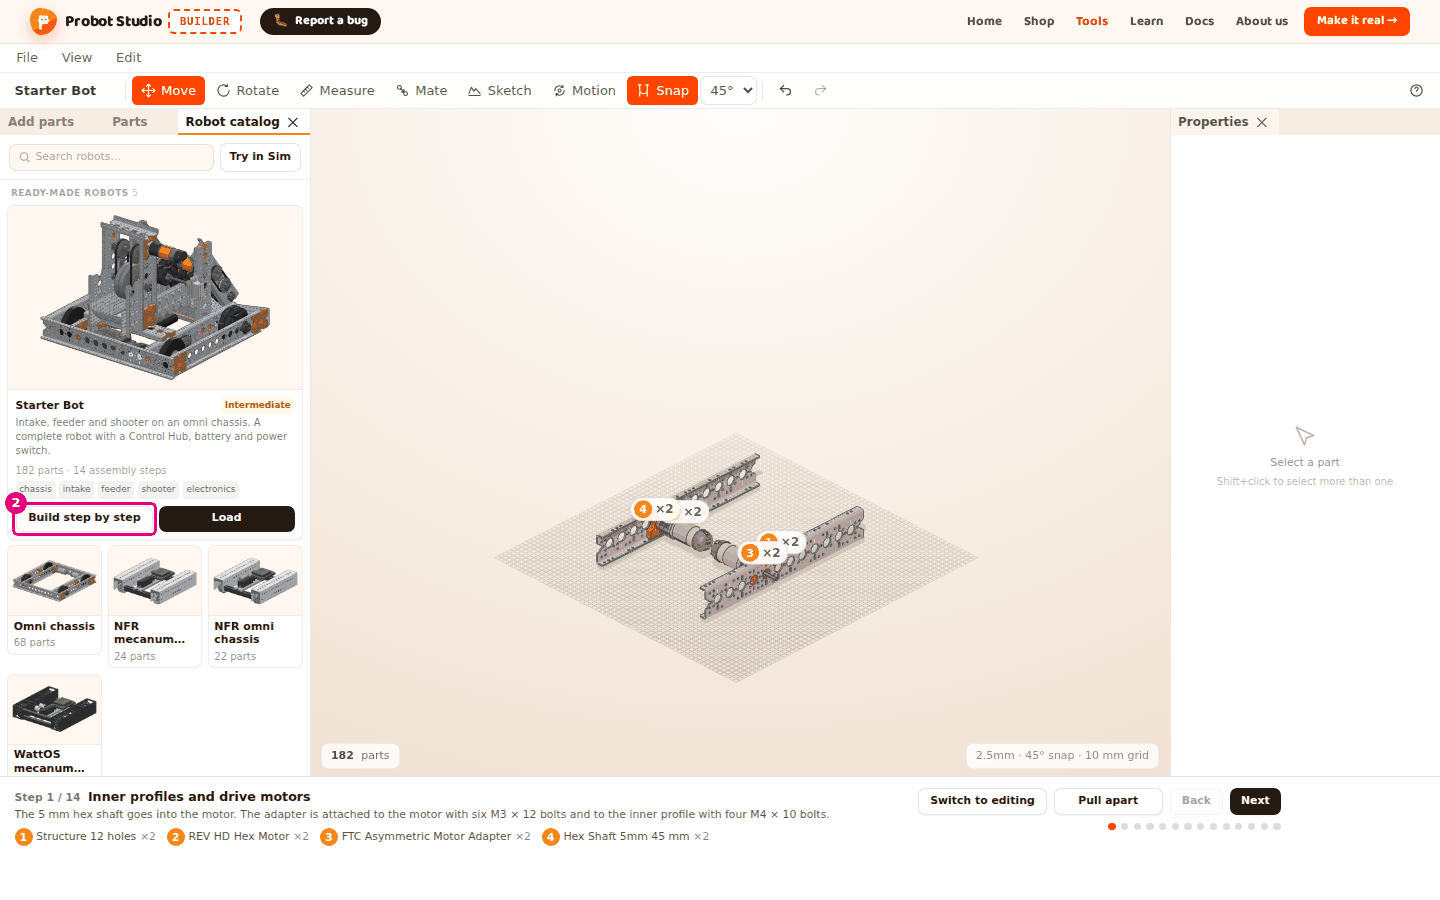
Result: The Assembly strip opens below the Scene. The strip shows "Step 1 / 14" and the name of the step, "Inner profiles and drive motors".
Below the step name, the strip shows a short description of the step and the parts that go on in that step. The parts are numbered. If there is more than one of the same part, "×N" appears next to it (for example ×4). In the scene you see the following:
- The parts that go on in this step glow orange, with the numbers from the strip above them.
- The parts from earlier steps look light in color.
- The parts from later steps are hidden.
The camera fits the robot in view once, from a diagonal angle. When you change the step, the camera does not move. You rotate, zoom and pan the camera as usual. See Move around the scene.
Move between the steps
- In the Assembly strip, press Next (→).
- To go back to the previous step, press Back (←).
- To jump to a step, press one of the step dots below Next.
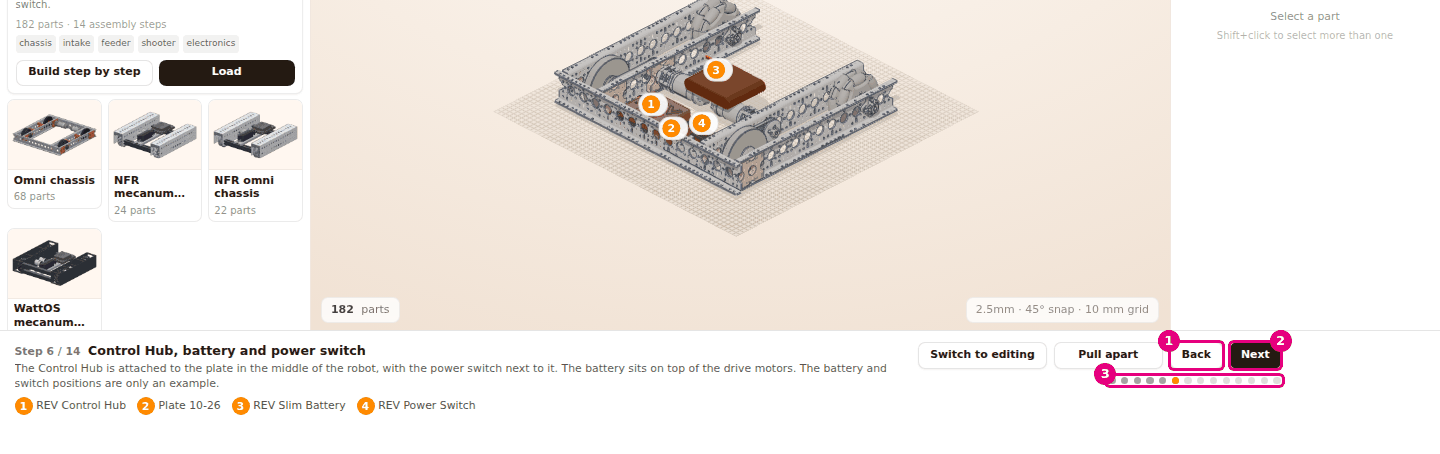
Result: The strip shows the number and name of the new step. When you go forward, the parts of the new step come in from outside and settle into place.
When you hold the mouse pointer over a dot, the step number and name appear (for example "Step 6, Control Hub, battery and power switch"). The dot of the current step is orange, and the dots of the steps you have passed are dark. On the first step Back is faded, and on the last step Next is faded.
The 14 steps of the Starter Bot:
| Step | Name |
|---|---|
| 1 | Inner profiles and drive motors |
| 2 | Motor pulleys |
| 3 | Drive wheels and belts |
| 4 | Omni wheels |
| 5 | Outer profiles and cross profile |
| 6 | Control Hub, battery and power switch |
| 7 | Intake side profiles and motor |
| 8 | Intake shafts and wheels |
| 9 | Intake pulleys and belts |
| 10 | Intake ramp and chassis mounting |
| 11 | Feeder servo and shaft |
| 12 | Shooter tower and flywheel |
| 13 | Upper shaft, gears and shooter motor |
| 14 | Hood |
Pull apart a step's parts
If many parts in a step fit inside each other, you can see them pulled apart.
- Go to the step whose parts you want to see (for example Step 3).
- In the Assembly strip, press Pull apart.
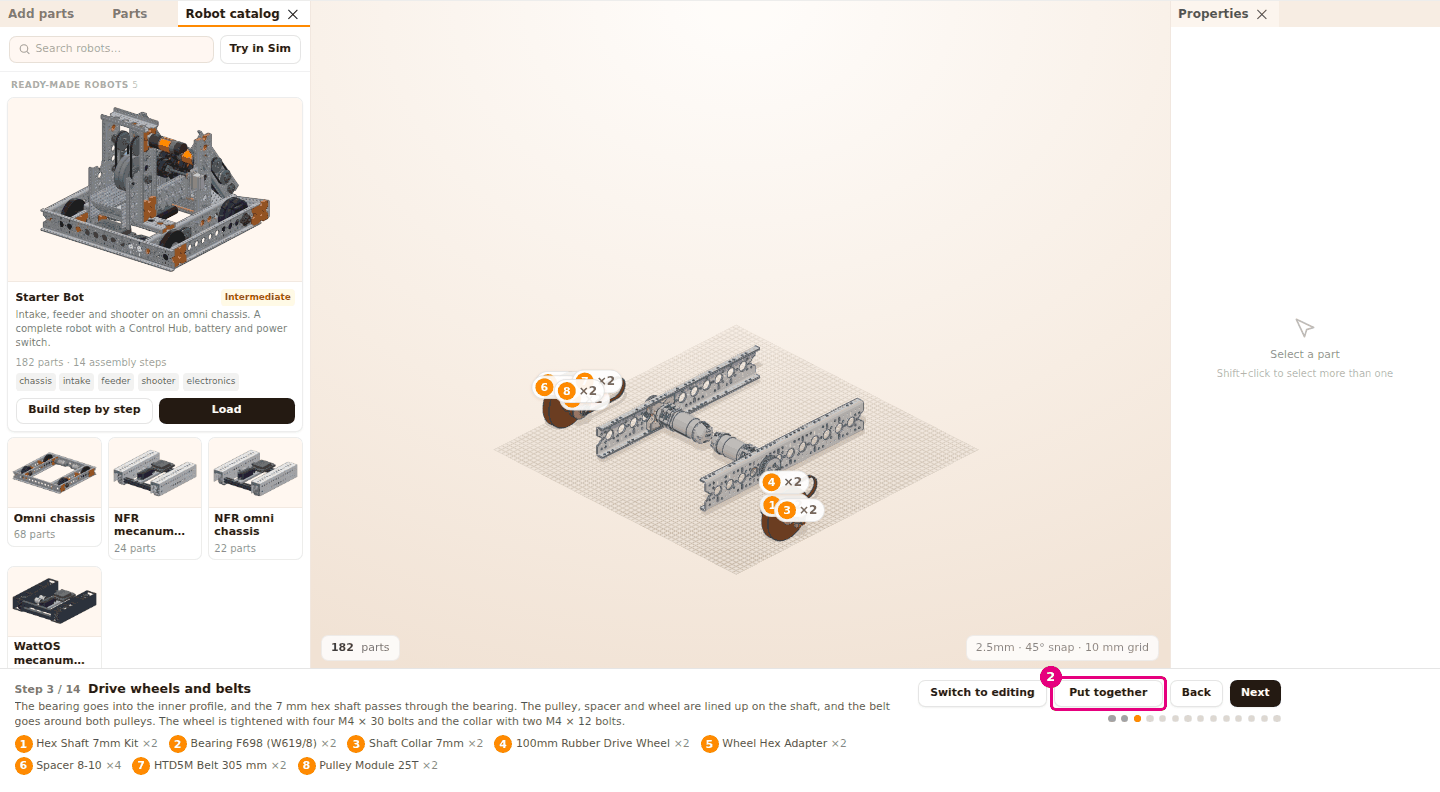
- To put the parts back in place, press Put together.
Result: When you press Pull apart, the parts of that step move outward from where they are mounted (an exploded view). The button changes to Put together. Put together puts the parts back in place.
The pulled-apart view stays on until you turn it off. When you change the step, the parts of the new step also appear pulled apart.
Leave assembly mode and edit the robot
- In the Assembly strip, press Switch to editing.

- In the Scene, select a part. The part's settings open in the Properties panel.
- In the Toolbar, press Move and drag the part's arrow.
Result: The Assembly strip closes. All the robot's parts appear in their own colors. You can select, move and delete parts, and add new ones.
No notification appears when you switch. Whatever step you are on, the whole robot stays in the scene. The project name becomes "Starter Bot", and the robot sits on one row in the Parts tab.
There is one more way to leave assembly mode: load another robot from the Robot catalog. Because the scene has parts in it, a Cancel / Replace confirmation appears first. If you press Build step by step again while assembly mode is on, the Starter Bot starts over from the beginning without asking.
What is off in assembly mode
In assembly mode you can only watch the robot. These things do not work:
- Clicking a part in the scene does not select it. Right-clicking does not open the context menu.
- Keyboard shortcuts do not work. Only ← and → change the step.
- The list in the Parts tab is read-only.
- Everything that changes the scene is blocked: clicking a part in Add parts, File > New, Open..., Import (STL, STEP, GLB, OBJ)... and the like. If you try these, the "Editing is off in assembly mode. Switch to editing to make changes" message appears. With New, first the "The parts in the scene will be deleted. Start a new project?" confirmation opens. Even if you confirm, the scene does not change. A part you drag from Add parts into the scene is not dropped. In that case no notification appears.
The camera and the View menu work. The view cube is hidden in assembly mode and comes back when you press Switch to editing. File > Save (download JSON) also works and downloads the whole robot.
Having trouble?
- "Editing is off in assembly mode. Switch to editing to make changes" appears: You are in assembly mode. In the Assembly strip, press Switch to editing. See Troubleshooting.
- The card has no Build step by step button: Only the Starter Bot has assembly steps. To load the other robots, press their cards.
- Clicking a part does not select it: Selection is off in assembly mode. Press Switch to editing. See Troubleshooting.
- ← / → does not change the step: On the first step ← does nothing, and on the last step → does nothing. Check the step number in the strip.
- The robot went off the screen: Select View > Fit view.