Write a drive program
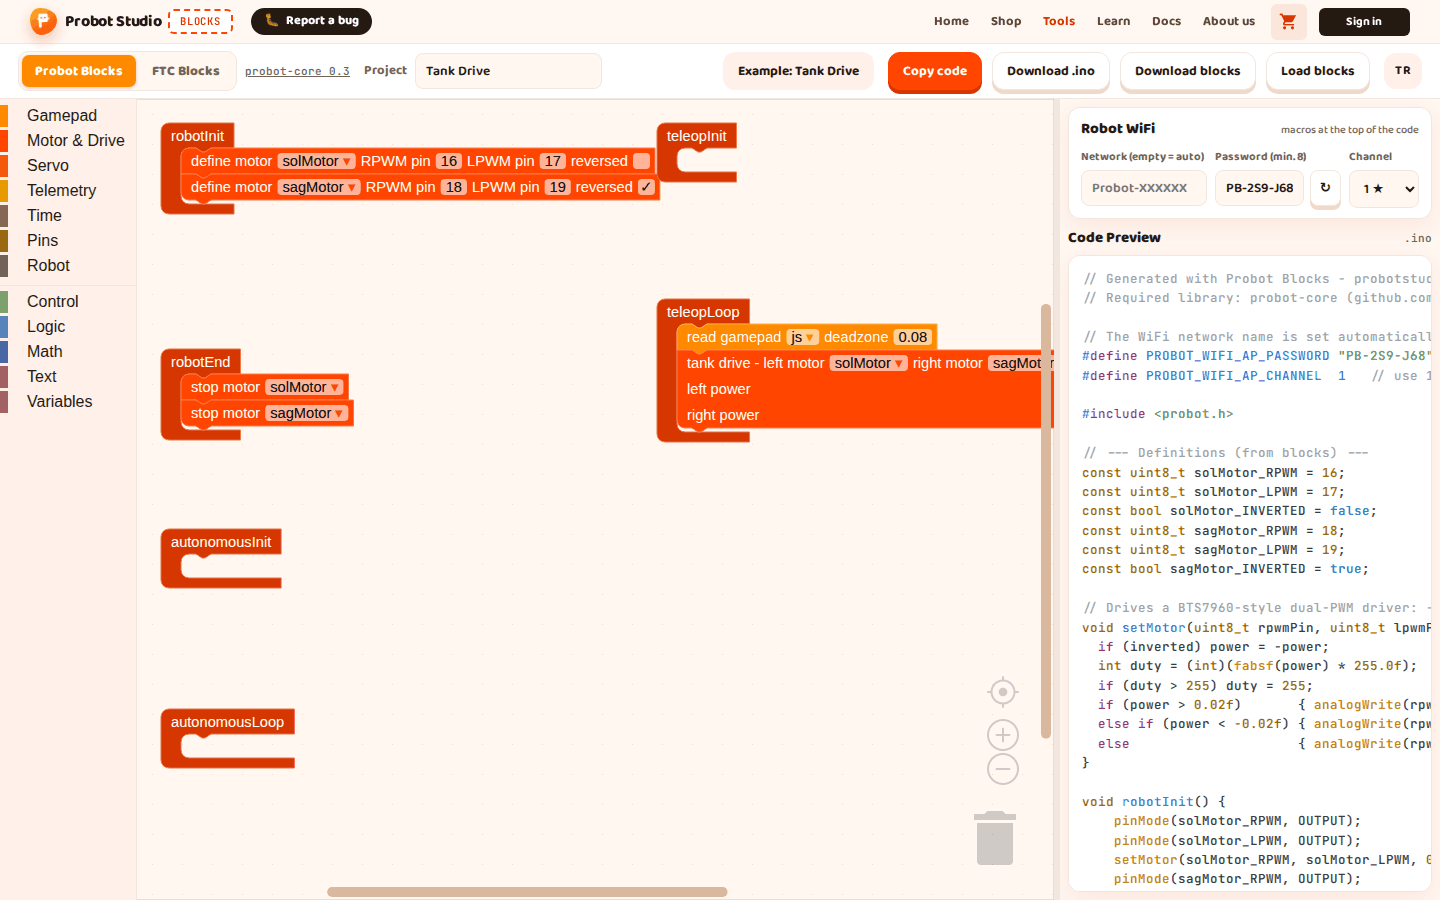
On this page you will start from an empty project and write a program for two motors that you drive with a gamepad. By the end, you will have built the Tank Drive example's program yourself. In the example, the right motor's reversed checkbox is also checked.
Before you start
- Blocks is open and the Probot Blocks tab is selected.
- The workspace holds only the six lifecycle blocks. If not, see Start over.
- Know the motor driver pins on your robot. This page uses the pins from the examples: left motor 16 and 17, right motor 18 and 19.
To see the finished result, open Pick an example > Tank Drive.
Get to know the lifecycle blocks
The program is split into six blocks. Each block runs at a certain moment in the robot's life. TeleOp (driver control) is the part where you drive the robot with the gamepad.
| Block | When it runs | What goes in it |
|---|---|---|
| robotInit | Once, when you press Init on the Driver Station | Motor and pin definitions |
| robotEnd | Once, when you press Stop | Stopping the motors |
| autonomousInit | Once, when autonomous starts | Getting ready for autonomous |
| autonomousLoop | About 50 times per second during autonomous | Autonomous moves |
| teleopInit | Once, when TeleOp starts | Getting ready for TeleOp |
| teleopLoop | About 50 times per second during TeleOp | Reading the gamepad and driving |
Do not wait longer than 2 seconds inside a loop block. The robot counts that as a deadline miss.
Create the right motor's name
Motor names are stored as variables. In the define motor, drive motor and stop motor blocks, the default name is solMotor.
sagMotor comes ready only in the tank drive and arcade drive blocks. You will define the motors before the drive block, so create this name yourself first.
Do not use Turkish letters or spaces in a variable name. Blocks changes these characters in the
code: a space becomes _, and a Turkish letter turns into characters like _C4_9F. For example,
sağMotor becomes sa_C4_9FMotor, which still compiles but is hard to read.
- In the block list, select the Variables category.
- In the block panel, press Create variable....
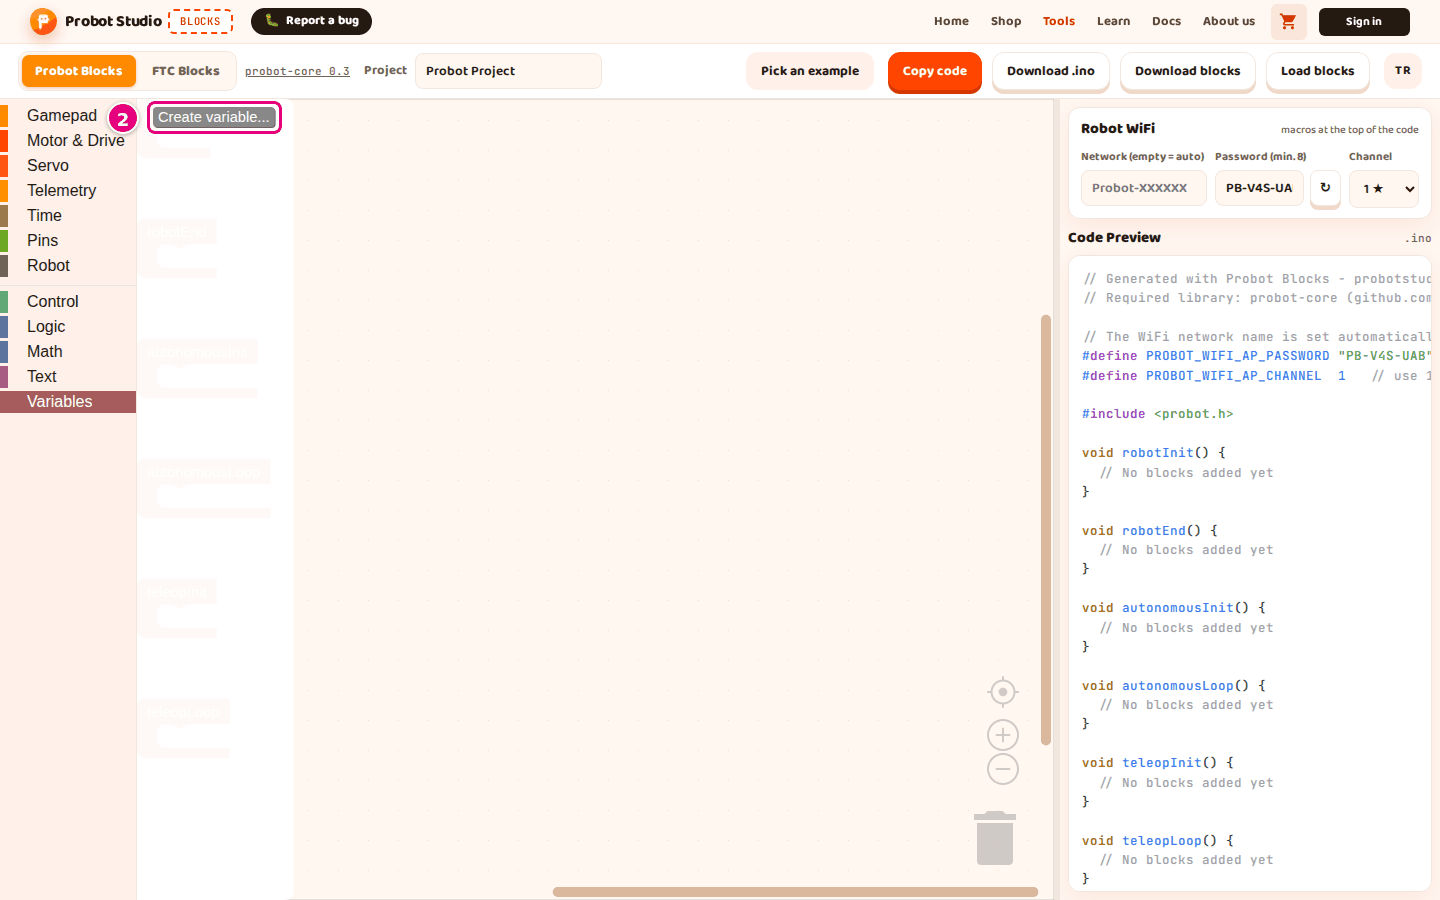
- In the "New variable name:" box, type
sagMotor.
- In the "New variable name:" box, type
- Press OK.
Result: The block panel shows blocks named sagMotor.
Define the motors
Tip
Drop each block inside a lifecycle block so that its notch clicks into place. A block left outside does not go into the code.
- In the block list, select the Motor & Drive category.
- Drag the define motor block into robotInit. It comes with the name solMotor and pins 16 and 17.
- Drag a second define motor block under the first one.
- On the second block, press the
solMotor ▾dropdown and select sagMotor. - On the second block, type
18in RPWM pin and19in LPWM pin. - If the right motor turns the wrong way, check the reversed checkbox on the second block.
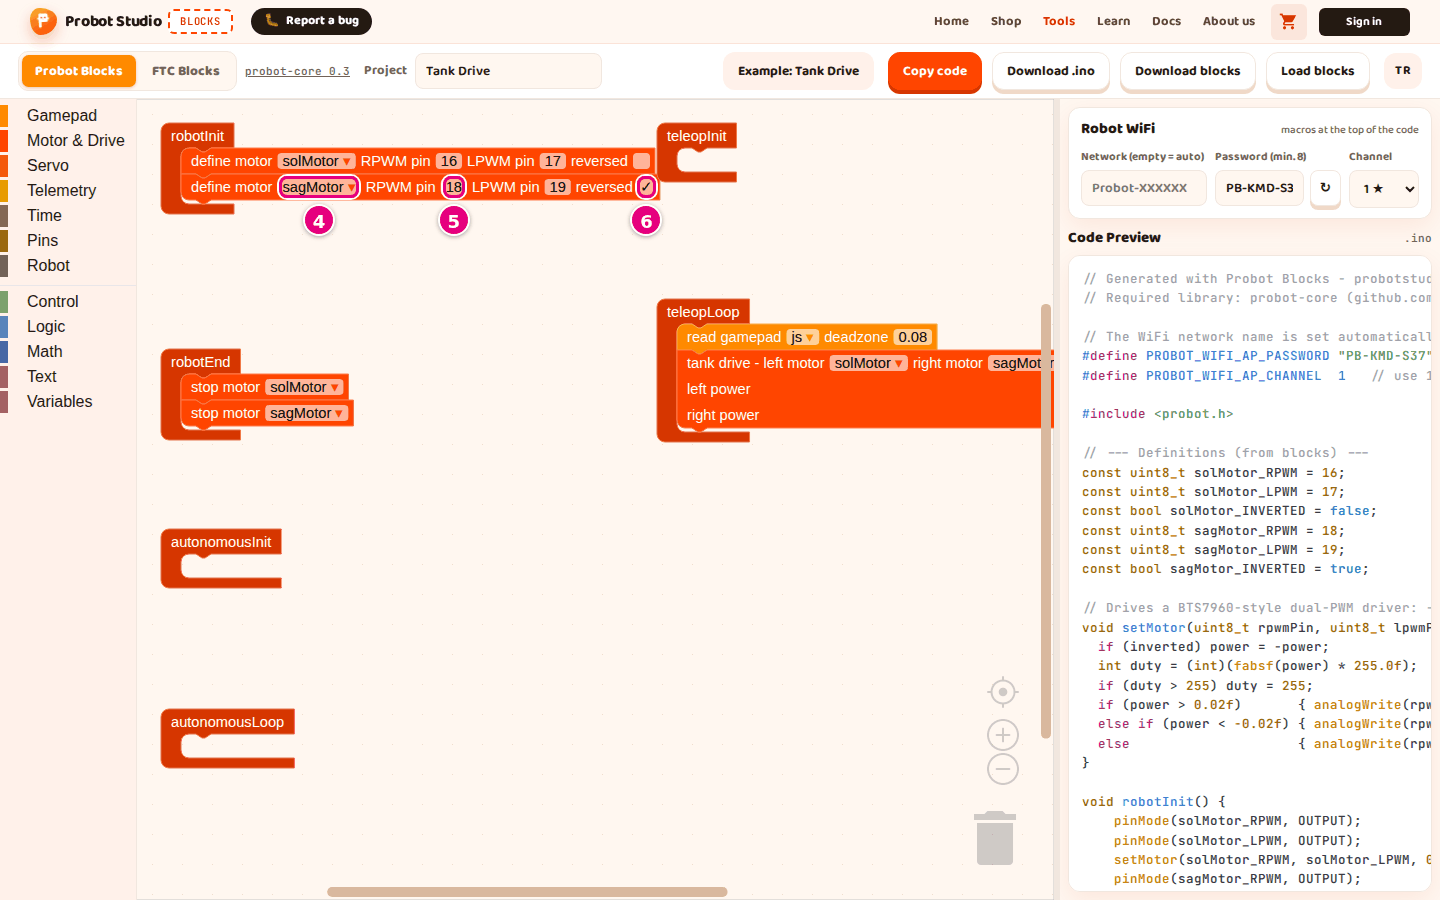
Result: In Code Preview, the line const uint8_t sagMotor_RPWM = 18; appears.
Stop the motors
- From Motor & Drive, drag the stop motor block into robotEnd.
- Drag a second stop motor block under it.
- On the second block, select sagMotor from the dropdown.
Result: In Code Preview, two setMotor( lines appear inside void robotEnd(). When you
press Stop on the Driver Station, both motors stop.
Drive with the gamepad
- From Gamepad, drag the read gamepad block into teleopLoop.
- From Motor & Drive, drag the tank drive block under read gamepad.
- From Gamepad, plug the js left stick ↕ (forward +) block into the left power slot of tank drive.
- Plug another js left stick ↕ (forward +) block into the right power slot.
- On the block in right power, press the
left stick ↕ (forward +) ▾dropdown and select right stick ↕ (forward +).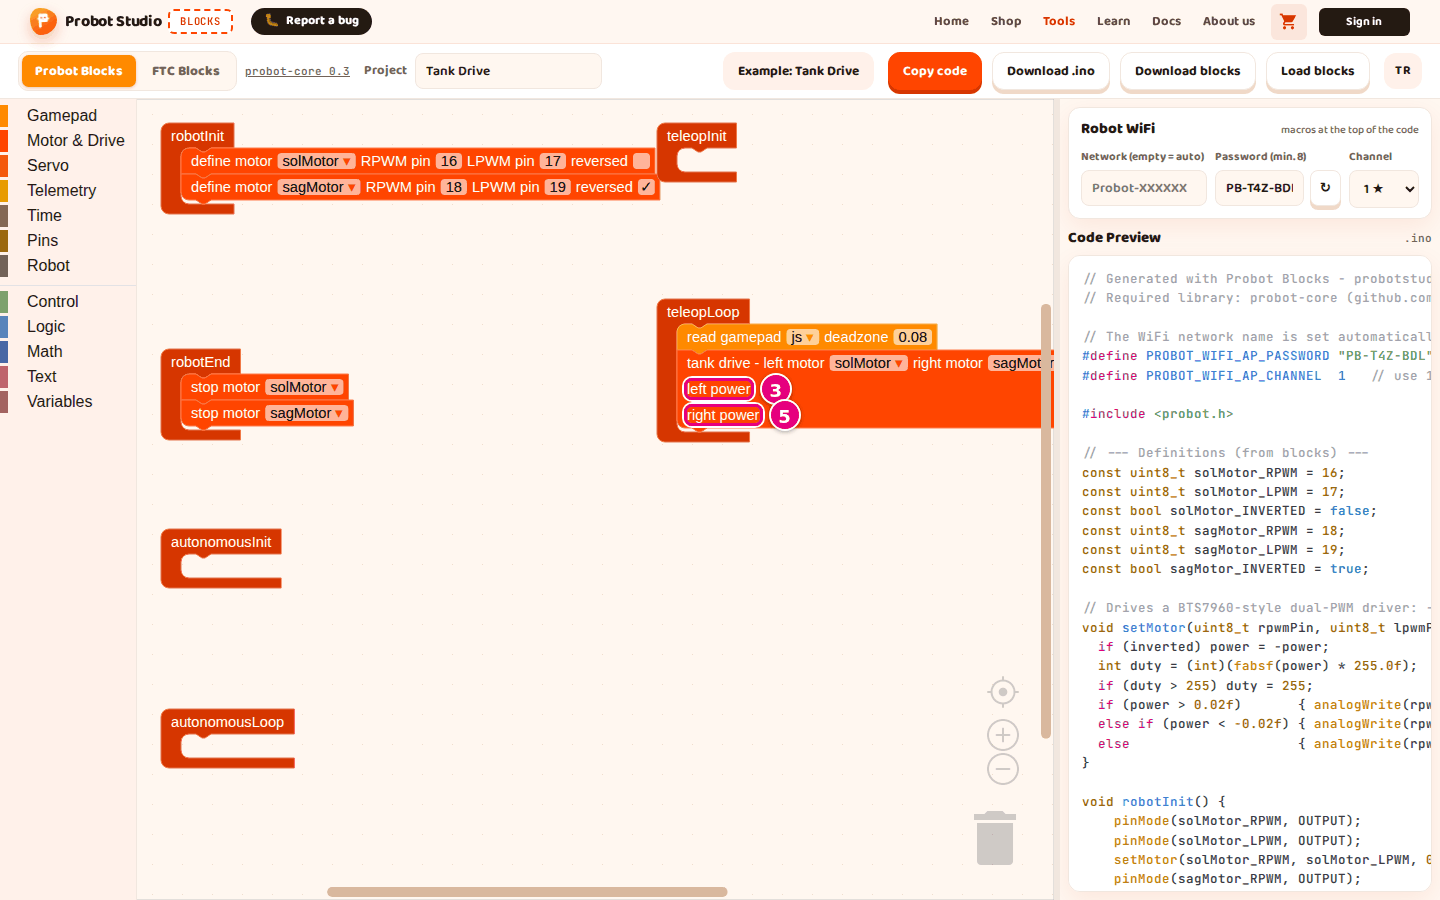
- The
0blocks that were in the slots drop into the workspace. Drag them to the trash can.
- The
Result: The left stick block is in the left power slot and the right stick block is in the right power slot. On the robot, the left stick drives the left motor and the right stick drives the right motor. When you push a stick all the way forward, the value is +1.
Check the code
- In the workspace, drag any block left outside the lifecycle blocks to the trash can.
- In the side panel, move the mouse over Code Preview.
- With the mouse wheel, scroll Code Preview down to the
void teleopLoop()line.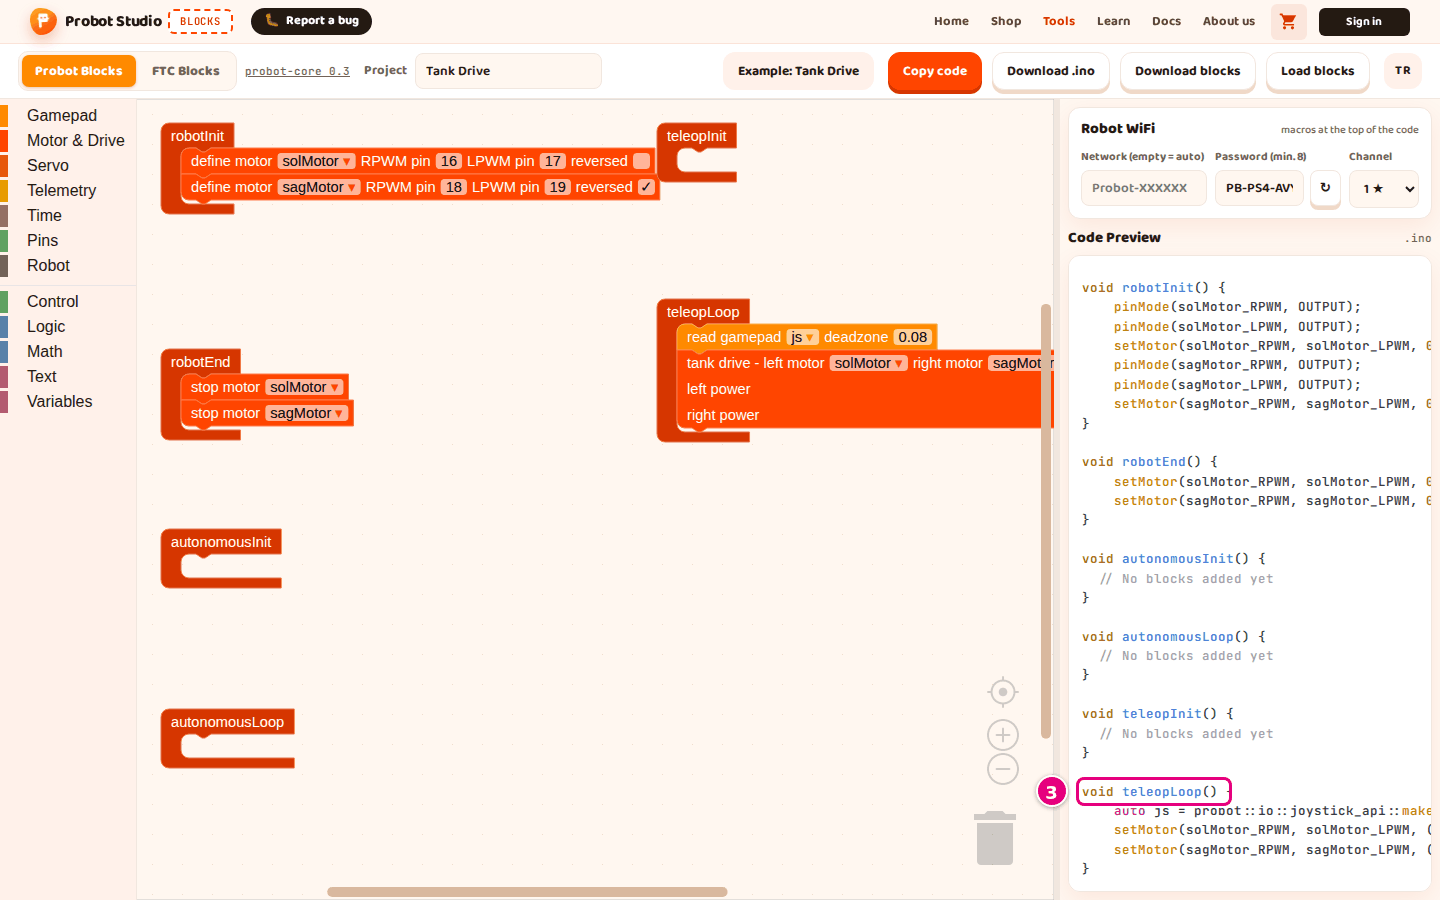
Result: Inside void teleopLoop(), an auto js = ... line and two setMotor( lines appear. The
code is ready to upload to the board.
To save it, press Download blocks. To upload it to the board, press Download .ino.
Having trouble?
- The block does not show up in the code: The block is not sitting inside a lifecycle block. Drag the block back into a lifecycle block. See Troubleshooting.
- The two motors do not turn the same way: Check the reversed checkbox in the define motor block of the motor that turns the wrong way.
- The robot keeps drifting a little: Raise the deadzone value in the read gamepad block (at most 0.5).