Import a 3D model
On this page you add a 3D model file from your computer to Builder as a part. Then you fix the model's units, orientation and size.
Before you start
- You have a model file on your computer. These file types work:
.stl,.step,.stp,.glb,.gltf,.obj. - The file is 25 MB at most.
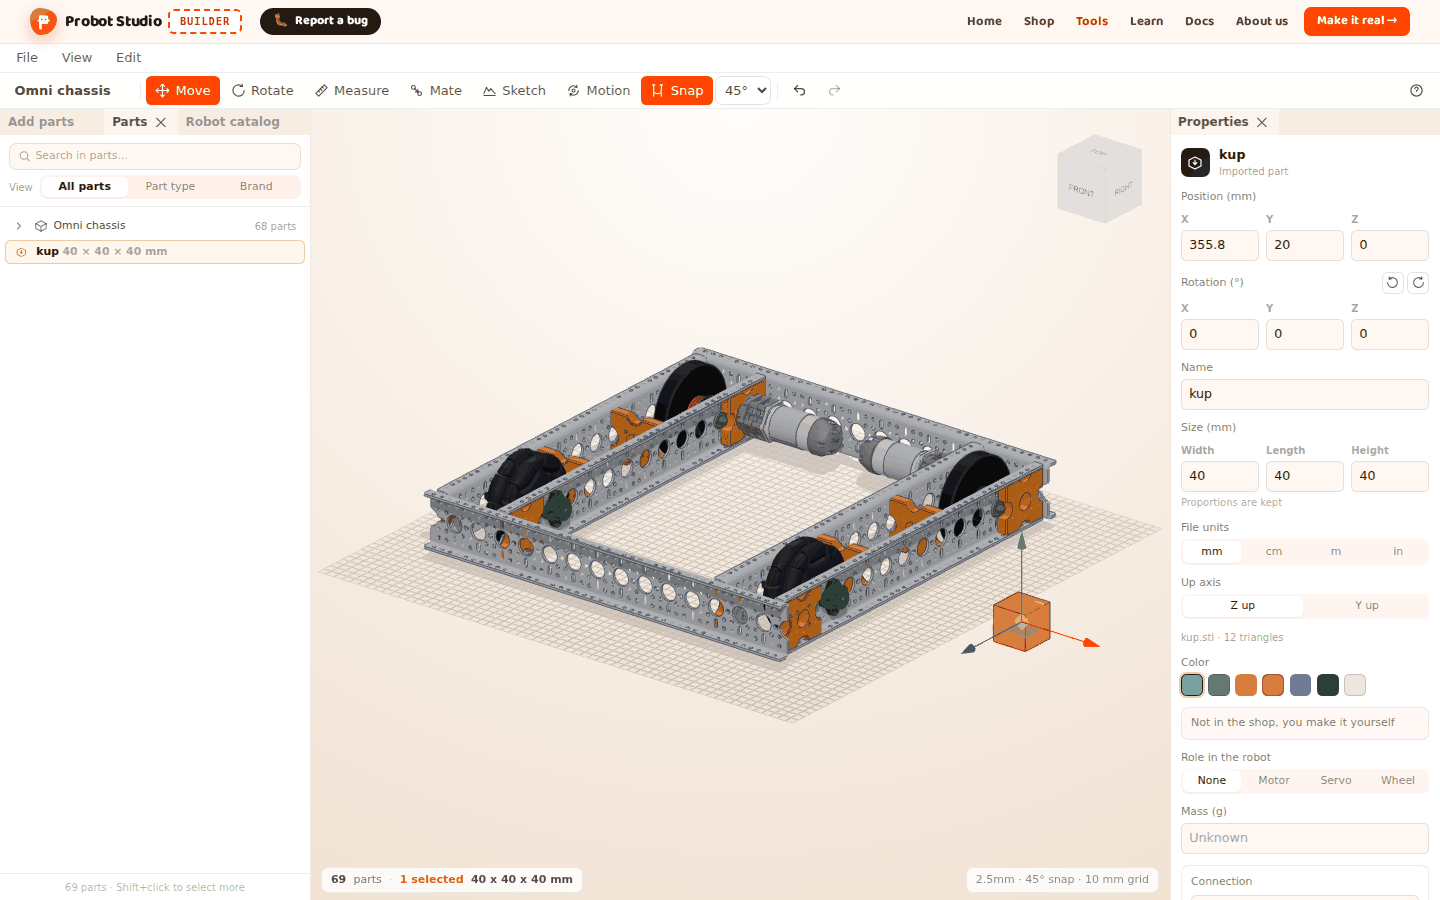
- To place the model next to a robot, load the Omni chassis (see Start with a ready-made robot).
Builder reads the file in your browser. A model with more than 50,000 triangles is simplified down to that number. Builder spends at most 120 seconds reading a STEP file. Round holes in the model are found automatically, and Measure and Mate snap to these holes.
Import by selecting a file
- In the Menu bar, select File > Import (STL, STEP, GLB, OBJ)....
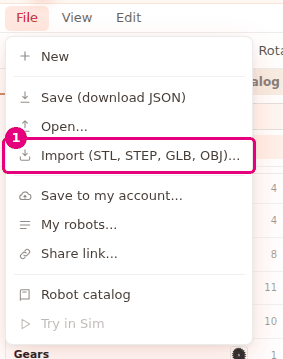
- In the file window that opens, select the model file. You can also select more than one file.
- In the window, press Open. The "Reading <file-name>" notification appears. For a STEP file, it says "STEP can take a while".
Result: The model stands on the ground in the free spot nearest the middle of the view, and it is selected. The notification says "<name> added". If the model was simplified, "Simplified from N triangles" is added. If holes were found, "N holes found" is added.
The Add parts tab in the Left panel opens the same file window: select the Import row at the end of the Basic shapes section. In the Brand view, it is at the end of the General section.
Drop the file on the scene
- Open your computer's file browser and go to the folder of the model file.
- Drag the file onto the Builder Scene.
- Drop it on the ground where you want the model to stand.
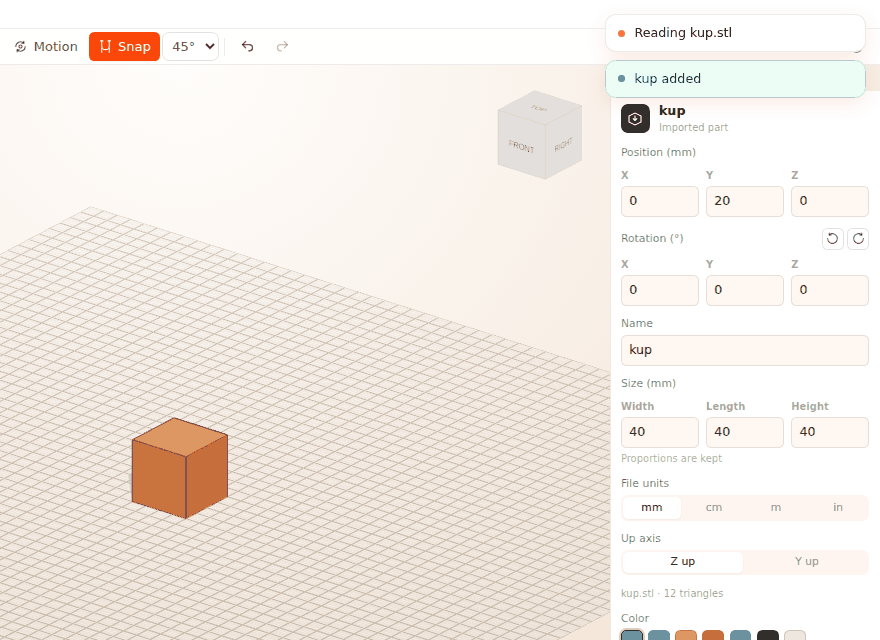
Result: The model sits on the ground where you dropped it. If you drop it where there is no ground, it goes to the free spot nearest the middle of the view. If you drop several files, the first one goes to that spot and the others go to free spots near the middle of the view.
Fix the units, orientation and size
The model can look very small, very big or lying on its side. You change the file units and the up axis in Properties.
- In the Scene, select the imported model. The top of the Properties panel says "Imported part".
- In the File units row, select the unit the file was drawn in: mm, cm, m or in.
- If the model is lying on its side, select Z up or Y up in the Up axis row. CAD files are usually Z up. GLB files and game models are usually Y up.
- If you want an exact size, type a value in Width, Length or Height under Size (mm) and press Enter.
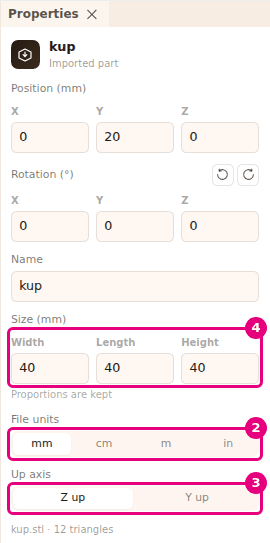
- If you need to, type a name for the part in the Name box (80 characters at most) and press Enter.
Result: The model has the right size and stands upright. The bottom of the panel shows the file name, the number of triangles and the number of holes.
When you change one size, the other two change by the same ratio ("Proportions are kept"). Changing the unit resets the size you typed. When it opens a file, Builder guesses a unit: mm for STEP, and usually m for GLB. For STL and OBJ it is m if the model's largest size is under 1, and mm otherwise.
Choose a missing model again
Sometimes a part keeps its place and size, but its model data is lost. The part shows as a box.
- In the Scene, select the imported part that looks like a box. The Properties panel shows the warning "The model data is not in this save, so it is shown as a box".
- Under the warning, press Choose the file again.
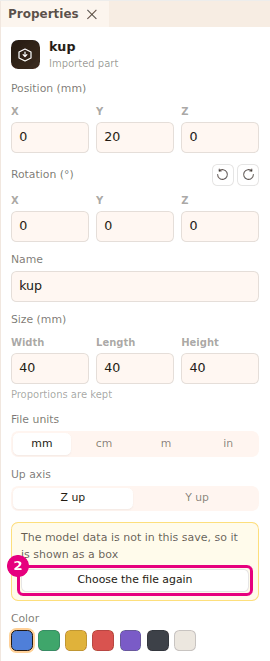
- In the file window, select the same model file and press Open.
Result: The notification says "<name> model updated". All parts that use this model show their real shape.
Limits of an imported part
- Autosave: The autosave in your browser holds about 3,000,000 characters at most (parts and models together). If they do not fit, the biggest models are left out of the autosave. If the browser's storage is full, no models go in. In both cases, "The autosave could not fit the imported models. Download the project with Save in the File menu" appears. File > Save (download JSON) puts the models inside the file. See Save to a file and open it.
- Saving to your account: A robot can be 5 MB at most, models included.
- Community: A robot with an imported part cannot be sent to the community with Share your robot. Delete these parts first. A share link does carry the models. See Save to your account and share.
- Merge: An imported model cannot be merged with basic shapes, and it cannot be made a Hole.
- Parts list: In the Make it real window, the model shows with its file name in the "CUSTOM PARTS" section.
Having trouble?
Error notifications appear in the corner of the screen.
| Notification | What to do |
|---|---|
| "This file type is not supported. Choose STL, STEP, GLB or OBJ" | Export the file in one of these formats. See Troubleshooting. |
| "The file is too big. At most 25 MB" | Make the model simpler, or split it into smaller models and import them separately. See Troubleshooting. |
| "The file is empty" | The file is 0 bytes. Export the model again. See Troubleshooting. |
| "The file could not be read. It may be damaged or incomplete" | Export the file again. Save a GLB as a single file. See Troubleshooting. |
| "The file has no solid model" | The file has no surfaces, only lines or points. Export the solid model. See Troubleshooting. |
| "The model looks flat, it has no thickness" | The model is a single surface. Import a solid that has a thickness. See Troubleshooting. |
| "The file has invalid numbers" | The file is damaged. Export it again from the CAD program. See Troubleshooting. |
| "GLB files with Draco compression cannot be opened. Export without compression" | Export the GLB with Draco compression turned off. See Troubleshooting. |
| "This GLTF depends on separate files. Export it as a single GLB" | Builder cannot read the .bin file next to the .gltf. Choose a single .glb file. See Troubleshooting. |
| "The model could not be simplified" | Make the model simpler in the CAD program and import it again. See Troubleshooting. |
| "The STEP reader did not load. Check your connection" | Check your internet connection and try again. See Troubleshooting. |
| "The STEP reader could not start" | Reload the page and try again. See Troubleshooting. |
| "The STEP file took too long. Try a simpler model" | The 120 seconds ran out. Try a STEP with fewer parts, or an STL. See Troubleshooting. |
| "The STEP file could not be read. It may be damaged or incomplete" | Export the STEP again, or use STL. See Troubleshooting. |
| "Editing is off in assembly mode. Switch to editing to make changes" | In the Assembly strip, press Switch to editing. See Troubleshooting. |
| "The models of N imported parts are not in the file. Choose the file again" | The project file has no model. Follow Choose a missing model again. See Troubleshooting. |
| "The models of N imported parts are not in the autosave. Choose the file again" | The model did not fit in the autosave. Choose it again the same way. See Troubleshooting. |
| "Imported parts cannot be shared in the catalog. Remove them first" | Delete the imported parts before you send the robot to the community. See Troubleshooting. |
- The model looks very small or huge: Change File units.
- The model is lying on its side: Change Up axis.