Set up joints and try the motion
On this page you use the Motion panel to turn the robot's motors, move joints by hand and set up new joints. A joint is a turning movement between two attached parts.
Before you start
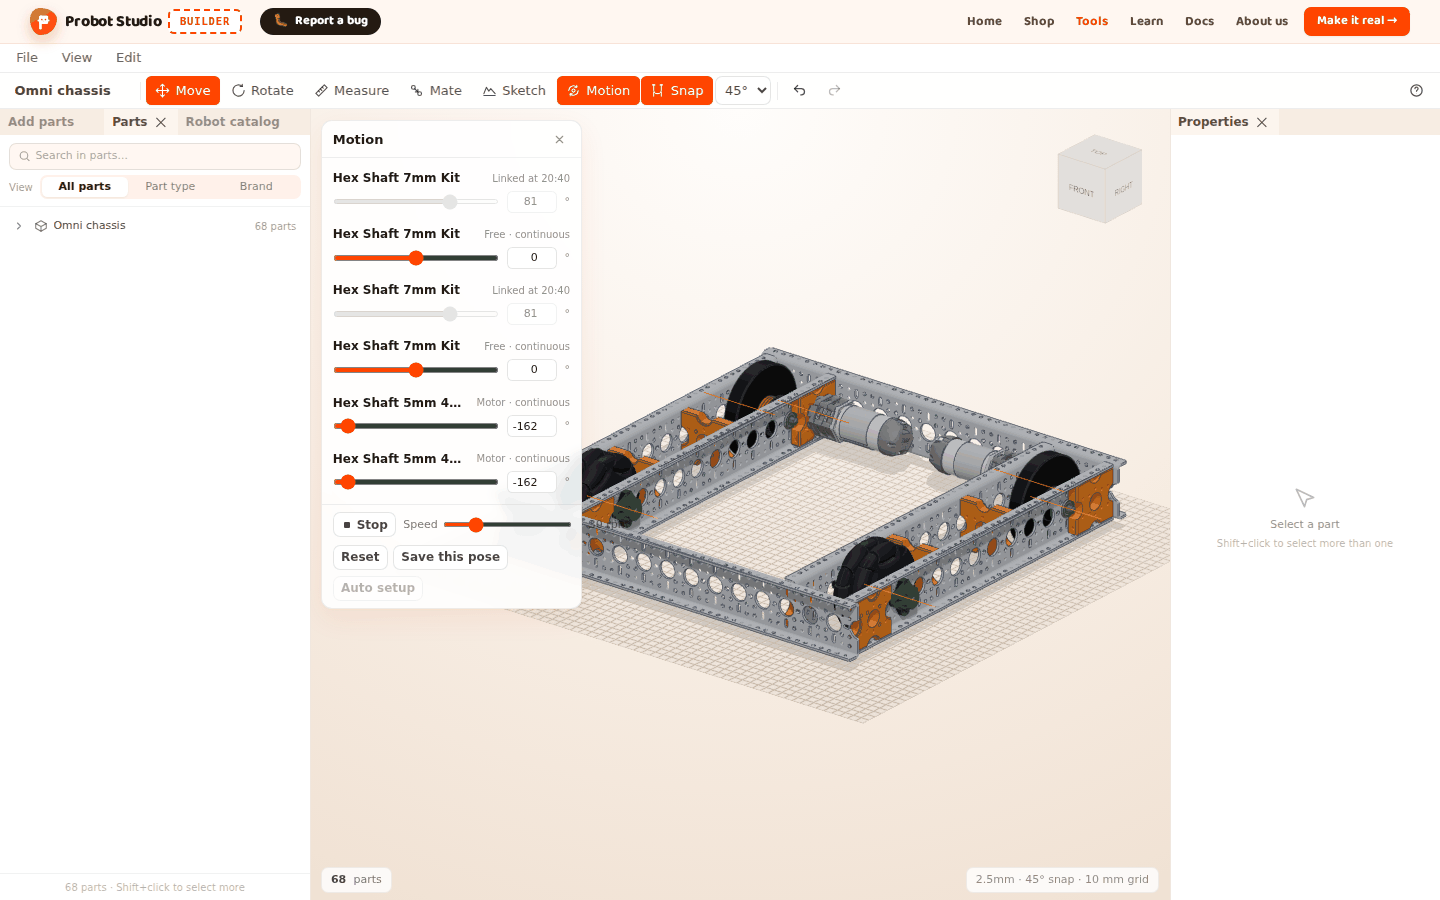
- The Omni chassis is open in the scene (see Start with a ready-made robot).
- When the Omni chassis loads, its 6 joints are set up by themselves: two motor shafts and four wheel shafts. The two rubber drive wheels at one end are linked to the motors by gears (20:40). The omni wheels at the other end turn freely.
- A joint is set up on top of an attachment. If you do not know attachments yet, read Group parts and attach them to each other first.
Turn the motors
- In the Toolbar, press Motion (E). The Motion panel opens in the corner of the Scene. Each joint is one row.
- In the panel, press Play. The motors turn, and the drive wheels turn with them through the gears.
- Drag the Speed slider. The speed changes between 5 and 120 rpm, in steps of 5. It starts at 30 rpm.
- Press Stop.
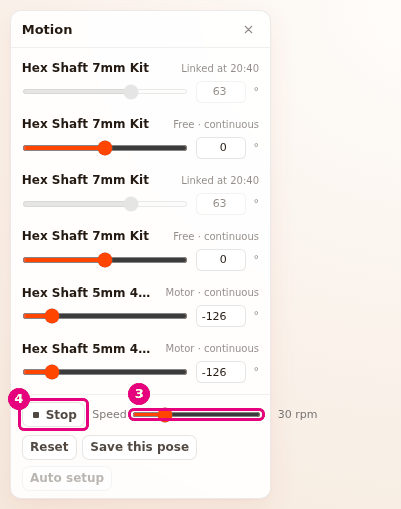
Result: The motion stops and the angles go back to where they were before you pressed Play.
The right side of each row shows the joint's type:
| Text | Meaning |
|---|---|
| "Motor · continuous" | Mounted on a motor shaft, turns all the time. |
| "Servo · 300°" | Mounted on a servo shaft, swings back and forth across this angle range. |
| "Linked at 20:40" | Paired with another joint by a gear or pulley, turns with it. |
| "Free · continuous" / "Free · limited" | No motor drives it. It moves only by hand. |
With Play, the motors turn at the speed you chose. The servos go from one end of their angle range to the other. Esc first stops playing, and a second press closes the panel.
If you have used the Speed slider, a row's slider or an angle box, click an empty spot first. While one of them has focus, Esc does not work.
Move a joint by hand and save the pose
- In the Motion panel, drag a row's slider, or type an angle (°) in the box next to it.
- Press the part name at the start of the row (Select the part). The part is selected in the Scene.
- Press Save this pose.
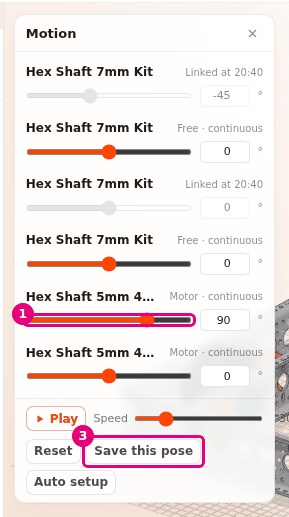
Result: A "Pose saved, Undo reverts it" notification appears. The parts stay in their new place.
- The slider of a continuous joint goes from -180° to 180°. On a limited joint it goes from Min ° to Max °.
- The slider of a linked row is faded. That joint turns together with the joint that drives it.
- Reset turns all angles back to 0.
- When you close the panel, a pose you did not save is lost, and the parts go back to their saved place. If you press Save this pose while playing, the pose at that moment is saved.
Set up a joint by mating a wheel to a motor shaft
If you use Mate to put a wheel, gear, hub or pulley on the shaft of a motor or servo, the joint is set up by itself. A motor gets a continuous rotation joint, and a servo gets a limited rotation joint.
- In the Scene, bring the motor and the part you want to mate next to each other.
- In the Toolbar, press Mate (B).
- Click the flat side face of the part you are mating, close to its middle. Do not click the empty space in the middle.
- Click the motor's shaft. The part sits on the shaft.
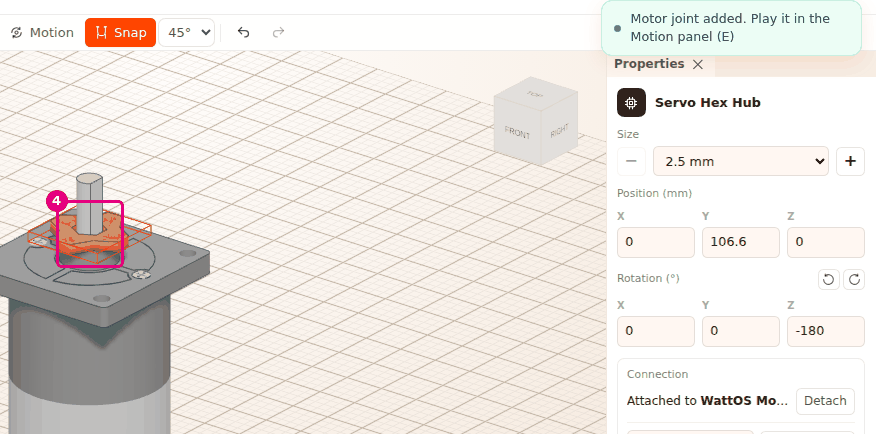
- To close the tool, press Esc twice. The first press stops adjusting the last mate, and the second closes the tool. The × in the Mate panel closes the tool in one press, and so does pressing Mate in the Toolbar again (or B).
Result: A "Motor joint added. Play it in the Motion panel (E)" notification appears (on a servo, "Servo joint added..."). A new row appears in the Motion panel.
The joint is set up only if the hole you clicked is on the motor's output axis. If no joint is set up, the part is still attached to the motor, and you add the joint in Properties.
Add a joint in Properties and limit it
To add a joint, the part must first be attached to another part. In this example you remove the joint of a motor shaft on the Omni chassis and set it up again.
- In the Motion panel, press the name of one of the "Hex Shaft 5mm 45 mm" rows. In the Properties panel, the Connection section shows "Attached to REV HD Hex Motor" and Continuous rotation.
- Press Remove joint. The attachment stays, and an axis selector and Add joint appear.
- In the axis selector, select the axis (on this shaft, "hex socket Ø9").
- Press Add joint. A "Joint added. Move it in the Motion panel (E)" notification appears.
- In the joint type list, select Limited rotation.
- Type
-90in the Min ° box and90in the Max ° box, then press Enter.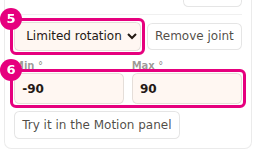
Result: In the Motion panel, the slider of this shaft moves between -90° and 90°.
Warning
When you remove the joint of the motor shaft, the 20:40 gear mesh on this shaft is deleted too.
Even if you set up the joint again, the pair does not come back, and Auto setup does not set
it up either ("The joints are already set up"). The drive wheel no longer turns with Play,
and its row says "Free · continuous". To set up the pair again, search for 40 teeth in the
Parts tab and select the "Gear 7mm Hex 40 teeth" across from this motor. Then, in the
Connection section, select "Gear 5mm Hex 20 teeth · 20:40" from the Select the driving
gear list (see the section below). You can also undo the steps one by one with Edit >
Undo.
- Min ° can be from -360 to 0, and Max ° from 0 to 360.
- On a part mounted on a servo shaft, Limited rotation starts with the servo's angle range. If the servo's angle is not known, "This servo's angle is not in the data, 180° assumed" appears.
- Try it in the Motion panel opens the Motion panel.
- If the joint is driven by a gear mesh, the joint type list is faded.
Pair a gear or pulley with the part that drives it
A pair turns one joint together with another joint, at a gear or pulley ratio. The 20:40 gear mesh on the Omni chassis is a pair like this.
Select a gear or pulley that has its own joint, or that is attached to a part with a joint. The Connection section then shows the Select the driving gear list (Select the driving pulley for a pulley). The list shows the parts it can pair with, and their ratios (for example "Gear 5mm Hex 20 teeth · 20:40").
When you select one, a "20:40 gear mesh set up" notification appears. When a pair is set up, the section says "Turns with X at 20:40". To delete the pair, press Remove next to it.
To see this on the Omni chassis, search for 40 teeth in the Parts tab and select the gear.
The gear has no joint of its own: it turns with the joint of the shaft. That is why the "No shared
axis found..." text also appears above the pair row, and it is not an error.
Set up joints automatically
In the Motion panel, press Auto setup. If there are no joints, the panel shows Set up joints automatically. Builder looks at the shaft and hole data, and sets up attachments, joints and pairs for turning parts that have no attachment. It does not touch the attachments that are already there, and one undo step takes it back.
The notification tells you the result: "6 joints, 2 gear or pulley pairs set up", "The joints are already set up" or "Found no joints to set up". If some cases could not be decided, the end of the message gets "N unclear cases skipped". While the motion is playing, Auto setup is faded.
Having trouble?
- The panel says "No joints yet...": Press Set up joints automatically, or use Mate to put the wheel on a motor shaft.
- Play is faded and its tooltip says "No motor or servo joint": No joint is on a motor or servo shaft. Use Mate to attach the wheel to a motor shaft. See Troubleshooting.
- "No shared axis found. For a joint, the holes of the two parts must be on the same axis, or the part must be mounted on a motor or servo shaft" appears: This text is normal if the part (for example a gear or a wheel) has no joint of its own, is attached to a shaft that has a joint, and turns with the shaft. Do nothing. If the part needs a joint of its own, its holes are not on the same axis. In the Connection section, press Detach (or select Edit > Undo). Then use Mate to put the part on the motor shaft, or to mate its hole to the other part's hole on the same axis. Then press Auto setup in the Motion panel. See Troubleshooting.
- "No gear to mesh with. The other part needs a joint too, and the axes must be parallel" appears: The other gear must have a joint too. Set up a joint on it first. See Troubleshooting.
- A row's slider is faded: The joint is linked by a ratio. Move the joint that drives it.
- The pose went back when I pressed Stop or closed the panel: The panel does not change the saved pose. Press Save this pose first.
- The Motion panel closed by itself: The panel closes when Measure, Mate, Sketch or Build step by step opens (and also when you start editing a sketch).
Next step
- Join the pulleys with a belt: Add a belt to two pulleys
- Give a motor a port: Give motors and servos a name and a port
- Try the robot by driving it: Try the robot in Sim