Add parts
On this page you will add parts from the catalog to the scene. You can select a part from a section, search for it or drag it into the scene. Then you change its length and size in the Properties panel.
Before you start
- Builder is open and the "The design tool is in development" window is closed (see First 10 minutes).
- The scene is empty or a ready-made robot is open. The examples were written with an empty scene. The same steps work with a ready-made robot too (see Start with a ready-made robot).
- The Add parts tab is showing in the Left panel. If you closed it, check Add parts in the PANELS group of the View menu.
Add a part from a section
The Add parts tab sorts the parts into sections. Each section row shows small pictures and the number of parts. The length or size options of the same part are collected in one family row.
- In the Left panel, select the Add parts tab.
- Select the Structure section. The parts of the section open.
- Select the Structure row that says "11 length options". The length options open.
- From the options, select 5 holes. The part is added to the scene and is selected.
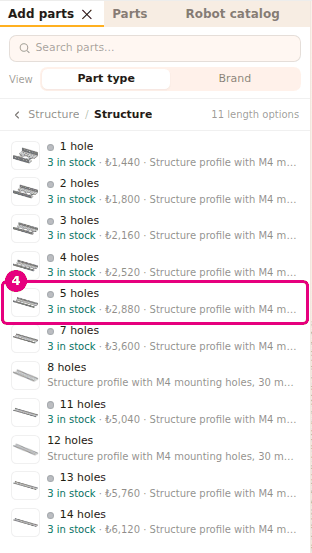
- To go back up one level, press the back row at the top of the list ("Back to Structure"). While a section is open in the panel, Esc also goes back up one level.
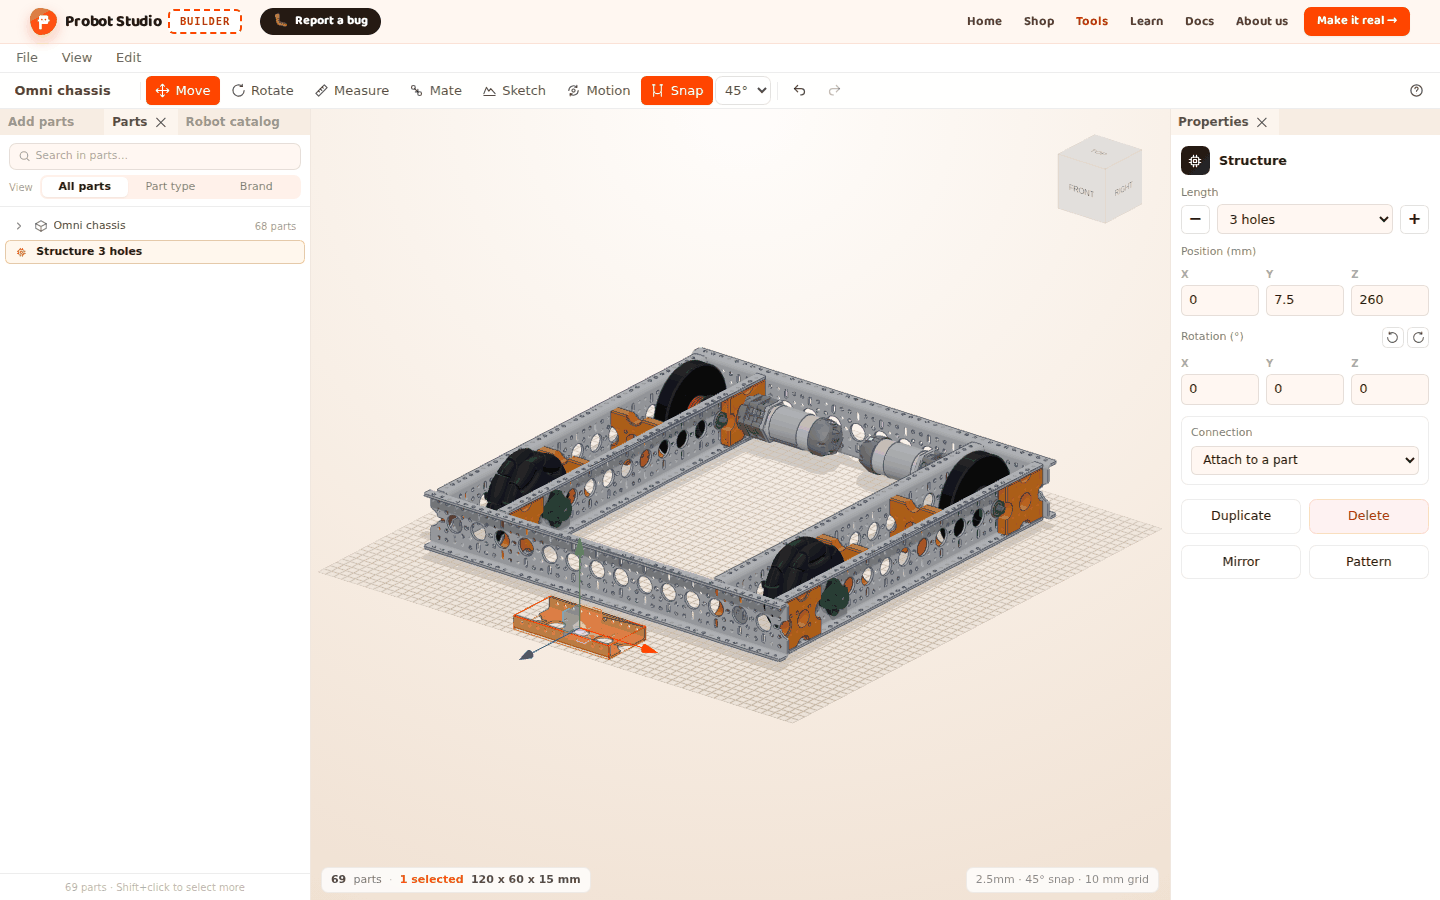
Result: The part is placed in the scene, in an empty spot near the middle of the visible area. At the top of the Properties panel, it says "Structure".
The sections in Add parts are: Basic shapes, Structure, Wheels, Hubs & Shafts, Connectors, Gears, Motors and Servos, Electronics, Game Elements, Belts and Pulleys. Electronics and Motors and Servos have subheadings (for example Control Hub, Battery, Power switch, Motor, Servo).
List the sections by brand
The View selector below the search box has two options. Part type shows the sections above. If you select Brand, the parts are grouped by brand. Inside a brand section, the parts are again split into subheadings by type. Your choice is remembered in this browser.
Add a Boardoza board
The catalog has 21 electronics boards from the Boardoza brand: a controller board, motor drivers, an IMU, sensors, I2C boards and voltage regulators. The boards are not sold in the shop, so their rows show no stock and no price.
- In the Left panel, select the Add parts tab.
- In the View selector, select Brand.
- Select the Boardoza section. Its row says "21 item(s)".
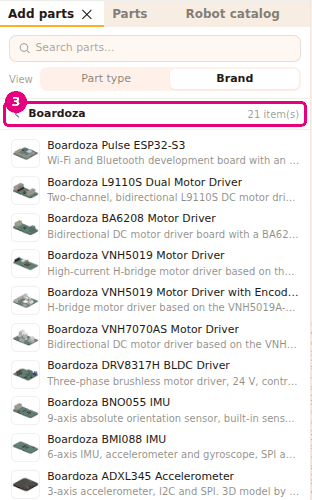
- From the list, select a board, for example Boardoza BNO055 IMU. The board is added to the scene and is selected.
Result: The board is in the scene. At the top of the Properties panel, it shows the board's name.
The boards have a half hole every 20 mm along their edges. When Snap is on, these holes make the board sit on the holes of the 10 mm grid. In the Make it real window, the board's row says "Not sold by Probot, get it from another supplier". You can also find the boards in the Electronics section of the Part type view.
Search for a part by name
If you know the part's name, you do not need to go through the sections. Type part of the name in
the Search parts... box at the top of the Add parts tab (for example gear). The search looks
in the part's name, its description and its product code (SKU), for example PRB-WHL-RBR-100. Section
names (for example Electronics) are not part of the search. To see the parts in a section, open that
section.
The results are listed one by one under section headings, together with their options. Select a result to add it to the scene. If nothing is found, it says "No results". The × in the box ("Clear search") clears the search. The list goes back to where you were before the search.
Drag a part into the scene
If you drag and drop a part, it lands where you want it. If you drop it on top of another part, it is placed on that part's surface.
- In the Add parts tab, open the Structure > Structure options.
- Hold the 5 holes row with the left mouse button.
- Drag the row into the Scene.
- Release the mouse button where you want to place the part.
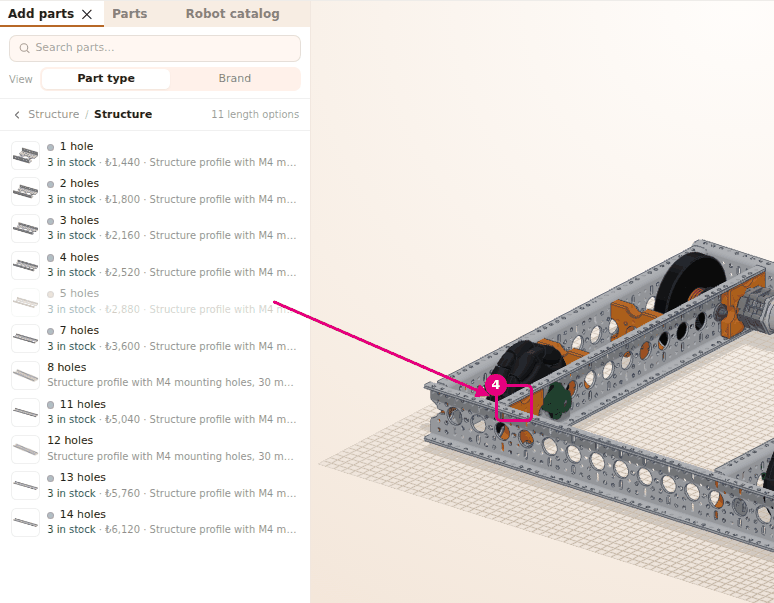
Result: The part sits on the ground or on a part's surface at the spot where you dropped it, and it is selected. If Snap is on, a part dropped on a surface lines up with the holes nearby.
Change a part's option
If a part belongs to a family, you can change its length or size later. The part's position and angle stay the same.
- In the Scene, select a Structure part.
- In the Properties panel, open the Length list. Depending on the part's family, the selector can have another name: Size, Speed, Side, Color, Bore, Type, Diameter, Thread size.
- In the list, select 11 holes.
- To go to the next length, press + next to the selector. − goes back to the previous option.
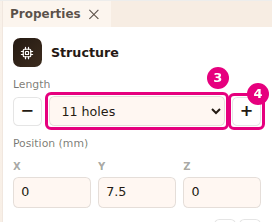
Result: The part in the scene changes to the length you selected. Each change is one undo step (Ctrl+Z).
If several parts from the same family are selected, the selector changes all of them together. If the parts have different lengths, the list says "Mixed options".
Set the length of a shaft or spacer
Parts that are cut to size, such as shafts, spacers and rods, have a Length field in the Properties panel. The example part is Hex Shaft 7mm Kit in the Hubs & Shafts section.
- In the Add parts tab, select the Hubs & Shafts section, then select Hex Shaft 7mm Kit.
- In the Properties panel, delete the number in the Length field. Next to its heading, it shows the current length (for example "120 mm").
- Type
150in the field and press Enter. While you type, the shaft grows longer in the scene. - To make it 0.5 mm shorter or longer, press − or + next to the field.
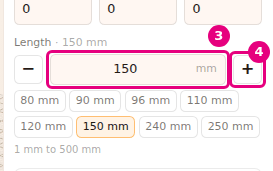
Result: The shaft is 150 mm long. Below the field, it shows the allowed range (for example "1 mm to 500 mm").
- The length buttons below the field (for example 80 mm, 120 mm, 250 mm) give common lengths with one press.
- Esc cancels what you typed. Leaving the field also applies what you typed.
- A value outside the range is set to the nearest limit.
- If several parts of the same type are selected, the field applies to all of them. If their lengths are different, the heading says "mixed lengths".
What a part row shows
Each part row has the part's picture, its name and a short description. For parts sold in the shop, the stock and the price come before the description.
| What you see | What it means |
|---|---|
| "in stock" | The part is in the shop. If Builder could not connect to the shop, this text appears even when the stock is not known. |
| "N in stock" | The shop has N left. |
| "out of stock" (red) | The part is not in the shop right now. You can still add it to your design. |
| Price | The unit price in the shop. It shows only when Builder is connected to the shop. |
| Colored dot before the name ("Print color") | The color the shop prints the part in. |
| Arrow at the end of the row | The row is a section or a family. Select it to open it. |
When you hold the pointer over a row, the tip "...: click or drag into the scene" appears. At the bottom of the panel, it says "Pick a section or search" or "Click or drag into the scene".
Builder connects to the shop when it opens. When it connects, a "Shop connected - N/M parts listed with live stock" notification appears in the corner of the screen. If it cannot connect, it says "Could not reach the shop stock - using the static catalog". You can still add parts, but the stock is not live and no prices show.
Having trouble?
- The part is not added, and "Editing is off in assembly mode" appears in the corner: Builder is in assembly mode, which Build step by step starts. In the Assembly strip, press Switch to editing. See Troubleshooting.
- The search for my part says "No results": Type a shorter part of the name (for example
shaft). You can also type the product code. See Troubleshooting. - "Could not reach the shop stock - using the static catalog" appears: Keep adding parts. For live stock, reload the page later. See Troubleshooting.
- Esc clears the selection instead of leaving the section: First click inside the panel, then press Esc. Or use the back row at the top of the list.
- The part went inside another part: Select the part and move it (see Move and rotate a part).