Mate parts by their holes
On this page you use the Mate tool to fit a hole of one part onto a hole of another part. The holes line up on the same axis, and the faces touch. The mated part is attached to the target part.
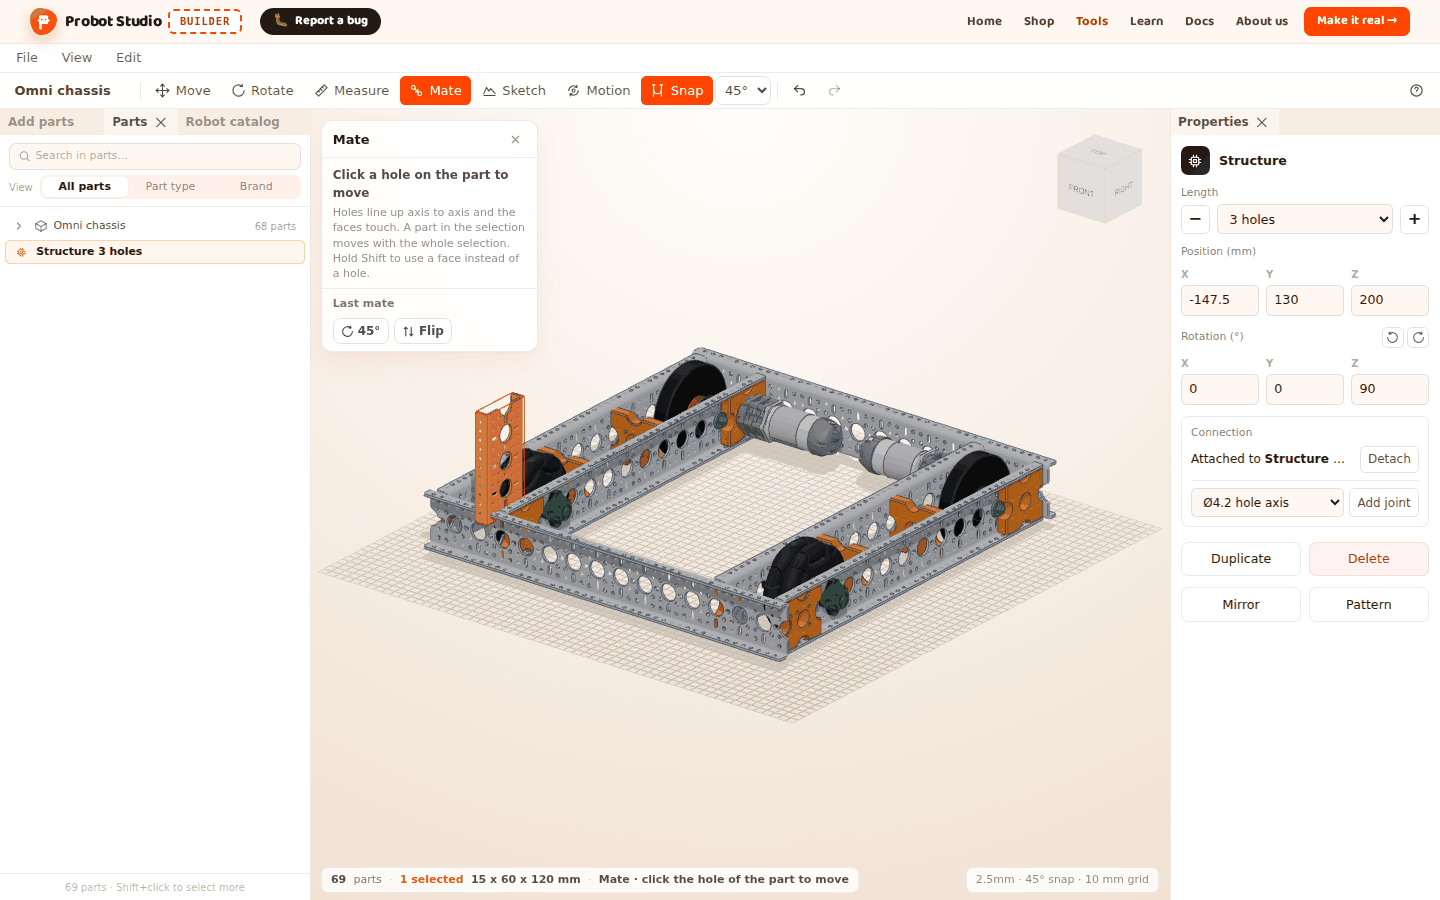
Before you start
- The Omni chassis is open in the scene (see Start with a ready-made robot).
- Add parts > Structure > Structure > 5 holes is added. The part stands on the ground in the middle of the chassis (see Add parts).
- The motor shaft section needs an empty scene. That section explains this at its start.
Mate a hole to a hole
- In the Toolbar, press Mate (B). The Mate panel opens in the corner of the Scene. The panel says "Click a hole on the part to move".
- Click a hole on the Structure part. The hole under the pointer is highlighted in orange. The hole you clicked stays blue.
- The text in the panel changes to "Click a hole on the target part". Click a hole on the top face
of the chassis.
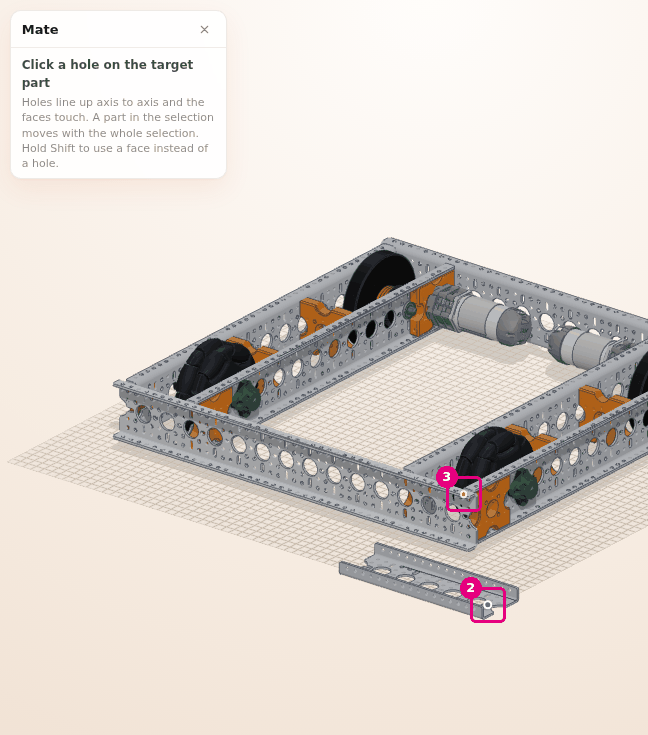
- In the Mate panel, press the close icon ("Close the mate tool (Esc)").
Result: The Structure sits on the top face of the chassis and is selected. The mate is a single undo step (Ctrl+Z).
- While Mate is on, the status bar says "Mate · click the hole of the part to move" or "Mate · click the target hole".
- If you click another hole on the same part, the source hole changes.
- If you move the mouse while you click, the click does not count, and the camera rotates.
- While Mate is on, parts are not selected, no handles appear and the context menu does not open.
The mated part is attached to the target
The part you moved is attached to the target part. If you move the target part later, the mated part comes with it. In the Connection section of the Properties panel, you can see the attachment and detach it (see Group parts and attach them to each other).
Mate a selection together
If you click the source hole on a part that is in the selection, the whole selection moves together. A grouped part also moves with its group. You can mate a few parts to each other first and select them, then mate them all to the robot in one go.
Rotate or flip the last mate
When the mate is done, a "Last mate" group appears in the Mate panel. If the part faces the wrong way, you can fix it here. The fixes go into the same undo step as the mate.
- Mate the Structure to the chassis (see the section above). Do not close the Mate panel.
- In the Mate panel, press 45° under "Last mate". The part turns 45° around the hole axis.
- If you want the other face of the part to touch, press Flip (F).
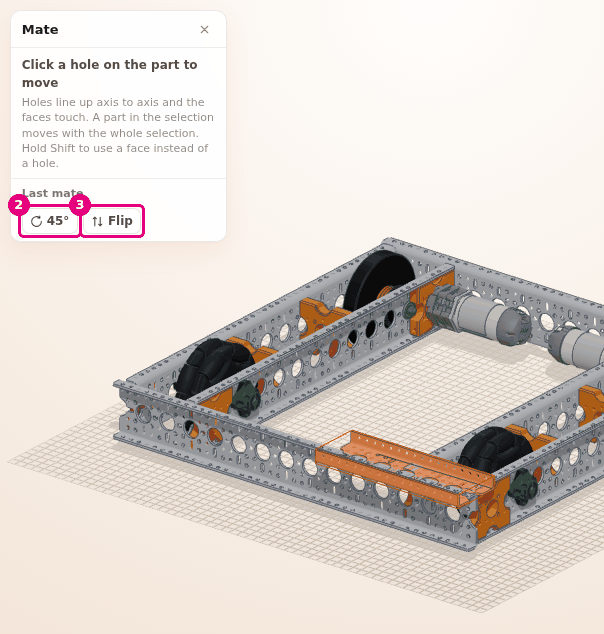
Result: The part turns without leaving its hole, or sits on its other face. A flipped part can go inside another part. If it does, undo with Ctrl+Z.
- The angle on the button is the rotation step in the Toolbar (5°, 15°, 30°, 45°, 90°).
- R rotates by the same step, and Shift+R rotates the other way.
- If you make any other change in the scene after the mate, the "Last mate" group goes away. Then R switches to the Rotate tool and closes Mate.
Mate a face instead of a hole
To fit a part that has no holes, or to fit one face onto another face, use Shift.
- In the Toolbar, press Mate (B).
- Hold down Shift and click the face of the Structure that will touch the chassis. If you cannot see the face, rotate the camera first.
- Hold down Shift and click the top face of the chassis.
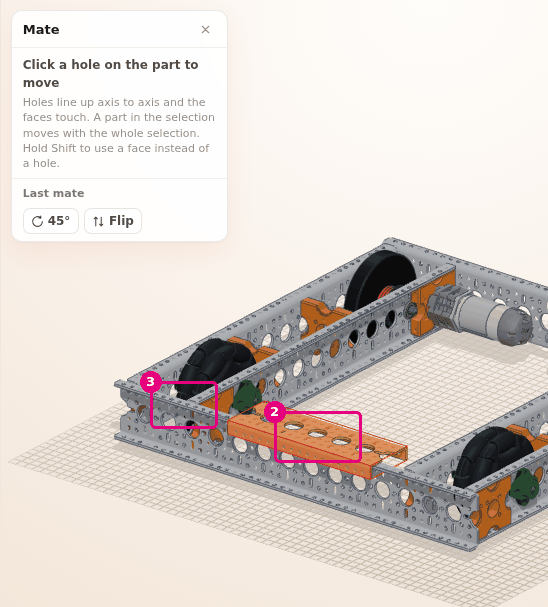
Result: The two faces touch. While Shift is held down, the part is not lined up.
If you want the part to slide over and line up with the nearby holes, keep Snap on. In step 3, let go of Shift and click a flat spot on the top face of the chassis, away from the holes. If you click near a hole, that hole is chosen as the target.
When you mate by a face, Flip makes the back face of the part touch. If the back face is not found, "The back of this face was not found" appears.
Mate a gear to a motor shaft
If you mate a wheel, gear, hub or pulley to the shaft of a motor or servo, a turning joint is set up between them by itself. Then you can turn the part in the Motion panel.
Warning
File > New removes the parts in the scene. If you want to keep your work, select File > Save (download JSON) first.
- Select File > New. Confirm the question "The parts in the scene will be deleted. Start a new project?".
- Select Add parts > Motors and Servos > WattOS Motor > 480 RPM.
- Select Add parts > Gears > Gear > 5mm Hex 20 teeth. If the gear ends up behind the
motor, move it next to the motor: in the Properties panel, under Position (mm), type
60in the X box. - In the Toolbar, press Mate (B).
- Click the flat side face of the gear, close to its middle. Do not click the empty space in the middle. No hole mark appears on the gear, and a face is chosen. When you mate it to a shaft, the gear centers itself on the shaft.
- Click the motor's shaft. The gear sits on the shaft.
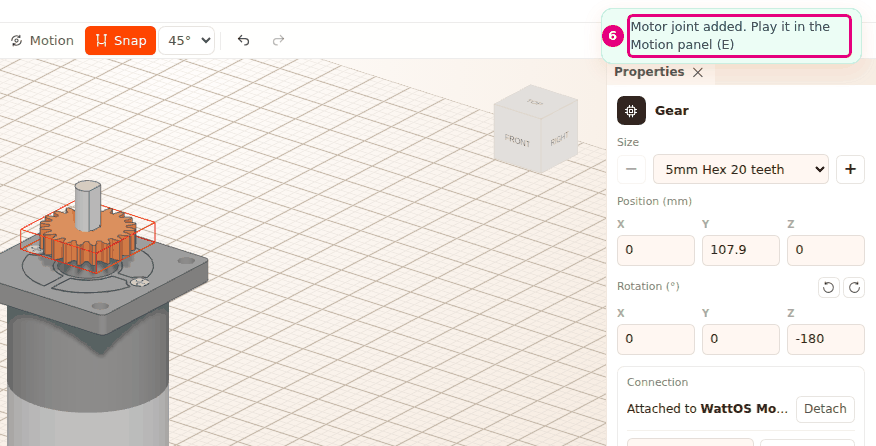
Result: A "Motor joint added. Play it in the Motion panel (E)" notification appears in the corner. If you mate to a servo, it says "Servo joint added. Play it in the Motion panel (E)". A "No gear to mesh with" notification may also appear next to it. This is normal, because the gear is not paired with another gear yet.
The joint is set up when you click the shaft of the motor or servo without pressing Shift. If you click the shaft with Shift, a face is chosen instead of the shaft, and no joint is set up. Shift makes no difference when you click the gear. To play the joint, see Set up joints and try the motion.
Close the Mate tool
Each press of Esc goes back one step:
- If you clicked a source hole, it lets go of that hole first. The panel says "Click a hole on the part to move" again.
- Next, it removes the "Last mate" group. The mated part stays where it is.
- If neither of these is there, it closes the tool.
Pressing Mate in the Toolbar again, pressing B, or switching to Move or Rotate also closes the tool.
Having trouble?
- "This part is being moved too. Click a part outside the selection" appears: The target part is in the selection too. Close Mate first, clear the selection (Esc) and try again. See Troubleshooting.
- "The target part is attached to the part being moved. Detach it in Properties first" appears: The target part is attached to the part you are moving. In the Connection section of the Properties panel, press Detach. See Troubleshooting.
- "The back of this face was not found" appears: The back face of the part you mated by a face was not found. Rotate the part with 45°, or mate it by another face. See Troubleshooting.
- The part sits facing the wrong way: Use the angle button under "Last mate", or Flip. If the "Last mate" group is gone, undo with Ctrl+Z and mate the part again.
- The hole is not highlighted: Move the pointer closer to the opening of the hole. If that still does not work, mate by a face with Shift.
- I mated it to the motor, but no joint was set up: For the target, click the hole of the motor's shaft. The part you move must be a wheel, gear, hub or pulley.